23 Easy DIY Wall Decor Ideas for a Stunning Living Room
Meta Description: Transform your living room with these 23 creative, budget-friendly DIY wall decor ideas. From gallery walls to macramé, discover stunning ideas you can make this weekend.
Have you ever walked into your living room, stared at those blank, lifeless walls, and thought — “Something’s missing, but I have no idea what”? You’re not alone. Most of us have been there. The good news? You don’t need an interior designer, a big budget, or any serious artistic talent to fix it. All you need is a little inspiration, a free afternoon, and the willingness to try something new.
DIY wall decor is one of the most satisfying home projects you’ll ever take on. You get to personalize your space, save serious money, and end up with something no one else on earth has — because you made it yourself. Whether your style leans cozy and rustic, clean and modern, or bold and eclectic, there’s something in this list for you.
Let’s dive into 23 genuinely stunning DIY wall decor ideas that will completely transform your living room — no boring walls allowed.
Why DIY Wall Decor Beats Store-Bought Every Time
Before we get into the ideas, let’s talk about why DIY is worth your time. Walk into any home goods store and you’ll find the same mass-produced prints, the same generic canvases, the same wall decor that looks identical in a million other homes. There’s nothing wrong with buying things — but there’s something deeply satisfying about hanging something on your wall and thinking, “I made that.”
DIY wall decor also lets you:
- Match your exact color palette instead of compromising
- Scale pieces to fit your specific wall size
- Create conversation starters that guests actually ask about
- Save anywhere from $50 to $500 compared to similar retail pieces
- Update your decor seasonally without guilt
Now let’s get into the good stuff.
Idea 1: Gallery Wall With Thrifted Frames
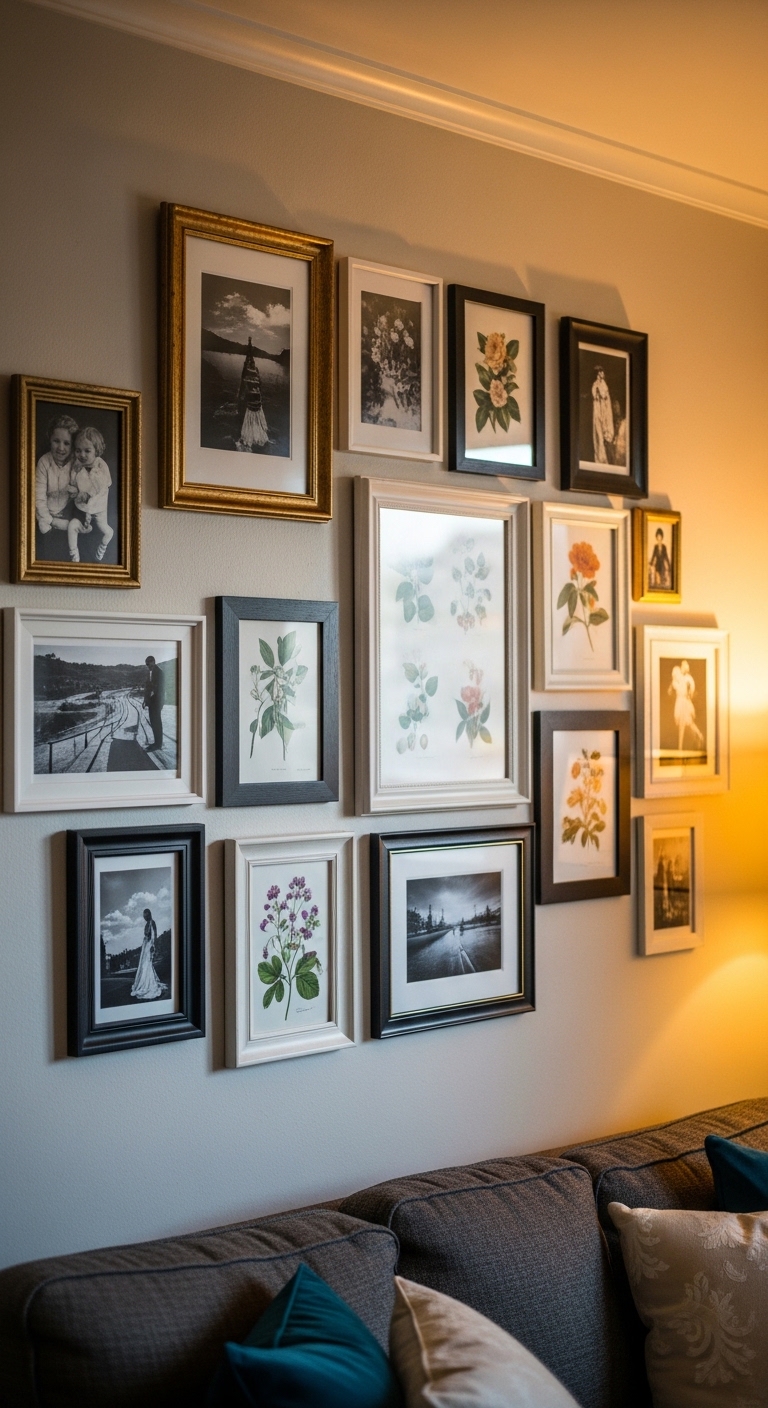
There is nothing — and we mean nothing — that transforms a bare wall faster than a gallery wall done right. The key word here is “done right,” because a random cluster of frames can look chaotic if you’re not intentional about it.
Here’s what actually works: go to your local thrift store and grab 8 to 12 frames in various sizes. Don’t stress about matching — the variety is the whole point. Bring them home, spray paint them all in two or three cohesive colors (we love a mix of matte black, warm gold, and antique white), and let them dry completely.
Now here’s the trick most blogs skip: before you hammer a single nail, lay all your frames out on the floor and arrange them until you’re happy. Trace each frame on kraft paper, cut them out, and tape those paper templates on your actual wall. Step back. Live with the arrangement for a day. Then nail.
Fill the frames with:
- Black and white family photos
- Botanical prints (free on Pinterest, printable at home)
- Pieces of vintage sheet music
- Abstract watercolor you paint yourself
The result looks like a curated, expensive statement wall that took weeks of planning — but really took a Saturday afternoon.
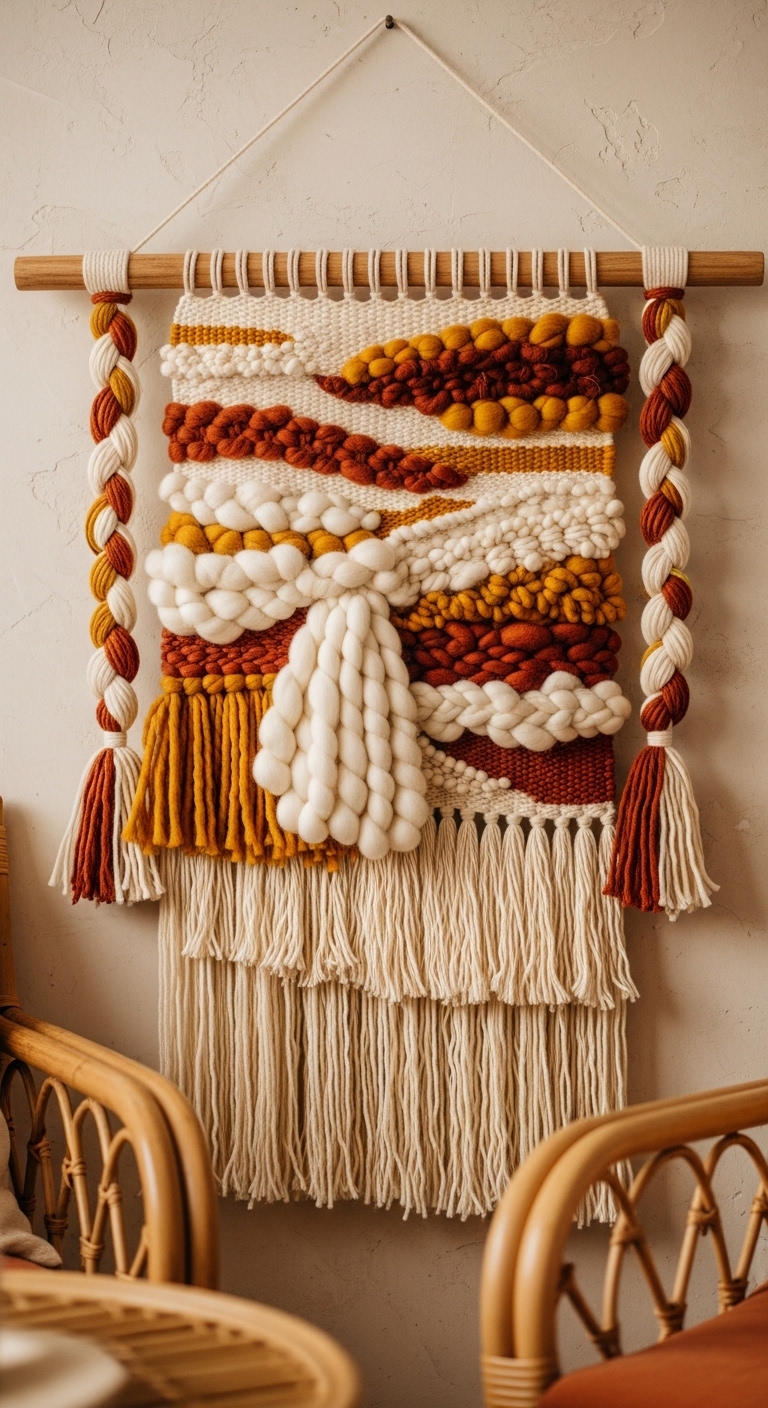
Idea 2: Macramé Wall Hanging

Macramé is having a serious moment right now, and honestly, it deserves every bit of the hype. It looks intricate and artisan, but the basic knots are genuinely easy to learn — even if you’ve never crafted anything in your life.
You only need a few supplies:
- A wooden dowel (or a thick branch from your backyard)
- Natural cotton macramé cord
- Scissors
- A little patience
Start by watching one 20-minute tutorial on the square knot and the lark’s head knot — those two knots alone will get you 80% of the way through most beginner patterns. Cut your cord into equal lengths, mount them on the dowel using lark’s head knots, and start working your pattern downward.
What makes macramé special as a DIY is how forgiving it is. Uneven sections? Nobody notices. Slightly off-center fringe? It adds character. A finished macramé piece that took you 3 hours could easily sell for $80 at a craft market — but it looks like a $200 designer piece on your wall.
Idea 3: Floating Shelves With Styled Vignettes

Floating shelves are technically functional storage, but when you style them well, they become some of the best wall decor you’ll ever have — because they’re three-dimensional and alive.
The key to styling shelves that look intentional (not cluttered) is the rule of three. Group items in odd numbers, vary the heights within each group, and mix textures — something ceramic, something green (plants), something with words (books or a small sign).
A few styling tips that make a real difference:
- Turn some books spine-in for a calm, neutral backdrop
- Add at least one trailing plant like pothos for organic movement
- Include one piece that has personal meaning — a small souvenir, a handmade object
- Leave breathing room — empty space is not wasted space
You can build simple floating shelves with pine boards and hidden bracket hardware. Sand them smooth, stain with a warm walnut tone, and mount level. The whole project costs around $30 per shelf and looks completely custom.
Idea 4: Washi Tape Geometric Wall Art
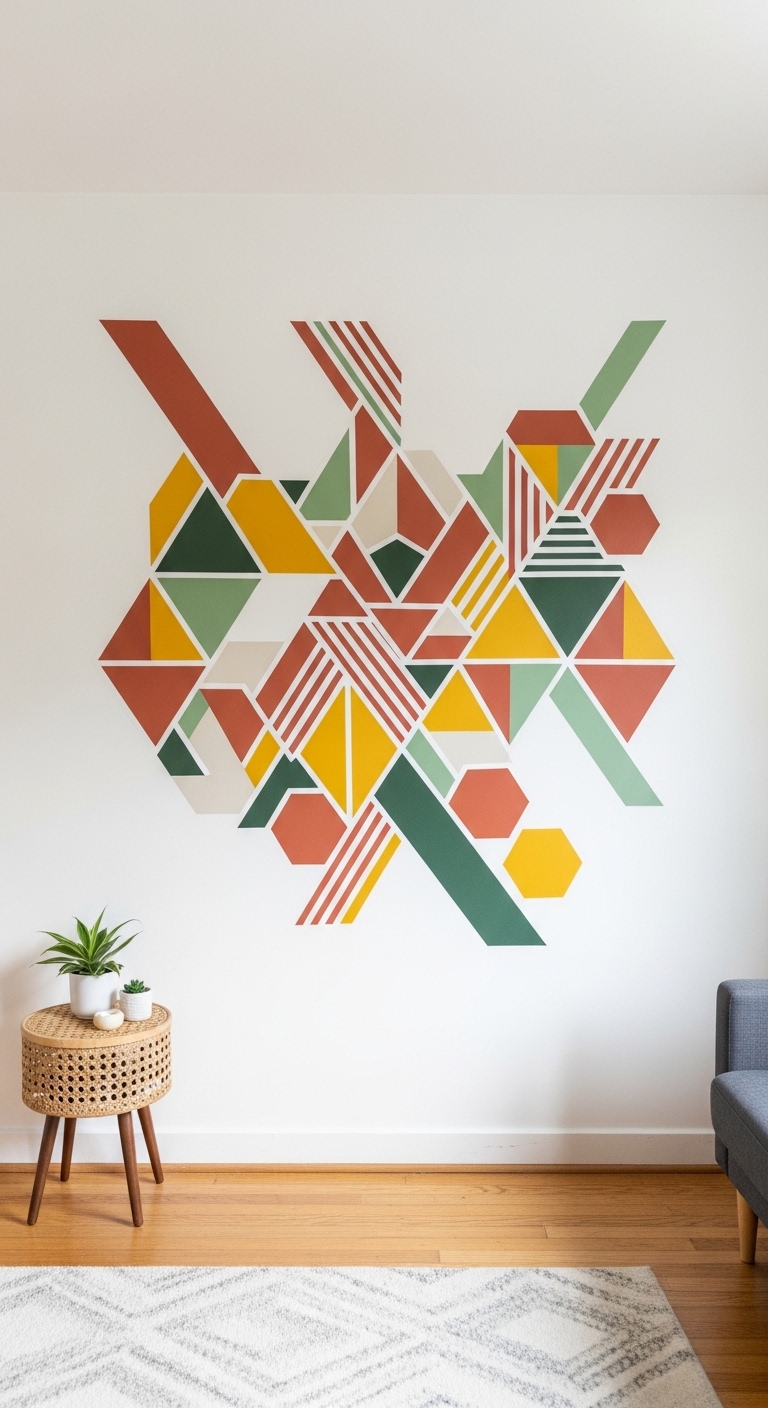
This one is perfect if you’re renting and can’t put holes in the wall — or if you just want something you can change on a whim. Washi tape is removable, affordable, and comes in hundreds of colors and patterns.
You can create:
- Oversized geometric shapes like triangles or hexagons
- A faux headboard effect behind your sofa
- A grid of squares mimicking tile work
- Abstract line art inspired by mid-century modern design
Use a level and painter’s tape as guides so your lines stay straight. The beauty of this idea is that you can completely redo it on a Sunday afternoon whenever you feel like a change. No commitment, no damage, no regrets.
Idea 5: Large-Scale Abstract Canvas Painting
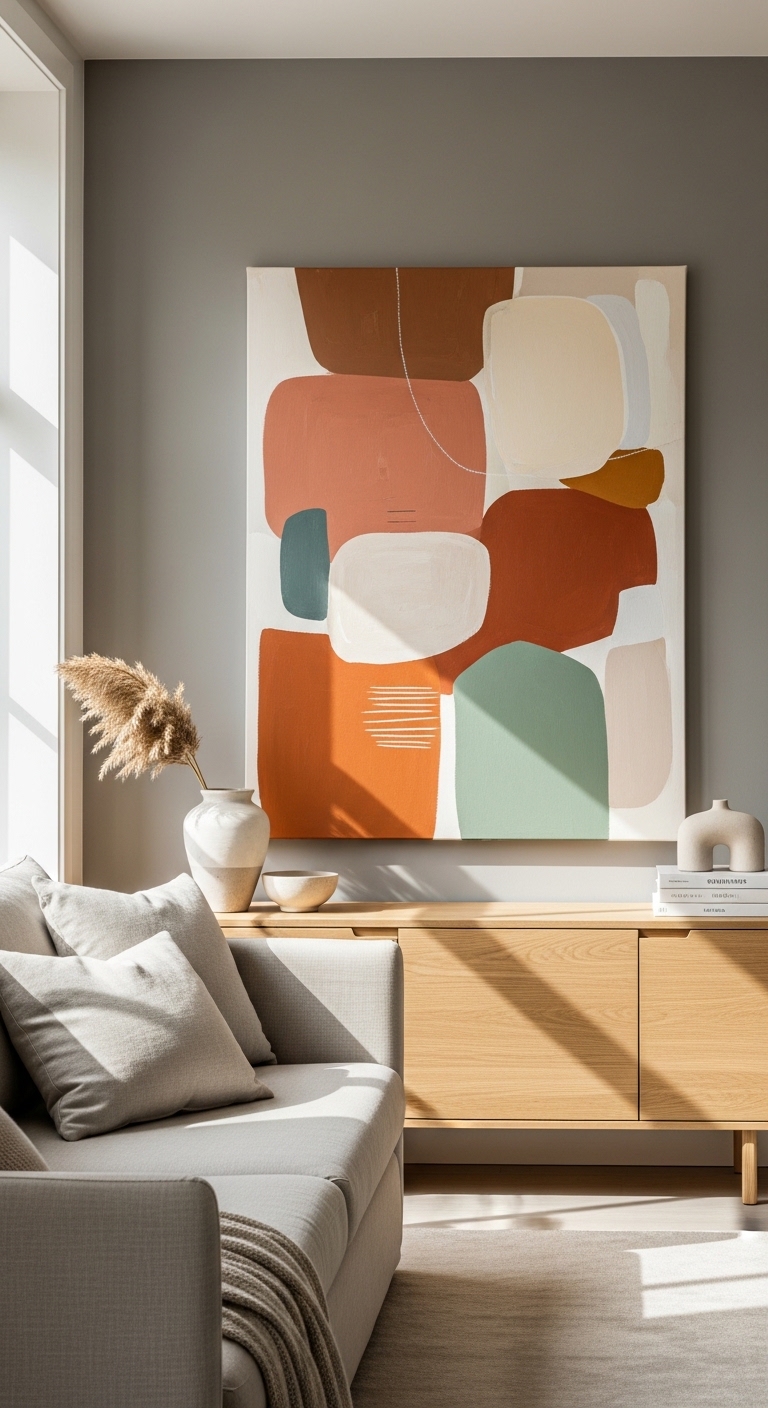
Here’s a secret the art world doesn’t want you to know: abstract painting is the great equalizer. You don’t need painting skills. You need boldness, a color palette you love, and permission to let go of perfection.
Buy a large canvas (24×36 or bigger — go bigger than you think), a few bottles of acrylic paint, and some broad brushes. Pick 3 to 4 colors that work together. Then just start.
Techniques that always look great:
- Dry brushing wide strokes across the canvas in layered colors
- Palette knife scraping for texture and depth
- Diluted paint poured and tilted for a fluid art effect
- Sponging for an organic, earthy texture
When you’re done, step back and assess. Add more contrast if it feels flat. Let parts of the raw canvas show through — that negative space is often what makes abstract work look intentional and sophisticated.
Frame it or hang it unframed with D-ring hooks. Either way, you’ve just created a piece that looks like it belongs in a boutique hotel.
Idea 6: Driftwood or Branch Wall Installation
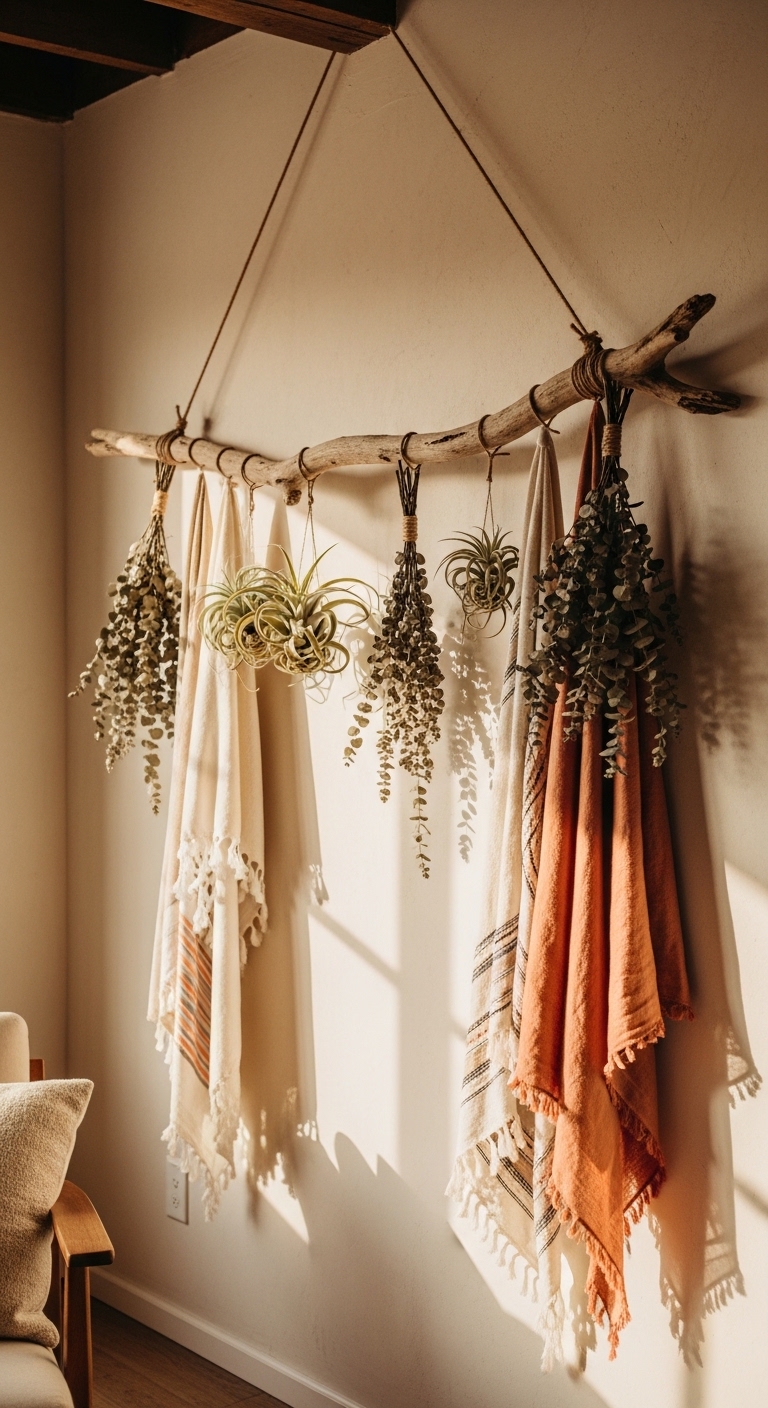
Nature is the best designer, and bringing raw natural elements inside is one of the most effortlessly beautiful things you can do. A large branch or piece of driftwood mounted horizontally on your wall becomes an instant focal point.
Hang it by mounting two small cup hooks or brackets into the wall and resting the branch. From there, you can dangle:
- Dried pampas grass or eucalyptus bundles
- Air plants in small holders
- Lightweight textiles or ribbons
- Small framed photos with clips
This works especially well in boho, farmhouse, or Scandinavian-inspired living rooms. And because the branch itself is free (collect it from a park walk or beach), your only investment is a few dollars in accessories.
Idea 7: DIY Sunburst Mirror
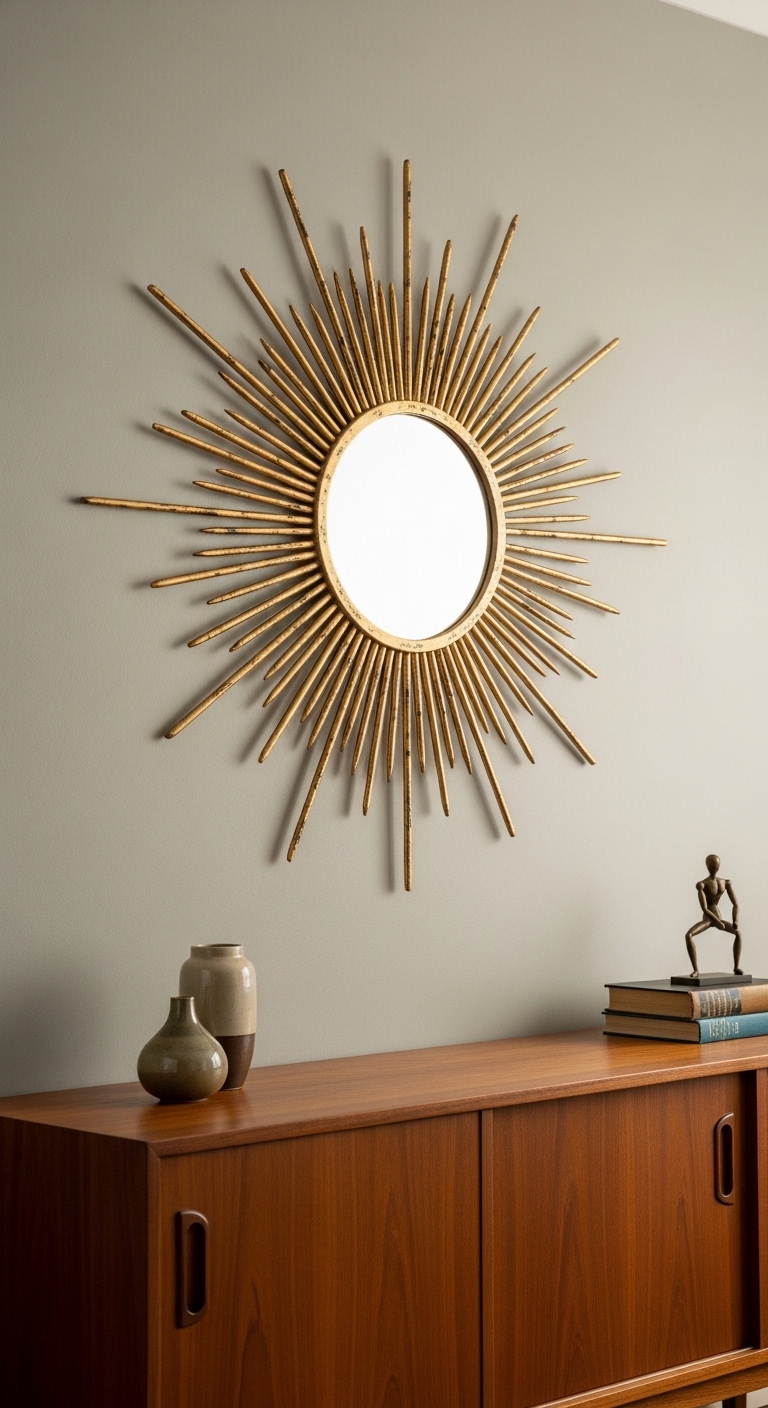
Sunburst mirrors retail for $100 to $400 in home stores. You can make one for under $20, and nobody will ever know the difference.
What you need:
- A round mirror (thrift stores always have them)
- Wooden skewers, thin dowels, or even chopsticks
- Hot glue gun
- Gold spray paint
Arrange the skewers around the back edge of the mirror in a radiating pattern, varying lengths for a dynamic sunburst effect. Secure with hot glue. Once dry, spray the entire piece — mirror face protected — in gold. Let it dry fully, hang it, and step back.
It’s genuinely one of those projects that makes people say, “Wait, you made that?” Yes. Yes you did.
Idea 8: Fabric Wall Art Stretched on Canvas Bars
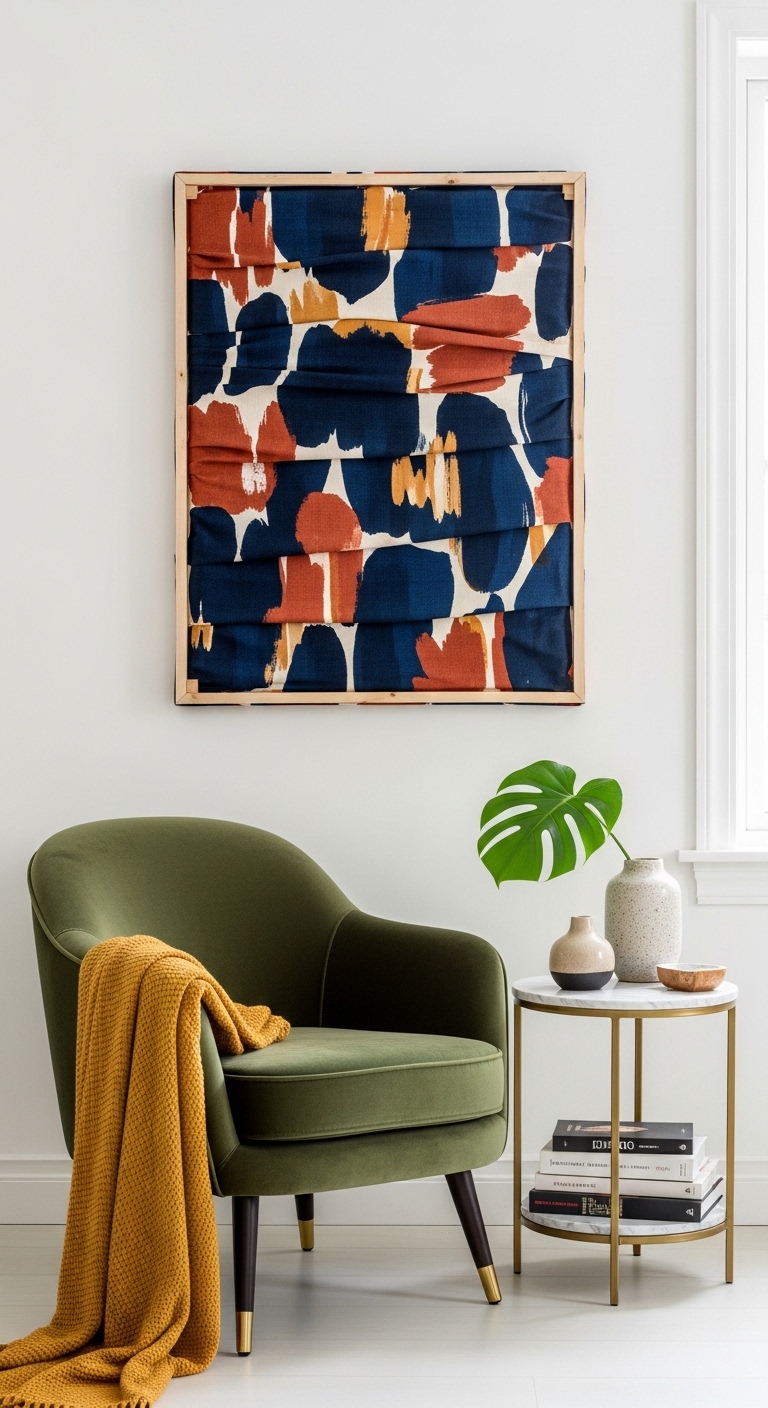
If you’ve ever loved a fabric print but had no idea what to do with it — this is your answer. Stretching fabric over canvas bars (the kind used for paintings, available at any art store) creates a dramatic, high-end wall piece for almost no money.
Choose a fabric with a pattern you love — something bold, graphic, or textural. Cut it to size with extra around all edges for wrapping. Stretch it tightly over the canvas frame and staple it to the back. Think of it like making a bed — pull tight, smooth as you go, and fold the corners neatly.
The result looks like a custom textile artwork that a gallery would charge $300 for. And if you get tired of it? Swap the fabric for a completely new look in 20 minutes.
Idea 9: Framed Botanical Prints Gallery
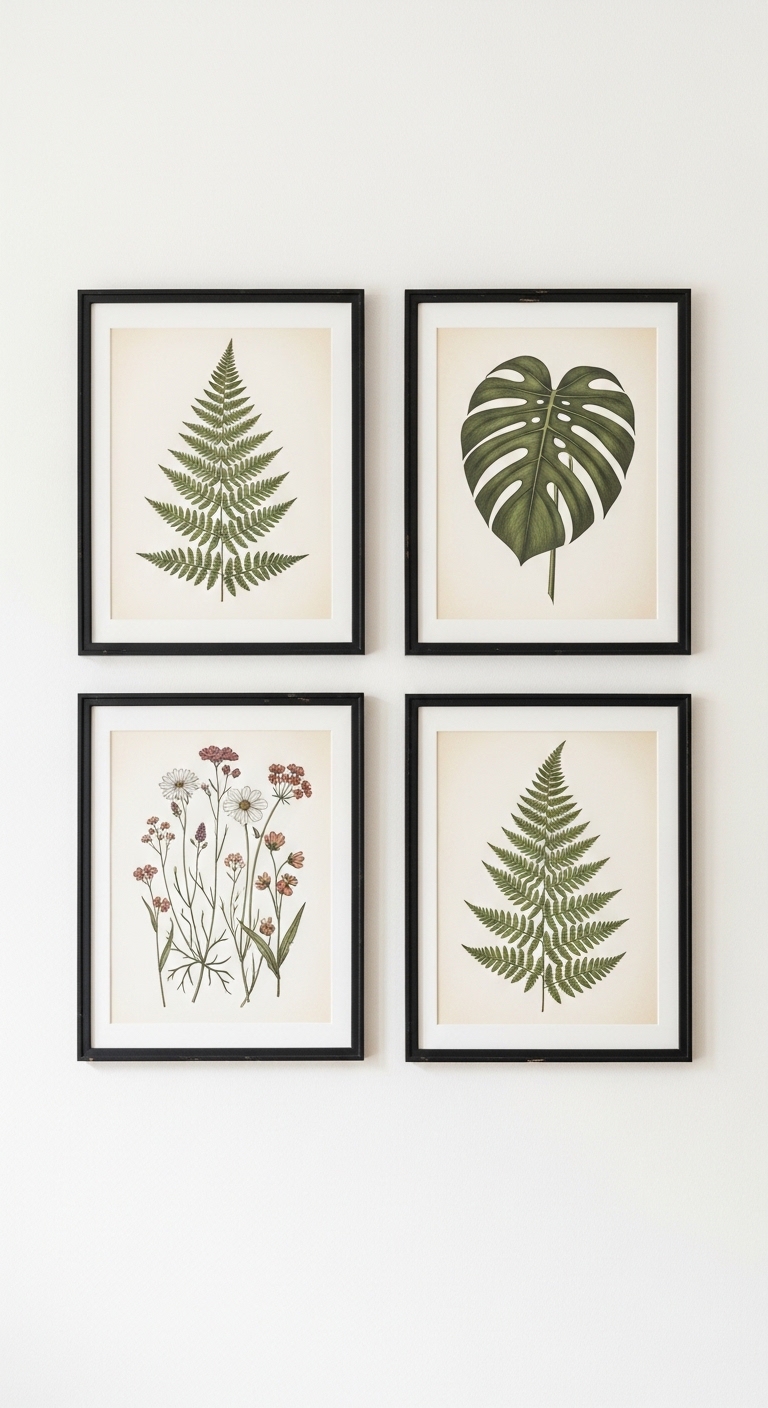
Botanical prints have been loved in home decor for centuries — and for good reason. They bring in nature, add intellectual elegance, and work with virtually any color palette.
The best part? High-resolution vintage botanical illustrations are completely free and out of copyright. Search for “vintage botanical prints free download” and you’ll find stunning antique illustrations that look like they came from a rare 19th-century book.
Print them at home or at a copy shop, pop them into matching frames, and hang them in a symmetrical grid. Four matching frames in a 2×2 arrangement is classic and always works. Six in a 2×3 arrangement works beautifully on larger walls.
Idea 10: Chalkboard Paint Accent Wall Panel
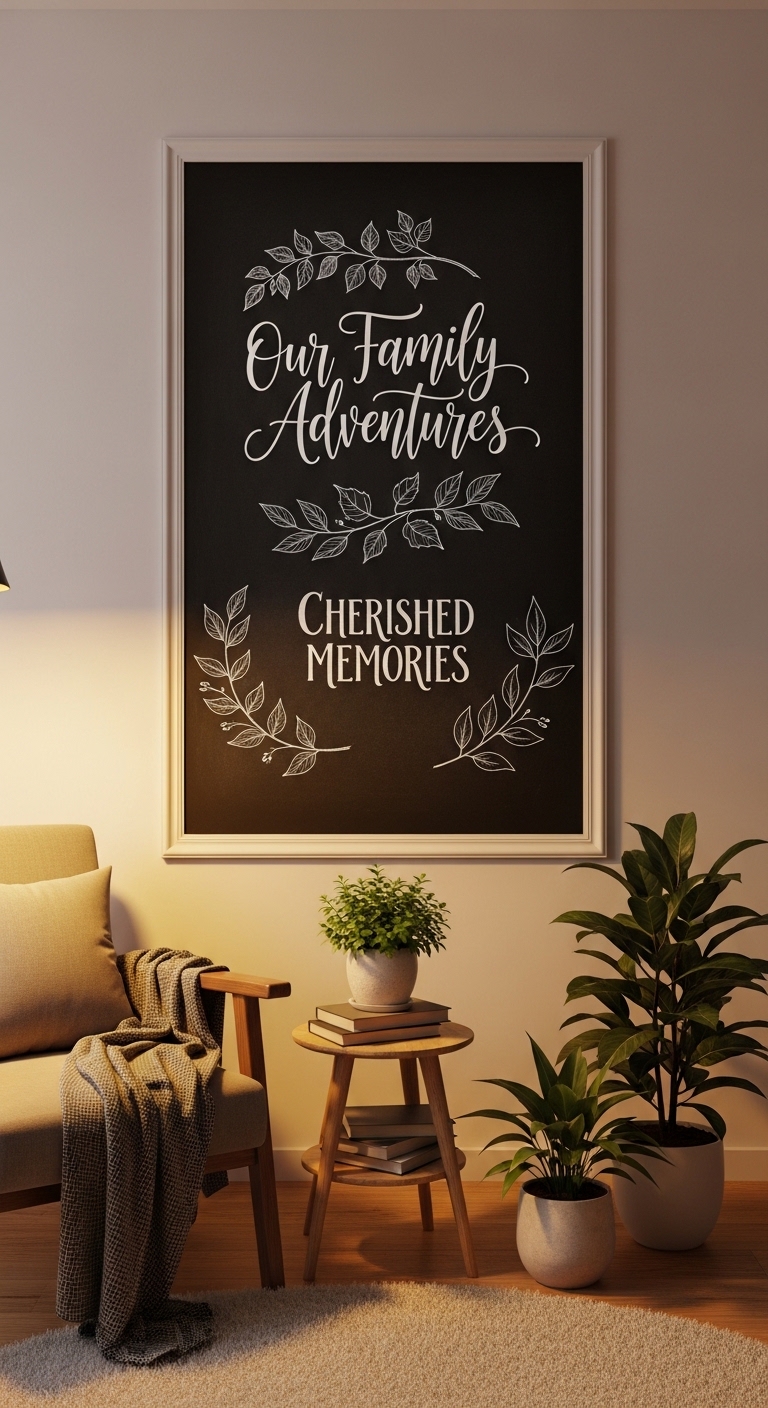
You don’t have to paint an entire wall with chalkboard paint — just a rectangular section framed with thin wood molding. This creates the look of a mounted chalkboard, which you can update with quotes, drawings, family schedules, or seasonal art.
This works especially well in living rooms that double as workspaces or creative studios. It’s also a fantastic option for households with kids — they get a creative outlet, you get a piece of ever-changing wall art.
Idea 11: Woven Fiber Tapestry
Weaving a tapestry is incredibly meditative — ask anyone who’s tried it. You can pick up a small loom for about $25 online, and the materials (yarn in various textures and colors) cost very little.
Even a small woven piece — 12 by 18 inches — makes a significant visual impact when hung. Mix chunky wool, smooth cotton, and silky yarn for texture contrast. Add knots, loops, and fringe for dimension.
It takes a few hours for a small piece, but the process itself is genuinely relaxing. And the finished piece? Completely one-of-a-kind.
Idea 12: DIY Pegboard Wall Display
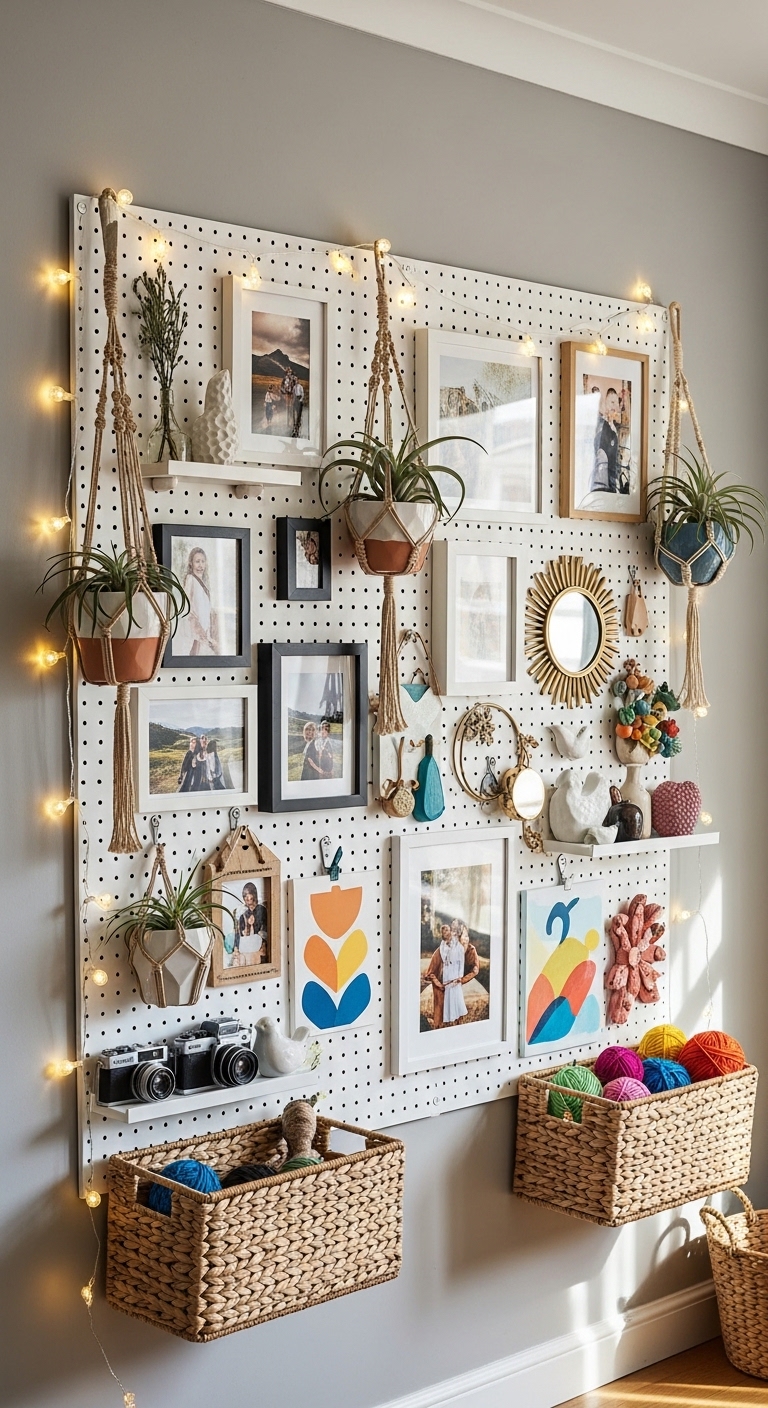
Pegboard isn’t just for garages anymore. Painted white or in a warm neutral, a large pegboard becomes a modular, completely customizable wall display that combines storage and style.
Mount it on the wall with standoff screws so it floats slightly from the surface (this allows the hooks to work properly and gives it a cleaner look). Then style it with small plants in clip-on pots, framed prints, string lights, small shelves, and hooks for bags or headphones.
The beauty is that you can completely rearrange it any time you want. It’s like having a living, evolving piece of wall art.
Idea 13: Statement Clock
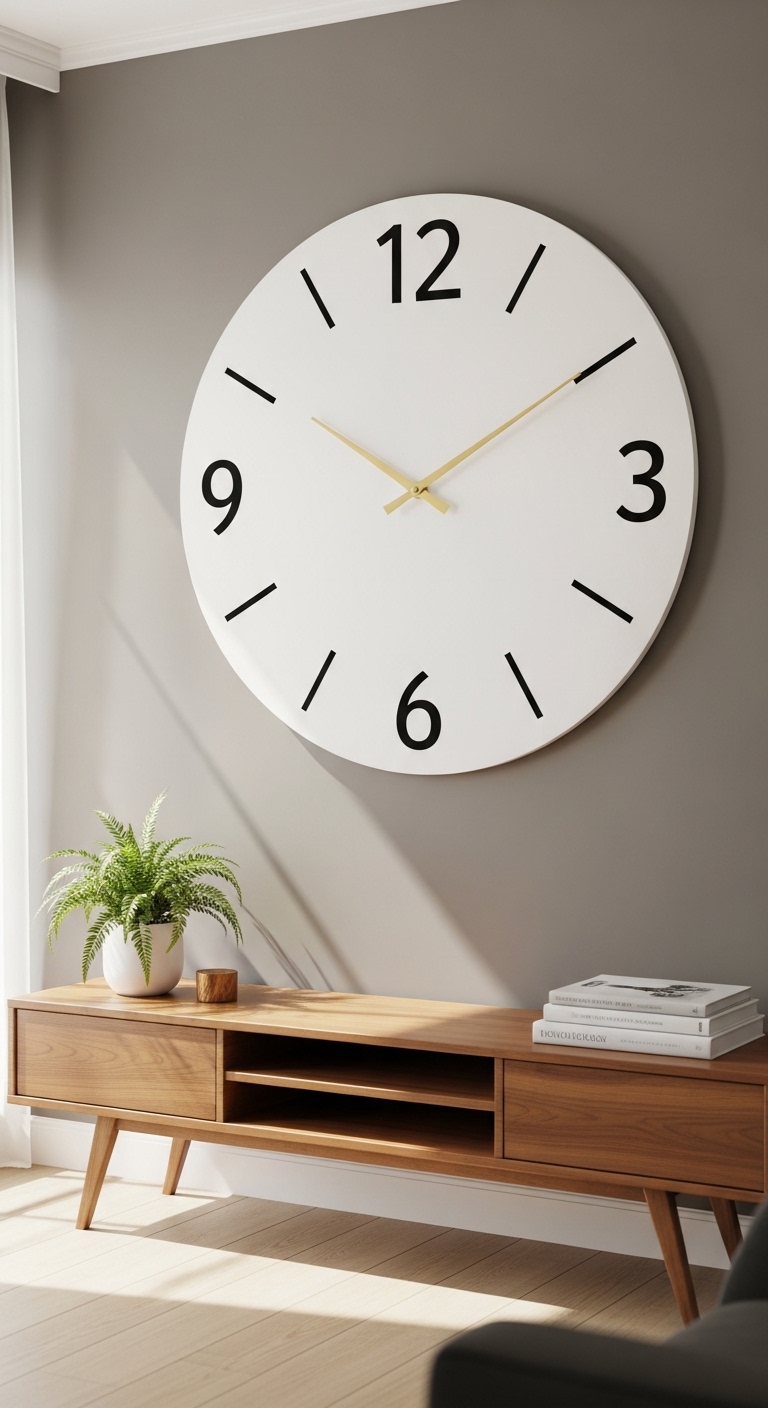
An oversized clock — we’re talking 24 inches or larger — acts as both functional decor and a genuine focal point. Making your own lets you control the size, color, and style completely.
Buy a clock movement kit online (they’re inexpensive and come with hands), then create your clock face from:
- A large wooden circle cut at a hardware store
- A vintage tray
- A piece of plywood painted with chalkboard paint
- Even a wine barrel lid for a rustic look
Mark the hours with paint, vinyl numbers, gold dots, or leave them completely minimal. Install the movement through a drilled center hole. Hang and set the time.
Idea 14: Vertical Planter Wall
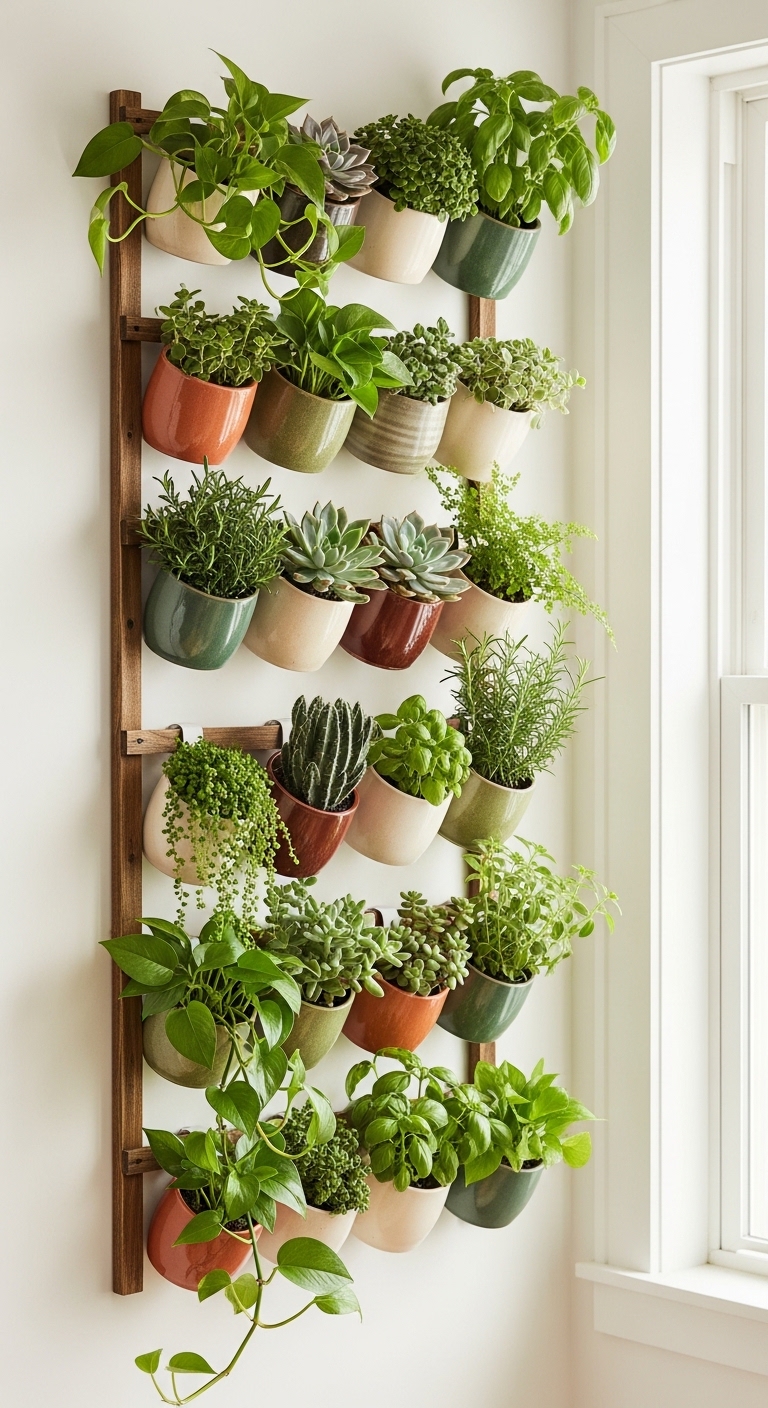
Living wall art is in a category of its own — because it’s literally alive. A vertical planter installation brings oxygen, humidity, and lushness into your living room in a way no print ever could.
You can create this with:
- A mounted wooden grid with small pot hooks
- A repurposed wooden pallet (sealed and sanded)
- A ladder-style shelf leaned against the wall
- Individual wall-mounted ceramic or terracotta pots
Stick with low-light tolerant plants like pothos, heartleaf philodendron, ZZ plant, or peace lily — these thrive indoors without demanding constant sunshine.
Idea 15: Rope and Wood Photo Display
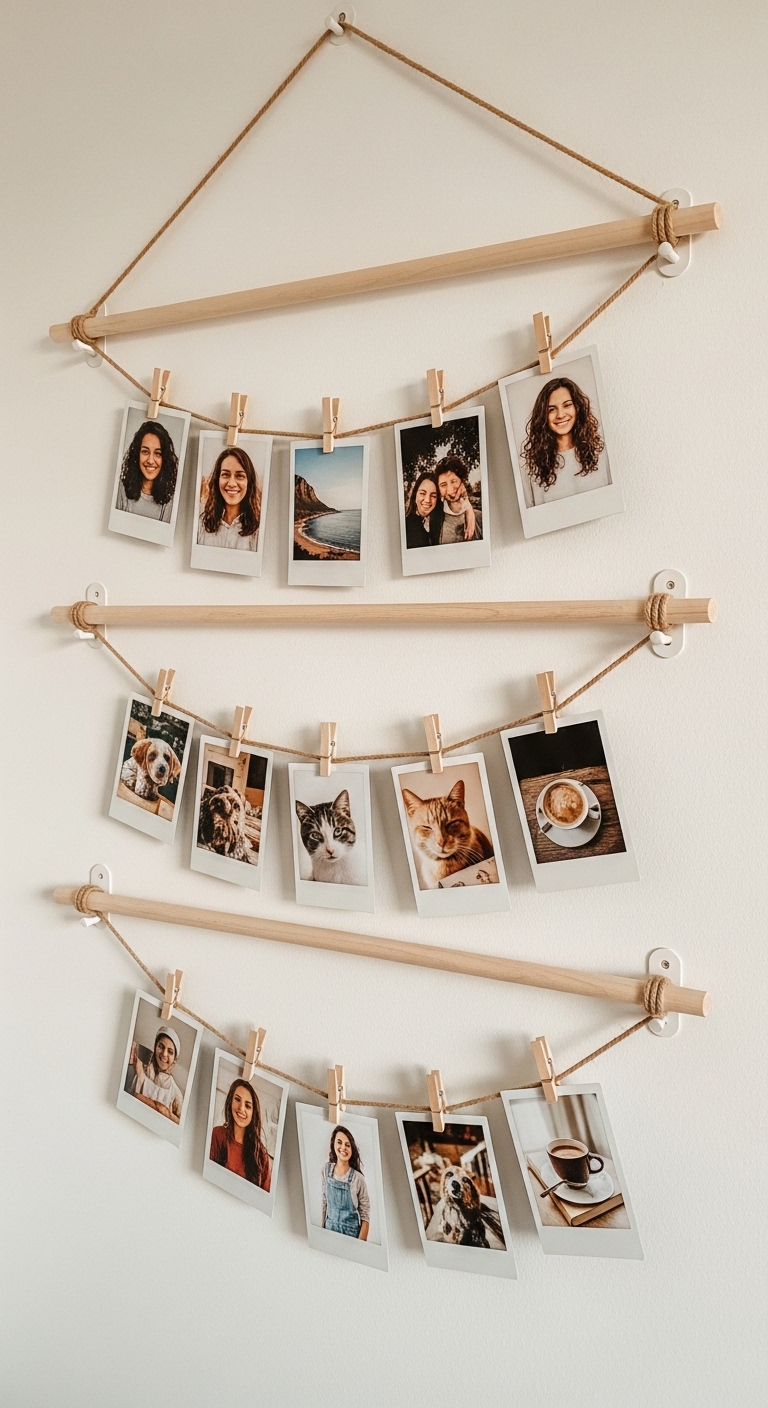
This is one of the most personal and charming wall decor ideas on the list. Mount two small wooden dowels horizontally on your wall. String lengths of natural jute rope between them in parallel rows. Attach your photos — polaroids, printed snapshots, or even postcards — with small wooden clothespins.
It’s casual, warm, and endlessly easy to update. Swap in new photos for the season, after a trip, or whenever you feel like a refresh. Unlike a rigid gallery wall, this display grows and evolves with you.
Idea 16: Geometric Wood Accent Panel
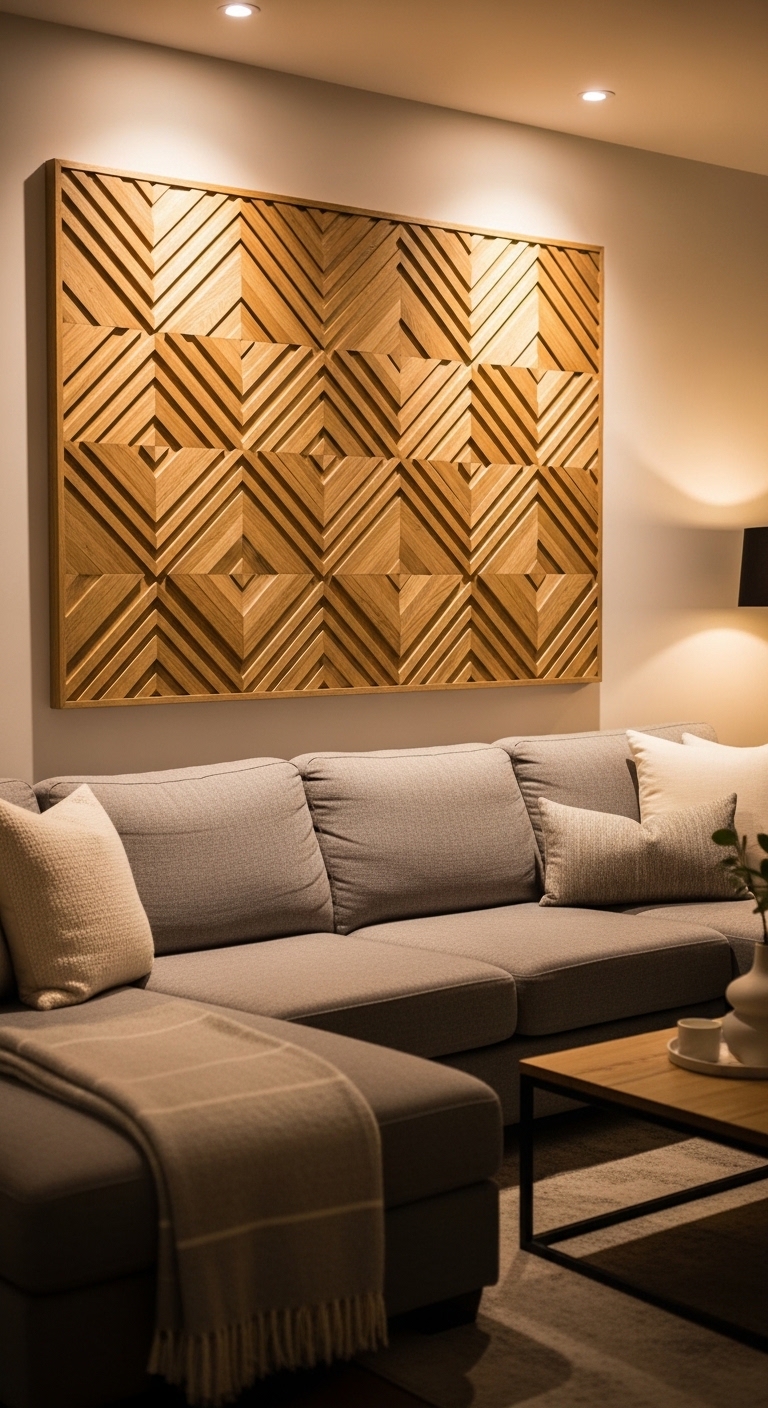
Thin wood strips (like lath from the hardware store) cut and arranged in geometric patterns create architectural interest that looks like expensive custom millwork. Herringbone, chevron, diamond, and sunburst patterns are all achievable with basic cutting tools.
Sand the pieces, stain or paint them in the tone that suits your space, then mount them directly to the wall using construction adhesive or small finish nails. The whole project can cost as little as $40 and completely changes the feel of the room.
Idea 17: Vintage Map Wall Art
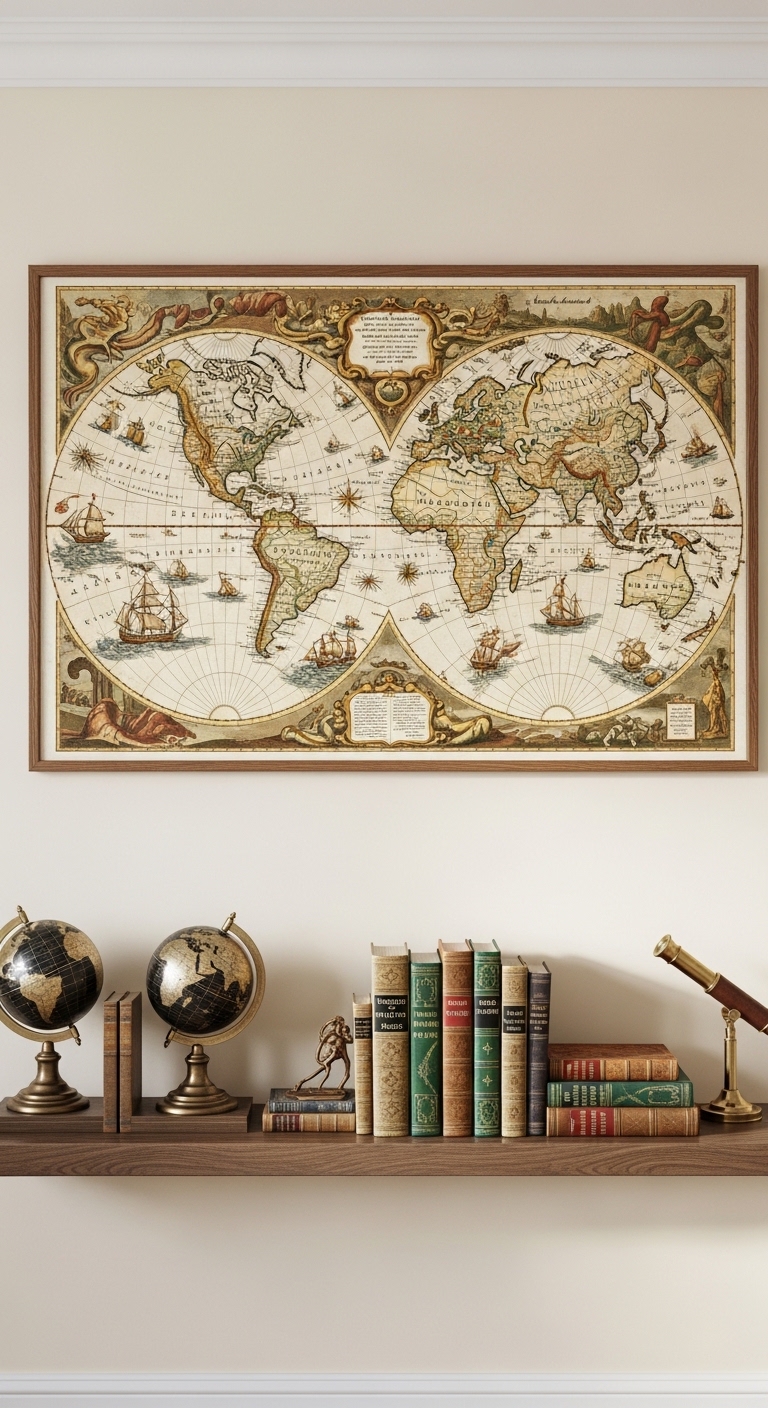
Maps carry romance — the idea of distant places, adventures taken or still to come. A large vintage-style map framed and mounted on your living room wall brings that sense of wonder into your daily space.
You can find large, high-quality vintage map images online (many are public domain and printable). Print at a local print shop in a large format, frame it simply, and hang it. Or go further: buy an actual vintage map from an antique shop, distress the edges with a tea stain, and create something with authentic history behind it.
Idea 18: Sculptural Paper Wall Art
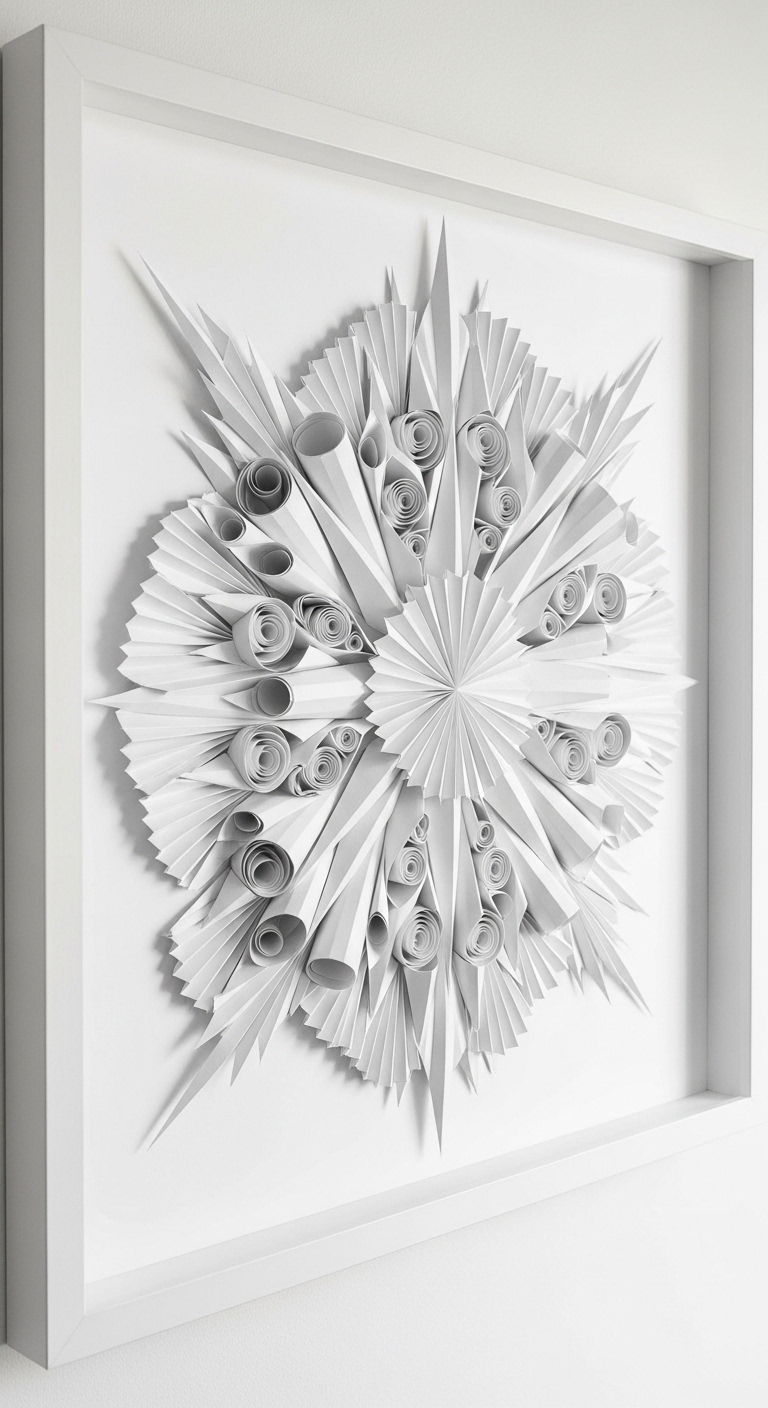
Paper, folded and arranged with intention, creates breathtaking three-dimensional wall art. This technique — sometimes called paper quilling or paper sculpture — transforms an inexpensive material into something that looks gallery-worthy.
Fill a deep shadow box frame with:
- Paper fans in graduated sizes
- Rolled paper tubes arranged like a honeycomb
- Origami shapes in a color gradient
- Layered paper circles for a topographic map effect
All white gives it a sculptural, architectural quality. Multiple colors create a bold graphic effect. Either way, the texture and shadow depth make it mesmerizing.
Idea 19: Reclaimed Wood Shiplap Panel
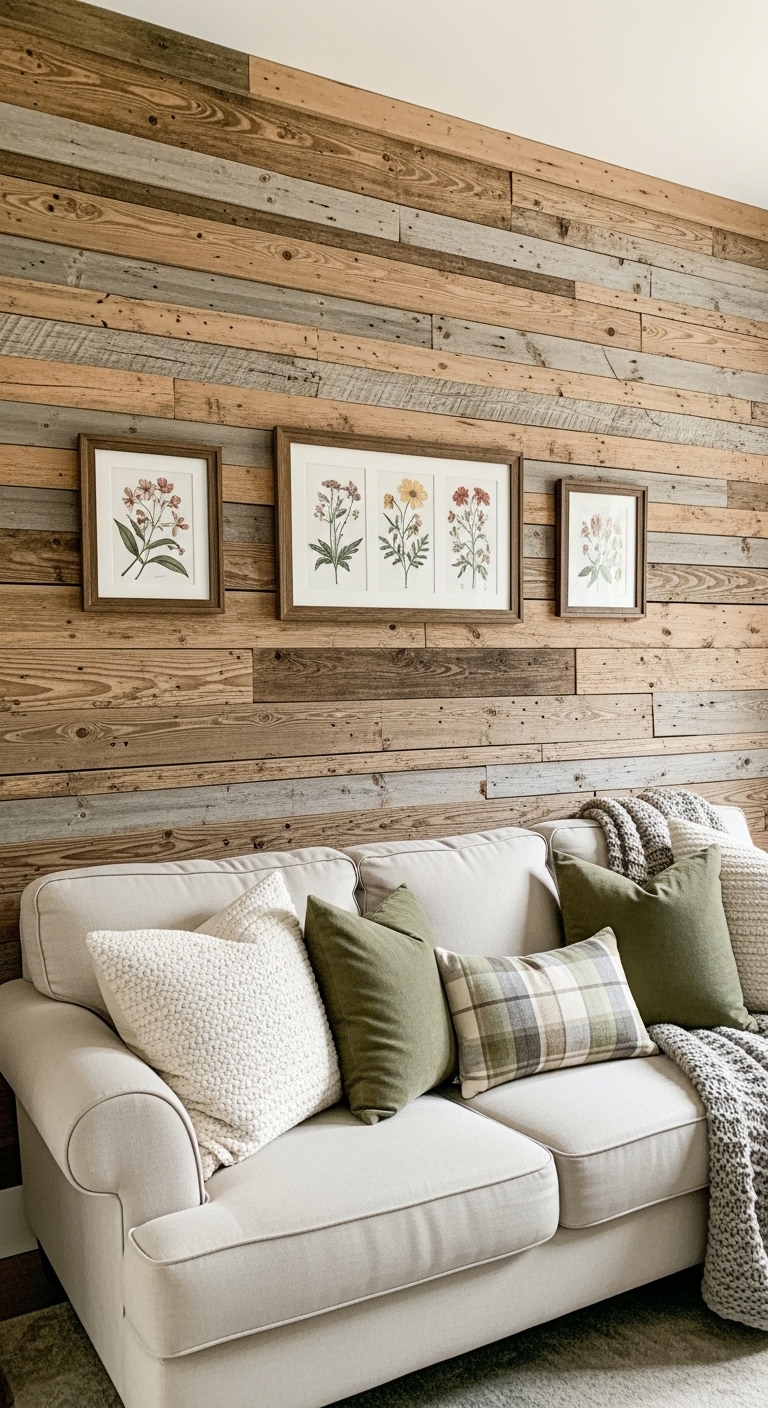
A partial shiplap wall — just behind your sofa, not the entire room — creates instant architectural character. Use reclaimed wood from a salvage yard for an authentic weathered look, or buy new pine planks and distress them yourself with sandpaper, a wire brush, and diluted grey paint.
Cut planks to wall width, nail them horizontally with a small gap between each board, and stagger the seams. Seal with a matte finish to protect from dust. The result looks like a custom designer feature that adds thousands of dollars in perceived value to your room.
Idea 20: Oversized Wicker or Rattan Wall Decor
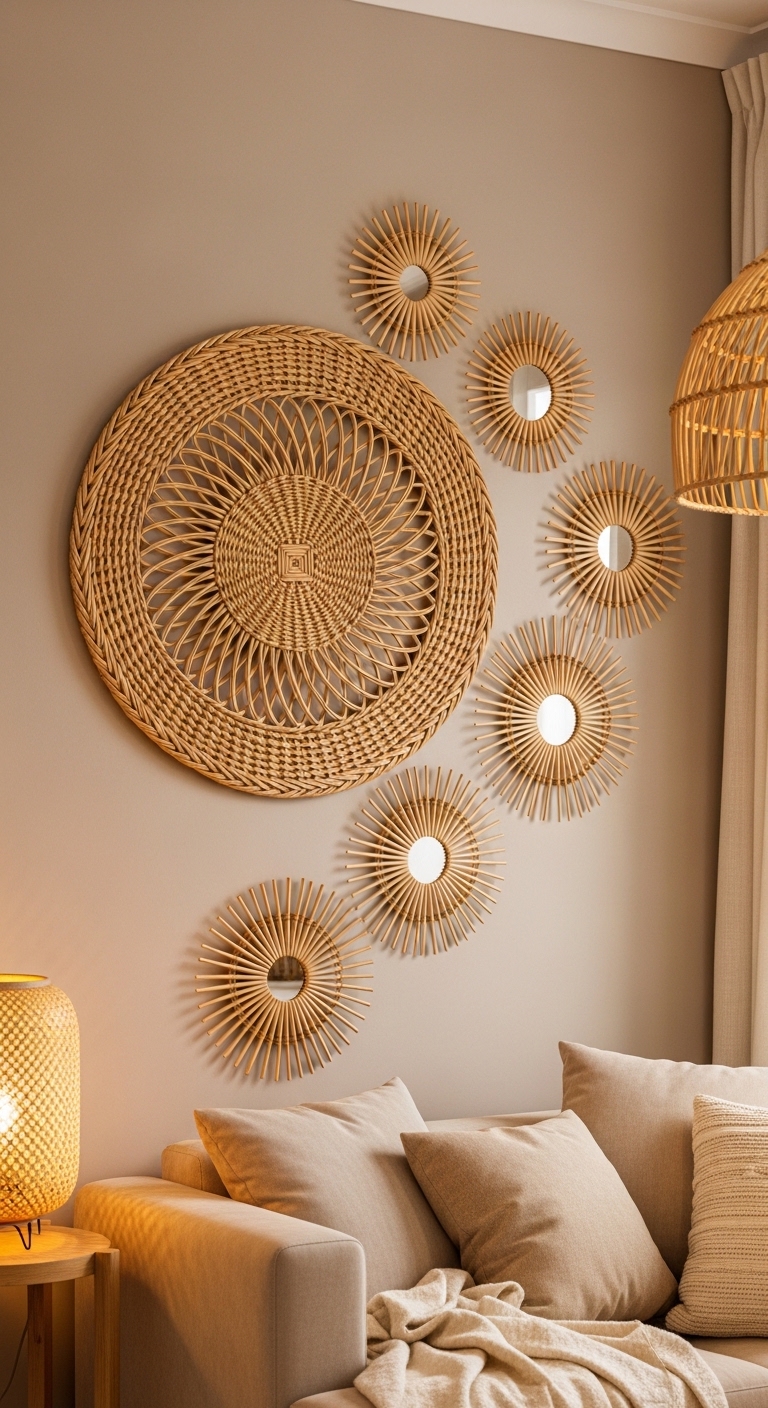
Rattan and wicker wall pieces — woven circles, sunburst shapes, large decorative platters — bring incredible texture and warmth to any wall. You can buy unfinished rattan pieces from craft stores and customize them, or simply hang them as-is for that natural, organic look.
Cluster three to five pieces in varying sizes asymmetrically. Mix circular shapes with linear ones. Overlap some slightly for depth. This approach works especially beautifully in boho, coastal, and tropical-inspired spaces.
Idea 21: Painted Mural or Accent Design
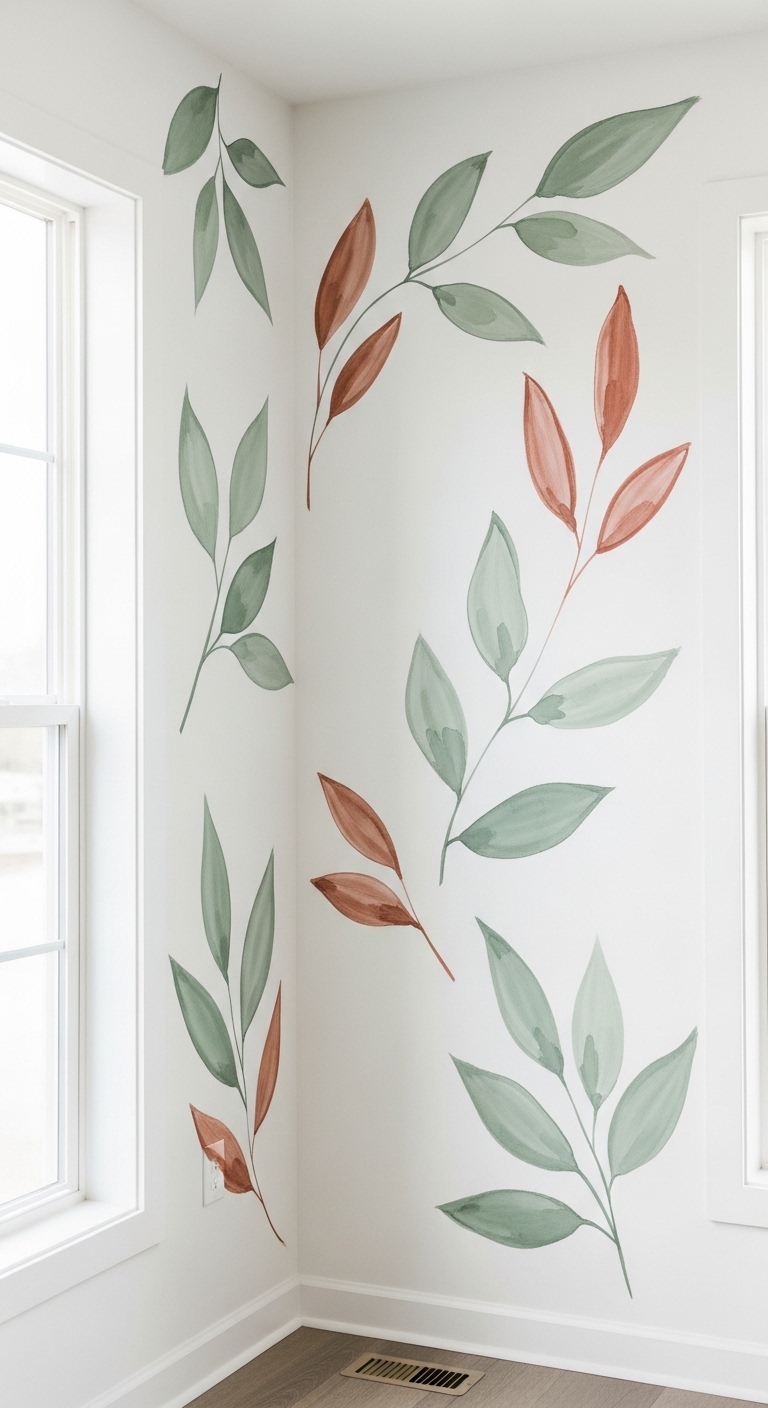
You don’t need to be a trained muralist to paint something stunning directly on your wall. Simple, loose botanical illustrations — branches, leaves, abstract botanical shapes — are achievable even for absolute beginners.
Use a light pencil sketch as your guide, then paint loosely with a flat brush and diluted acrylic paint. Imperfections read as artistic intention, not mistakes. Focus on one wall or just one corner beside a window for maximum impact with minimal pressure.
Idea 22: Vintage Plate Wall

A vintage plate wall is one of those ideas that sounds old-fashioned until you see it done beautifully — and then you immediately want one. Collect mismatched vintage plates from thrift stores (they’re usually under $2 each), choose pieces with a cohesive color story (blues and whites, warm earth tones, or all-white with varied patterns), and mount them with plate disc hangers.
Arrange them in an organic cluster — not a rigid grid. Let some overlap slightly in your visual plan. The result feels collected, curated, and full of history.
Idea 23: LED Light Art Installation

We’re ending with one of the most dramatic and genuinely magical wall decor ideas — an LED light installation. This sounds more complex than it is. You simply use command strips or small nails to guide string lights into a shape on your wall: a constellation, a simple tree silhouette, a starburst, or an abstract geometric.
On a dark accent wall, warm white LED fairy lights create an effect that’s nothing short of breathtaking at night. Layer in some small framed photos or minimal art pieces lit by the glow for a complete, styled vignette.
How to Choose the Right DIY Wall Decor for Your Living Room
With 23 ideas in front of you, it’s worth taking a moment to choose strategically rather than randomly. Ask yourself:
- What’s your dominant style? Boho, modern, farmhouse, eclectic, minimalist?
- What’s your budget? Some of these ideas cost $5. Others might run $50 to $100.
- How much wall space are you working with? One large statement piece or a clustered arrangement?
- Do you rent or own? If renting, lean toward removable options like washi tape, leaning shelves, and command-strip hangings.
The best wall decor doesn’t have to be expensive or complicated. It just has to feel like you.
Final Thoughts: Your Walls Deserve Better
Here’s the truth: every blank wall in your home is a missed opportunity. Not an obligation — an opportunity. An invitation to express something about who you are, what you love, and how you want to feel in your own space.
The 23 ideas in this list range from a Saturday afternoon project to a weekend commitment, from completely free to modestly priced. But every single one of them will make your living room feel more like home — more curated, more personal, more alive.
Pick one idea that genuinely excites you. Gather your supplies. Start this weekend. Your walls — and honestly, your soul — will thank you.
Have you tried any of these DIY wall decor ideas? We’d love to hear what worked for you. Drop your experience in the comments — and if you share your project online, tag us so we can celebrate what you created.