Front Yard Upgrades That Make Any Home Look Expensive
Front Yard Upgrades That Make Any Home Look Expensive
Let’s be real — most front yards in America look exactly the same. A flat patch of grass, a few shrubs shoved against the house, maybe a flower pot by the door. It works, sure. But does it make people slow down as they drive past? Does it make you feel proud every time you pull into your driveway? Probably not.
Here’s the exciting truth: your front yard is essentially free real estate for creativity, and most homeowners completely ignore its potential. In 2026, the rules of curb appeal have changed. We’re no longer just mowing and watering. We’re designing outdoor spaces that tell a story, reflect a personality, and honestly — raise property values.
I’ve gone deep researching what the top landscape designers across the USA are actually doing right now, what’s still missing from most “ideas” lists, and what genuinely works in real front yards. These 15 ideas go beyond the predictable. Let’s dig in.
The Moonlight Garden: A Front Yard That Comes Alive After Dark
Most front yards only look good during daylight. A moonlight garden flips that completely.
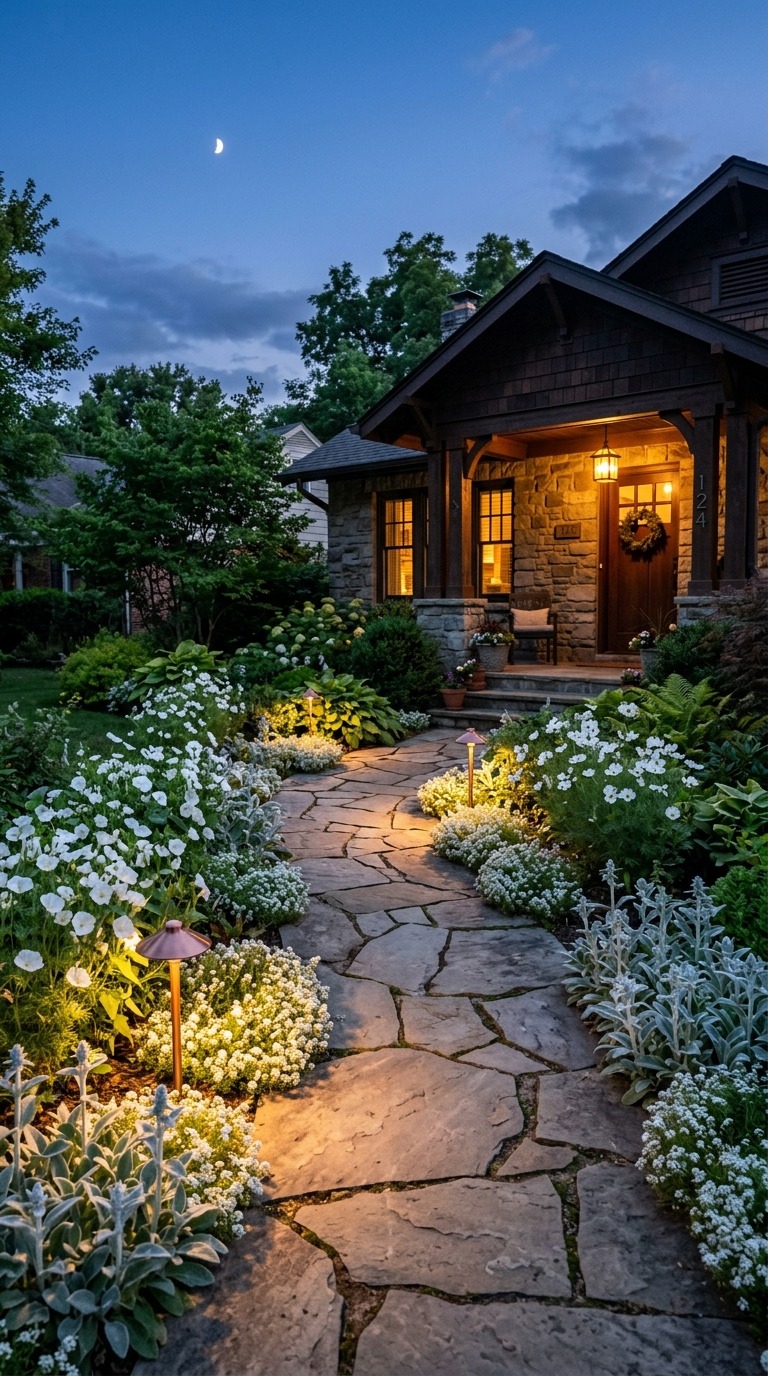
The concept is simple but striking: you plant exclusively white and pale-toned flowers, silver-foliage plants, and soft-textured grasses that seem to glow when the sun goes down. Pair that with low-voltage warm pathway lights buried just below eye level, and you have a front yard that looks like something out of a storybook at 9 PM.
Plants that work beautifully for this:
- White coneflowers (Echinacea ‘White Swan’)
- Silver sage (Salvia argentea) for its almost metallic leaf texture
- Ghost plant succulents along the walkway edges
- Moonflower vine climbing a simple black iron trellis near the entry
- White phlox as a low border around the mailbox area
The real magic happens when you add a single soft-uplighting fixture aimed at a Japanese maple or ornamental grass clump near your front steps. That one dramatic light angle creates a shadow-play effect on your home’s facade that looks genuinely architectural.
Why does this work so well? Because your neighbors, guests, and potential buyers almost always see your home in the evening — coming home from work, arriving for dinner, driving by after sundown. Most landscaping is designed purely for daytime. You immediately stand out by thinking about the other 12 hours.
Practical tip: White flowers tend to fade fast in intense summer heat. In hotter climates like Texas, Arizona, or Florida, go heavy on the silver-foliage plants like dusty miller and artemisia, which hold their luminous look all season without wilting.
The Textured Stone Tapestry Walkway
Flat concrete sidewalks are forgettable. A textured stone tapestry walkway makes people look down in surprise and delight before they even reach your door.
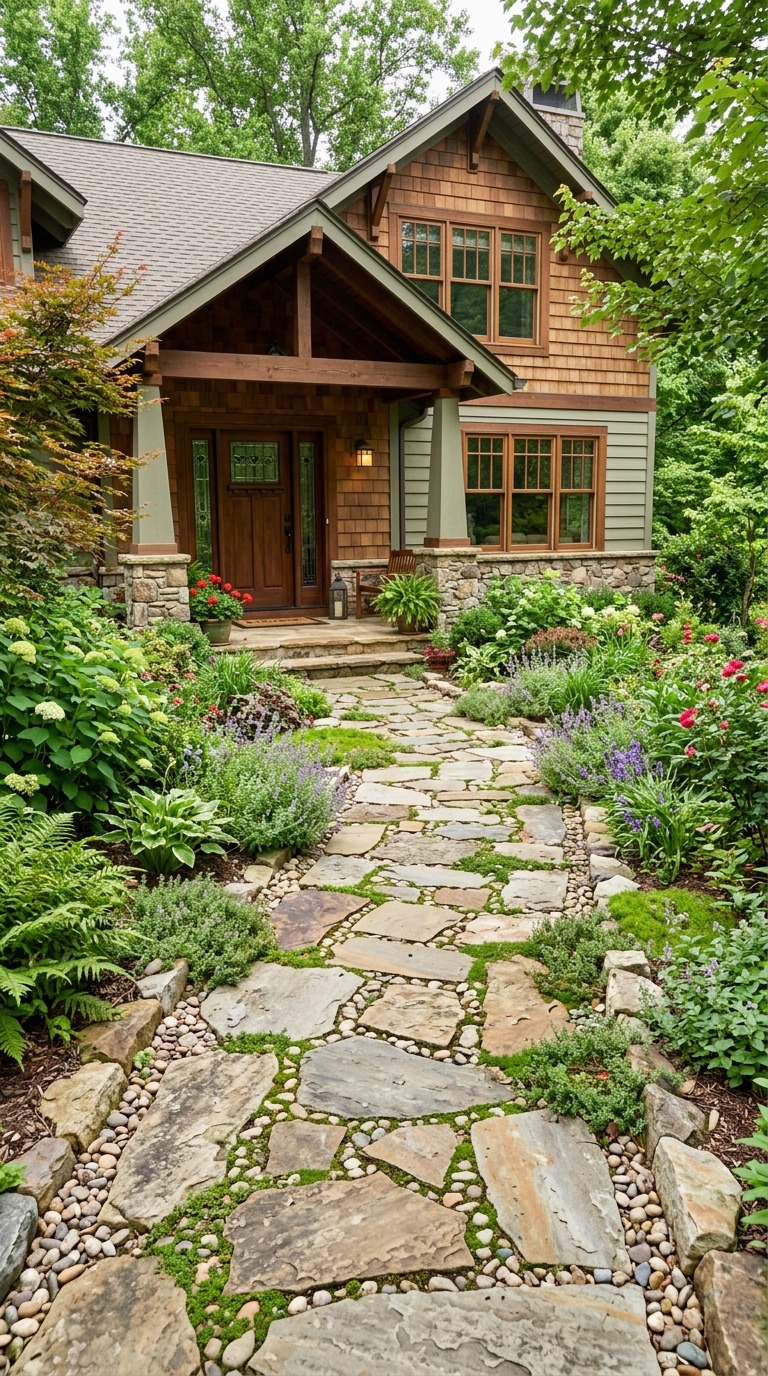
The idea here is to replace or overlay your standard walkway with a mosaic-style mix of materials rather than one uniform surface. Think flagstone slabs of varying sizes, mixed with:
- Polished river pebbles packed tightly in the gaps
- Low-growing creeping thyme planted between larger stones (it releases a light herbal scent when stepped on)
- Occasional square concrete pavers for clean geometry
- Dark lava rock used as a grounding accent color
The visual effect is richness and intention. It says someone actually thought about this, rather than just pouring a concrete path and walking away.
Here’s what most homeowners get wrong: they try to use too many colors. Keep your stone palette to two or three tones maximum — warm tan flagstone, dark grey river pebbles, and light cream concrete work beautifully together. Contrast comes from texture, not color clash.
This idea works for almost every house style:
- On a craftsman bungalow, use irregular limestone with moss tucked into edges
- On a modern home, go with large-format grey concrete pavers mixed with black pebbles
- On a cottage-style home, irregular red brick offcuts mixed with sandstone creates the perfect storybook path
Budget reality: A 20-foot walkway using this layered approach typically costs between $800 and $2,200 depending on stone type and whether you DIY the installation. Creeping thyme runs about $4–7 per plug and spreads naturally within two seasons.
The Raised Berm Garden With Flowing Ornamental Grasses
If your yard is flat as a pancake, a raised berm is one of the most transformative things you can do — and one of the most underused ideas in residential landscaping.
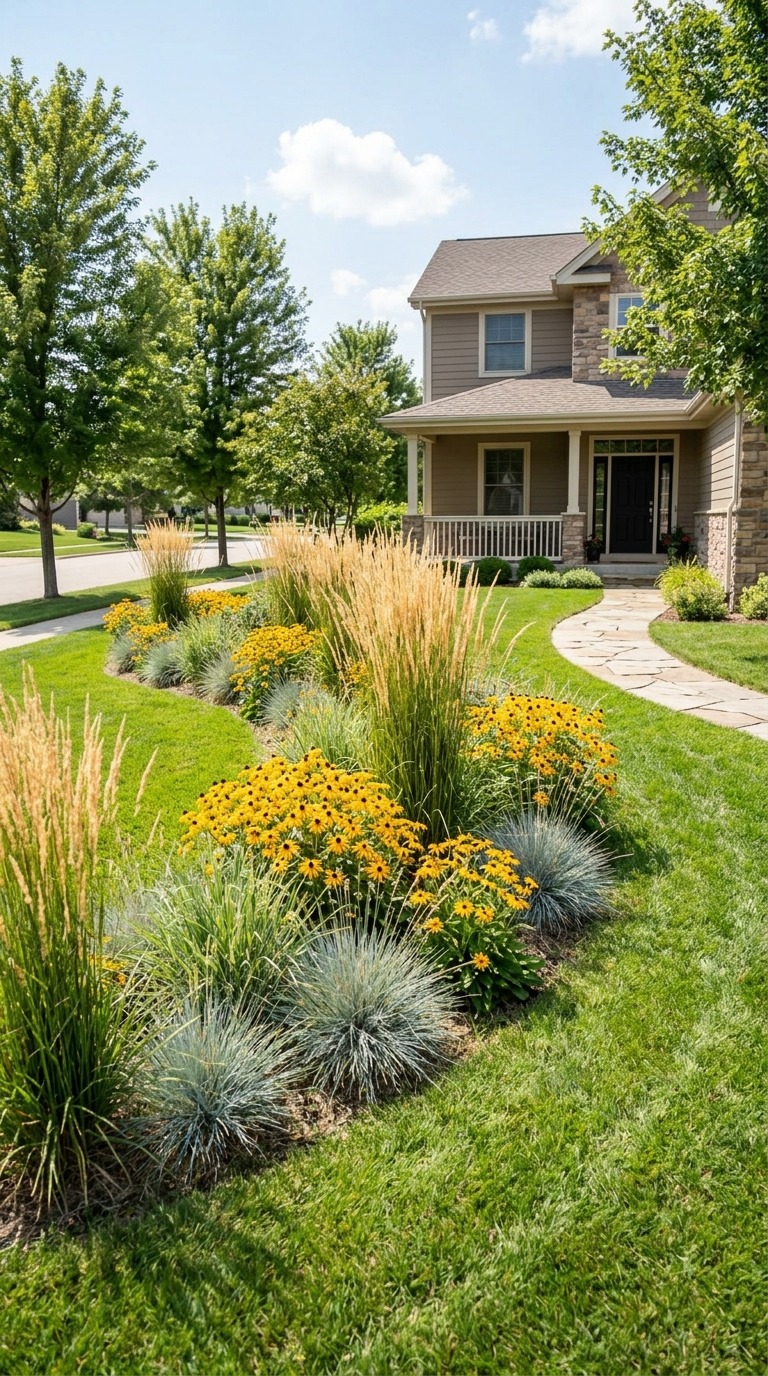
A berm is simply a gently mounded raised planting bed built directly in the lawn, usually 18 to 36 inches tall, shaped like a soft wave or teardrop. No retaining wall required. Just soil, compost, and plants.
Here’s why berms are so powerful:
- They add immediate dimension to a flat yard
- They create a natural visual separation between street noise and your home
- They give taller plants a platform to look dramatic from the curb
- They actually improve drainage by elevating root zones
For the best curb-appeal berms in 2026, the winning plant combination is layered ornamental grasses mixed with pollinator-friendly perennials:
- Karl Foerster feather reed grass as the tall backbone (reaches 5 feet, incredibly upright and architectural)
- Blue oat grass at mid-height for cool blue-grey color contrast
- Black-eyed Susans woven through the middle tier for yellow-gold punch
- Low-creeping sedums or ice plant at the base to flow over the berm edge naturally
Shape matters just as much as plant selection. Avoid perfectly symmetrical or circular berms — they look artificial. A slightly elongated teardrop shape, positioned at a 45-degree angle to your driveway, creates the most natural-looking form.
Real homeowner tip: If you’re in a windy region like the Midwest, taller grasses on berms actually help by acting as a windbreak near your entry. In colder zones (USDA 4 and 5), Karl Foerster grasses stay upright through winter, giving you visual structure even in January when everything else is dormant.
Edible Front Yard Landscaping Done Beautifully
Growing food in the front yard used to feel taboo. In 2026, it’s one of the most admired things a homeowner can do — as long as you design it with intention.
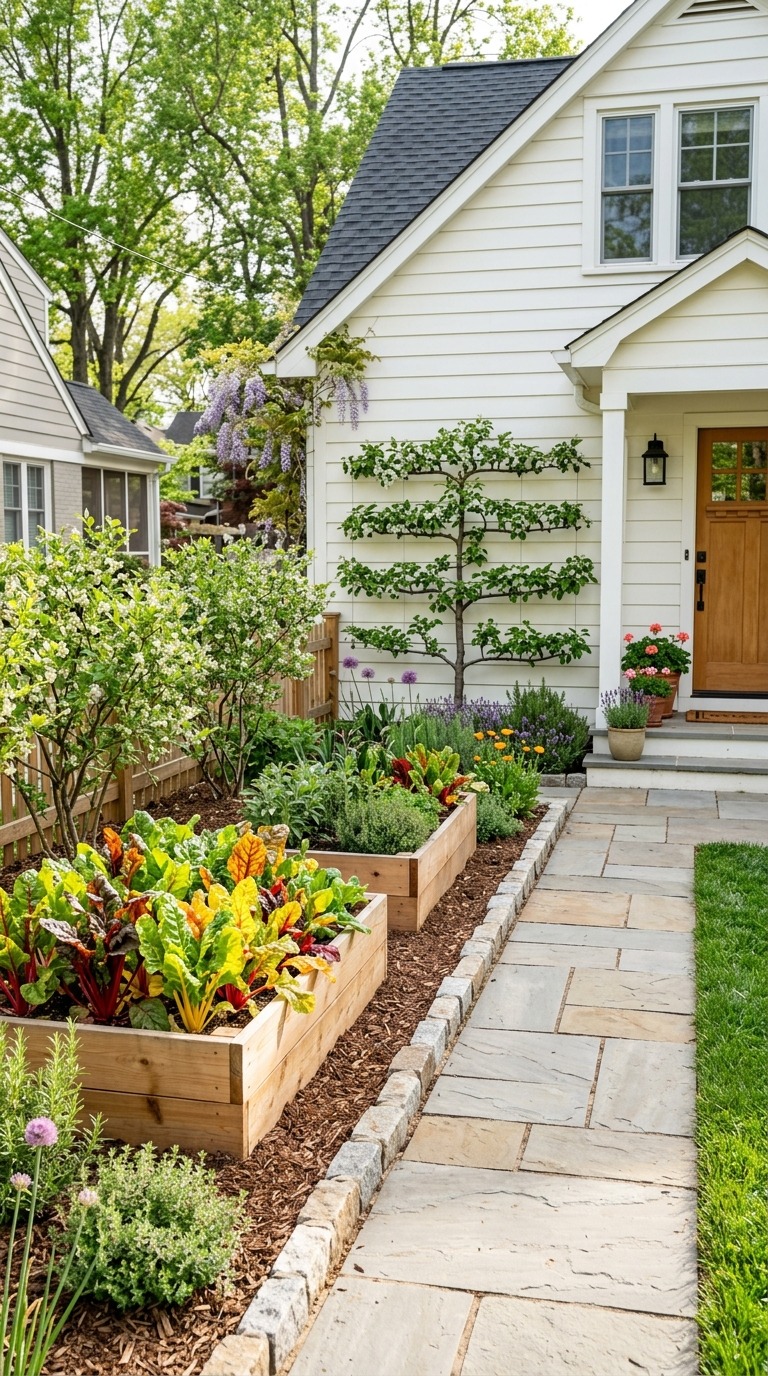
The key difference between an edible front yard that looks incredible and one that looks like a neglected vegetable patch is structure. You’re designing an ornamental edible garden, not a farm row.
Here’s the formula that works:
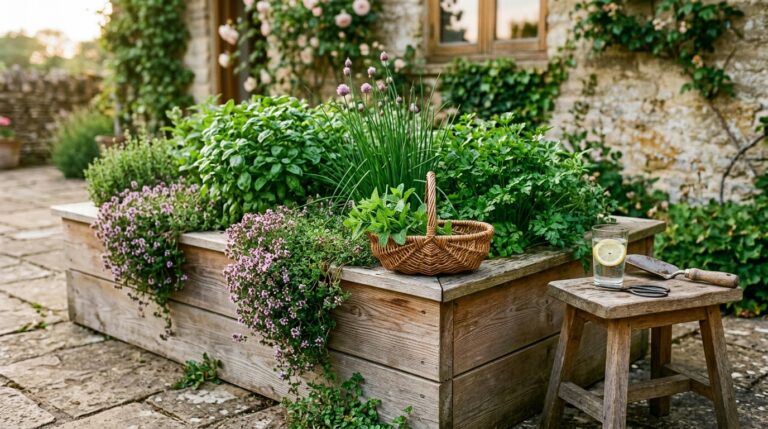
- Use raised cedar planters (18–24 inches tall) with clean lines flanking your entry steps — plant these with trailing cherry tomatoes, compact pepper plants, or lemon cucumbers
- Replace standard border shrubs with blueberry bushes, which are actually gorgeous ornamental plants — beautiful white spring flowers, bright berries, and stunning red fall foliage
- Line your front fence or walkway edge with rainbow Swiss chard, which looks genuinely spectacular with its neon-colored stems of red, yellow, orange, and pink
- Add a dwarf espaliered apple or pear tree flat-trained against your home’s front wall — this is a centuries-old European technique that looks sculptural and produces real fruit
The secret ingredient that makes edible landscaping look designed rather than accidental: consistent container style. When all your raised planters are the same material — say, weathered cedar or painted black metal — the whole yard reads as intentional even with a wild mix of plants.
One homeowner I know in Denver replaced her entire front lawn with a combination of blueberry shrubs, artichoke plants (which are stunning architectural specimens even before they fruit), and raised herb beds. Her HOA initially pushed back — until her yard won the neighborhood beautification award.
The Japanese Courtyard-Inspired Entry
You don’t need to travel to Kyoto to experience the calming power of a Japanese-influenced front garden. In fact, this design style translates extraordinarily well to American front yards — particularly for homes on busier streets where you want to create a feeling of peace the moment you arrive.
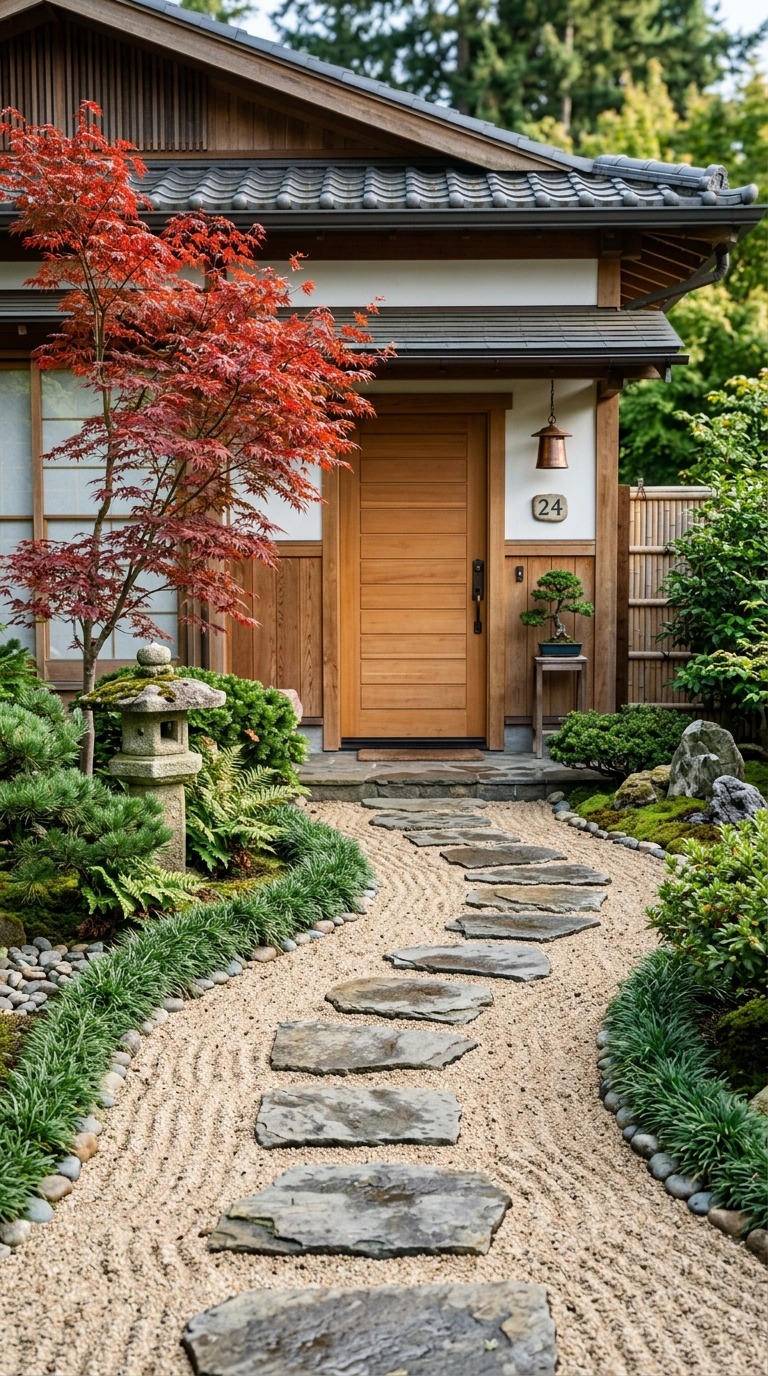
The core elements of a Japanese courtyard entry:
- A clean gravel or decomposed granite ground plane (raked into subtle wave patterns for a traditional look, or left smooth for a modern version)
- One or two deliberately chosen focal trees — a single Japanese maple, a weeping cherry, or a cloud-pruned boxwood
- Large stepping stones with intentional spacing that forces you to slow down as you walk to the door
- A simple bamboo water feature or stone lantern as a grounding centerpiece
- Low moss patches or mondo grass used in place of conventional lawn areas
What makes this idea special is the concept of ma — the Japanese design principle of meaningful empty space. Where most American landscaping tries to fill every inch, the Japanese garden approach uses emptiness as a design element. The space around your focal tree is just as important as the tree itself.
This approach works especially well on smaller front yards where you don’t have room for sprawling beds. A 20 by 30-foot front yard can feel like a serene sanctuary with this framework.
Budget note: The biggest cost is usually the Japanese maple or weeping cherry specimen. A well-established 6-foot Japanese maple can run $150–$450. But here’s the thing — one stunning specimen tree does more for your curb appeal than $1,500 worth of generic foundation shrubs ever will.
Statement Mailbox Landscaping With a Mini Garden Vignette
Here’s something nobody talks about enough: your mailbox is right at the street — it’s literally the first thing people see. And 90% of homeowners just stick a metal post in bare dirt and call it done.
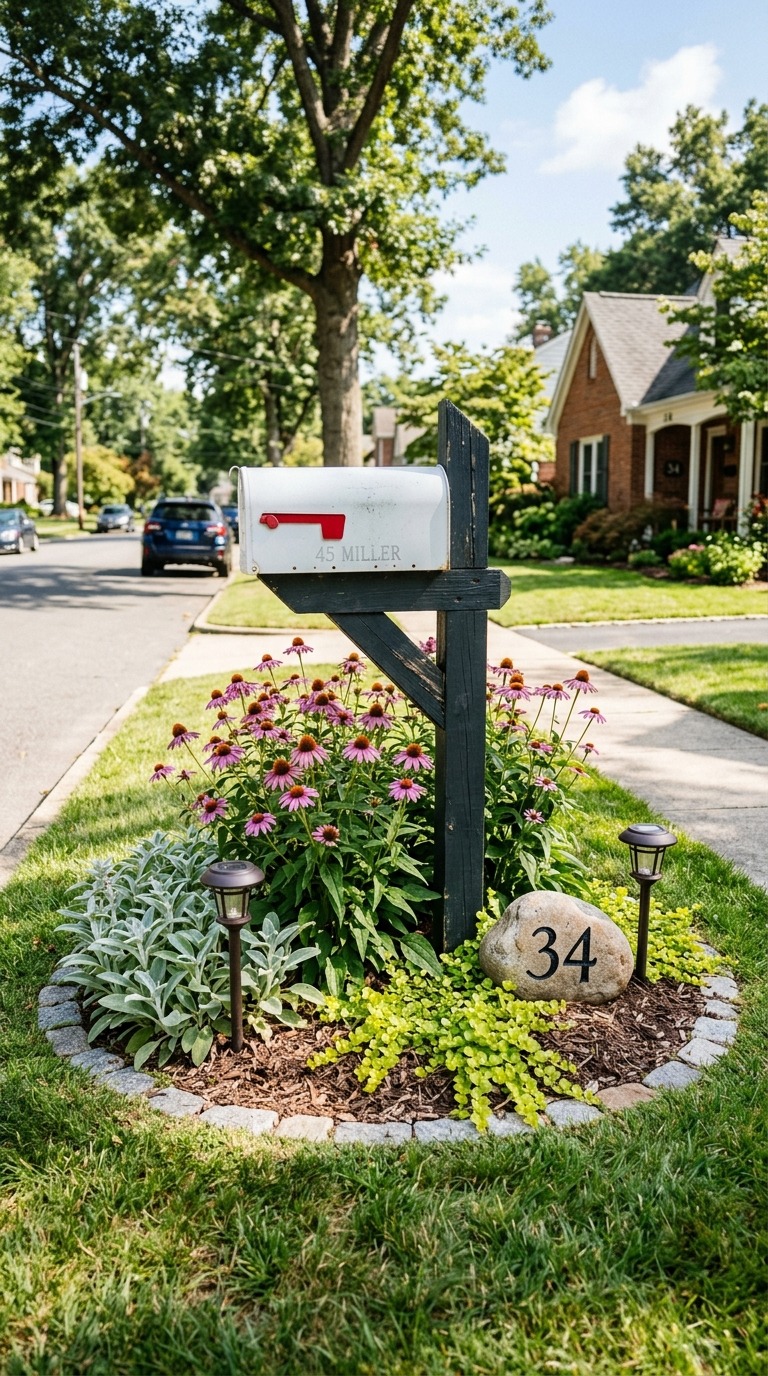
A mailbox vignette garden turns that overlooked spot into a polished design moment. The approach:
- Surround the mailbox post base with a defined planting circle or rectangle — use metal edging to keep it crisp
- Plant in three layers: tall ornamental grass or a compact shrub behind the mailbox, medium flowering perennials at mid-height, and a low groundcover or creeping plant at the base
- Add a small decorative boulder or two to anchor the composition
- Incorporate solar-powered stake lights on either side of the mailbox for evening visibility and charm
Excellent plant combinations for mailbox gardens:
- Purple coneflowers (Echinacea) + lamb’s ear + creeping Jenny groundcover
- Dwarf fountain grass + yellow rudbeckia + sedum ‘Autumn Joy’
- Blue salvia + catmint + creeping phlox (a beautiful blue-purple early spring combination)
The critical design rule: keep the footprint modest — no wider than 3 to 4 feet on each side of the post, and no taller than the mailbox itself. You want a polished accent, not a plant explosion that blocks sight lines and annoys mail carriers.
Cost to build: Usually $75–$200 in plants, an $18–$30 metal edging kit, and two afternoons of your time. One of the best return-on-investment landscape upgrades you can make.
The Living Privacy Screen: Ornamental Grasses as a Natural Fence
Traditional wood fences in front yards often look closed-off and uninviting. Chain link fences look industrial. But a living screen of layered ornamental grasses and tall perennials gives you privacy, movement, sound, and beauty — all at once.
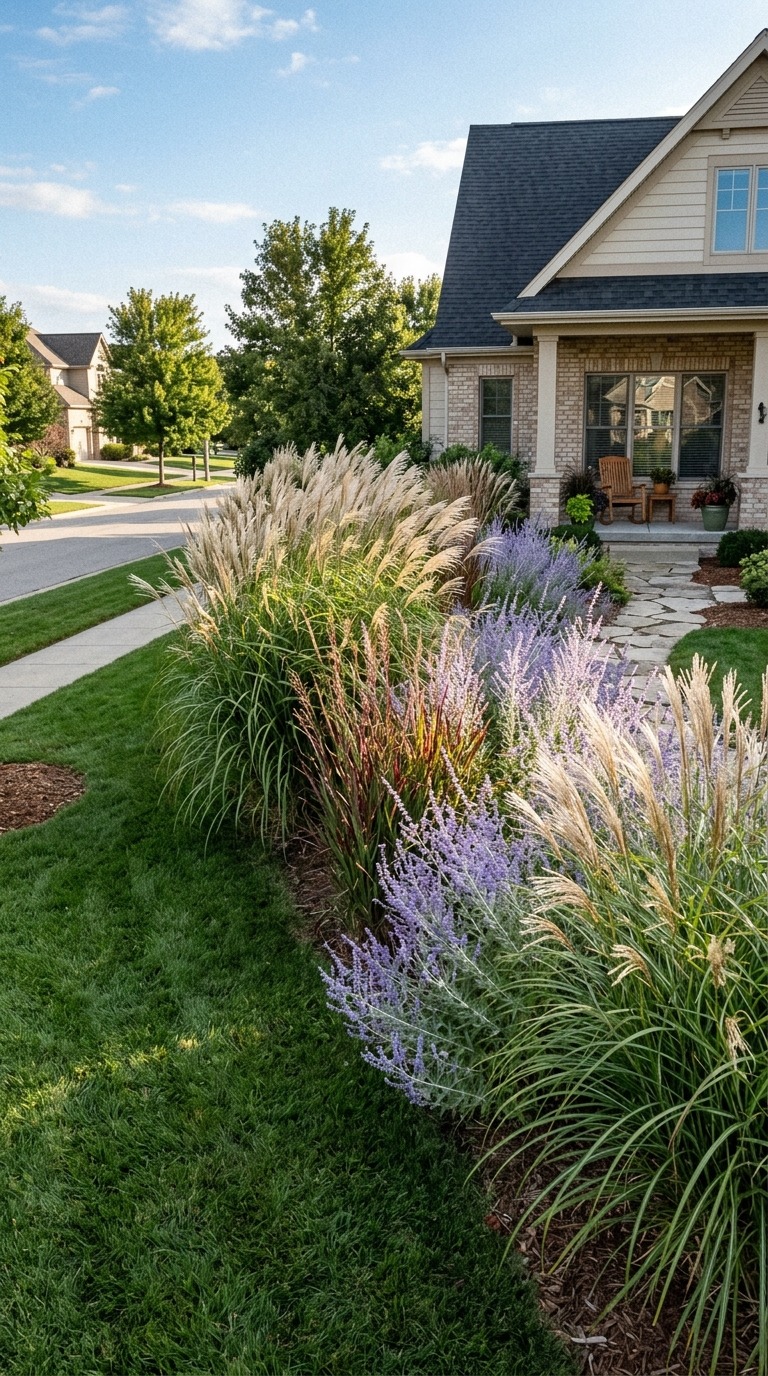
This idea works exceptionally well for:
- Homes on corner lots with high foot traffic
- Properties near busy streets where you want a visual and sound buffer
- Front yards where you want to define a more intimate entry courtyard feel without building a hard fence
The most effective living screen uses three to four plant varieties in a staggered, naturalistic mass:
- Miscanthus sinensis ‘Gracillimus’ (maiden grass) at the back — reaches 5 to 6 feet and sways dramatically in wind
- Panicum virgatum ‘Shenandoah’ (switch grass) in the middle row — turns brilliant red-orange in fall
- Russian sage at the front tier for its silvery stems and lavender-purple flowers that bloom all summer
- Calamagrostis ‘Overdam’ (variegated feather reed grass) used as end caps to define the screen boundaries
What makes this approach better than a fence? Movement and sound. Tall grasses rustle in the breeze and create a soft white noise effect that actually muffles street traffic. Plus, they change with every season — green and upright in summer, golden and feathery in fall, frosted with ice crystals in early winter.
Important planting tip: Space maiden grass clumps at least 4 to 5 feet apart — they spread significantly and look best with breathing room. Plant in a slightly curved, offset line rather than a rigid straight row to maximize the naturalistic effect.
The Gravel and Ground Cover Front Yard Replacement
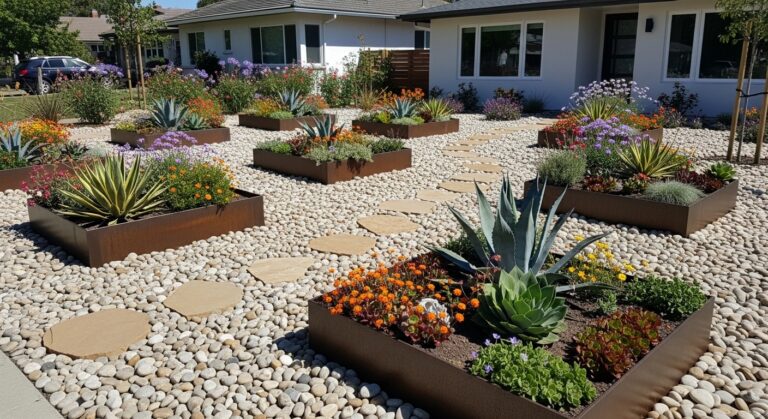
Replacing your front lawn with a thoughtfully designed gravel and groundcover landscape is one of the boldest moves you can make — and one that’s absolutely paying off for homeowners across the western and southwestern USA, where water costs and drought restrictions make traditional grass increasingly impractical.
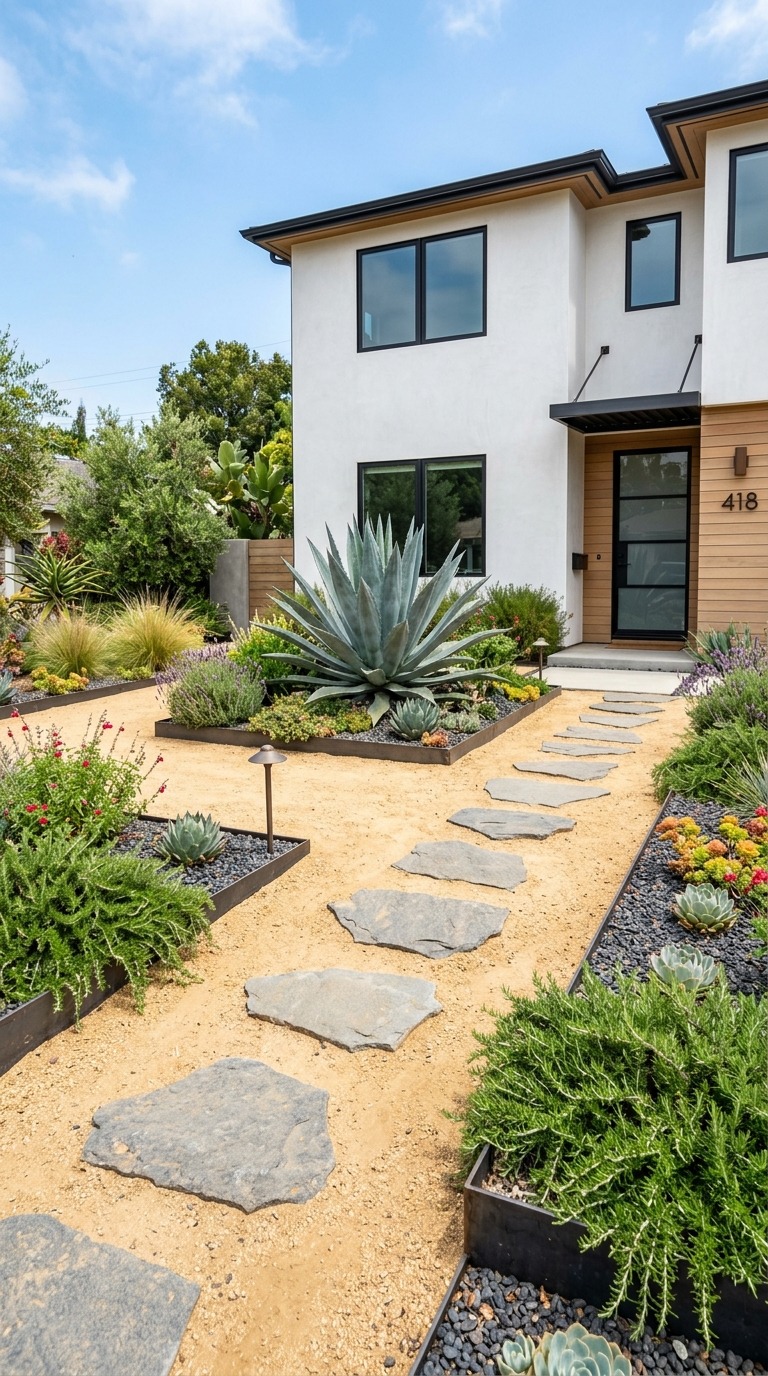
But this idea goes far beyond just dumping gravel everywhere. The design matters enormously.
A well-executed gravel and groundcover front yard includes:
- Decomposed granite or pea gravel as the primary ground plane (pick a warm tone — buff, tan, or gold — that complements your home’s exterior colors)
- Defined pathways of larger stepping stones cutting through the gravel in a logical route from driveway to front door
- Groundcover plants in defined planting pockets — creeping rosemary, prostrate juniper, ice plant, or dymondia (a flat silver-green groundcover that is essentially drought-proof)
- A focal accent: one statement boulder, a sculptural succulent like a blue agave, or a single architectural tree
- Clean metal edging everywhere borders meet hardscape
The result looks intentional, modern, and honestly impressive — not like someone gave up on lawn care.
Critical design mistake to avoid: don’t use black or dark grey gravel as the primary surface in full-sun front yards. It absorbs heat aggressively and can raise ground-level temperatures by 15 to 20 degrees, which stresses nearby plants and makes the space uncomfortably hot. Warm light tones always work better.
Water savings reality: Homeowners who make this switch in regions like Southern California, Nevada, and Arizona routinely report 50–70% reductions in outdoor water use. Some municipalities even offer rebate programs — up to $2 per square foot of lawn removed — that partially fund the project.
The Sculptural Foundation Planting Overhaul
Most homes have the same foundation planting: a row of junipers, maybe some boxwood balls, occasionally a tired azalea. They sit flat against the house in a predictable line and do absolutely nothing interesting.
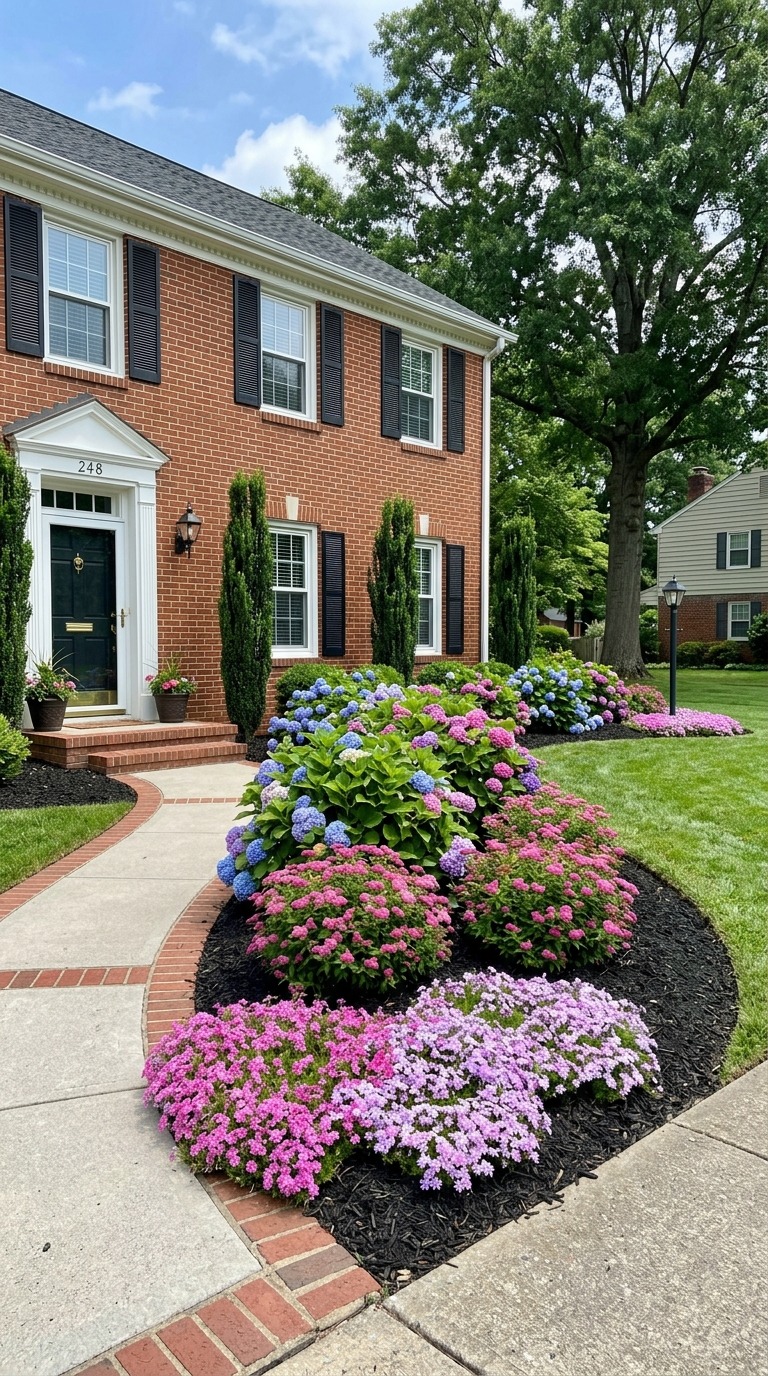
The sculptural foundation planting approach completely rethinks this zone. Instead of uniform shrubs at the same height, you build a layered, three-dimensional composition directly against your home’s facade.
Here’s the layering framework:
- Anchor species (5–8 feet): One or two specimen shrubs with strong form — ‘Sky Pencil’ holly for a narrow vertical exclamation point, a clipped ‘Green Giant’ arborvitae, or an ornamental serviceberry
- Mid-tier species (2–4 feet): Flowering shrubs with year-round interest — dwarf spirea ‘Double Play Gold’, ‘Incrediball’ hydrangea, or dwarf flowering quince
- Low tier (under 18 inches): Fine-textured plants that soften the base — carpet roses, low-growing nandina, or a mix of liriope and creeping phlox
- Ground layer: Shredded hardwood mulch in a consistent 3-inch depth, kept tight against plant bases but pulled back from stems
The real upgrade comes from varying heights dramatically. When your eye travels from a 7-foot vertical holly down to a 2-foot spirea and then to 8-inch liriope at the base, the whole facade of the house looks more interesting and dynamic.
Pro insight: Foundation planting also serves an architectural purpose — it visually anchors the house to the ground. Homes without thoughtful foundation planting look like they’re floating on top of the soil. The right plants in the right arrangement make the entire structure look more grounded and intentional.
The Dry Creek Bed: Drainage That Doubles as Art
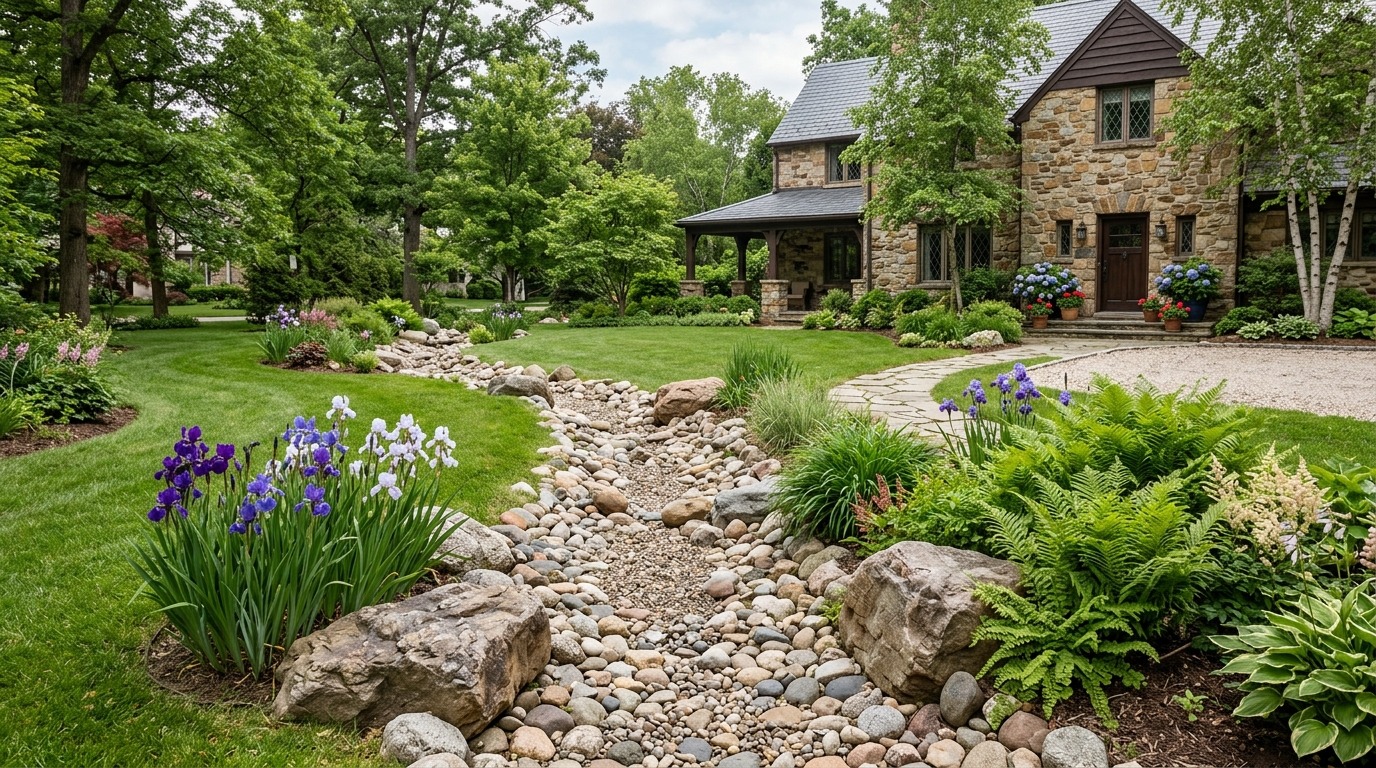
If your front yard has water drainage issues — low spots, runoff channels, or areas that flood after heavy rain — a dry creek bed is one of the cleverest solutions in landscaping because it solves your drainage problem while simultaneously becoming one of your yard’s best visual features.
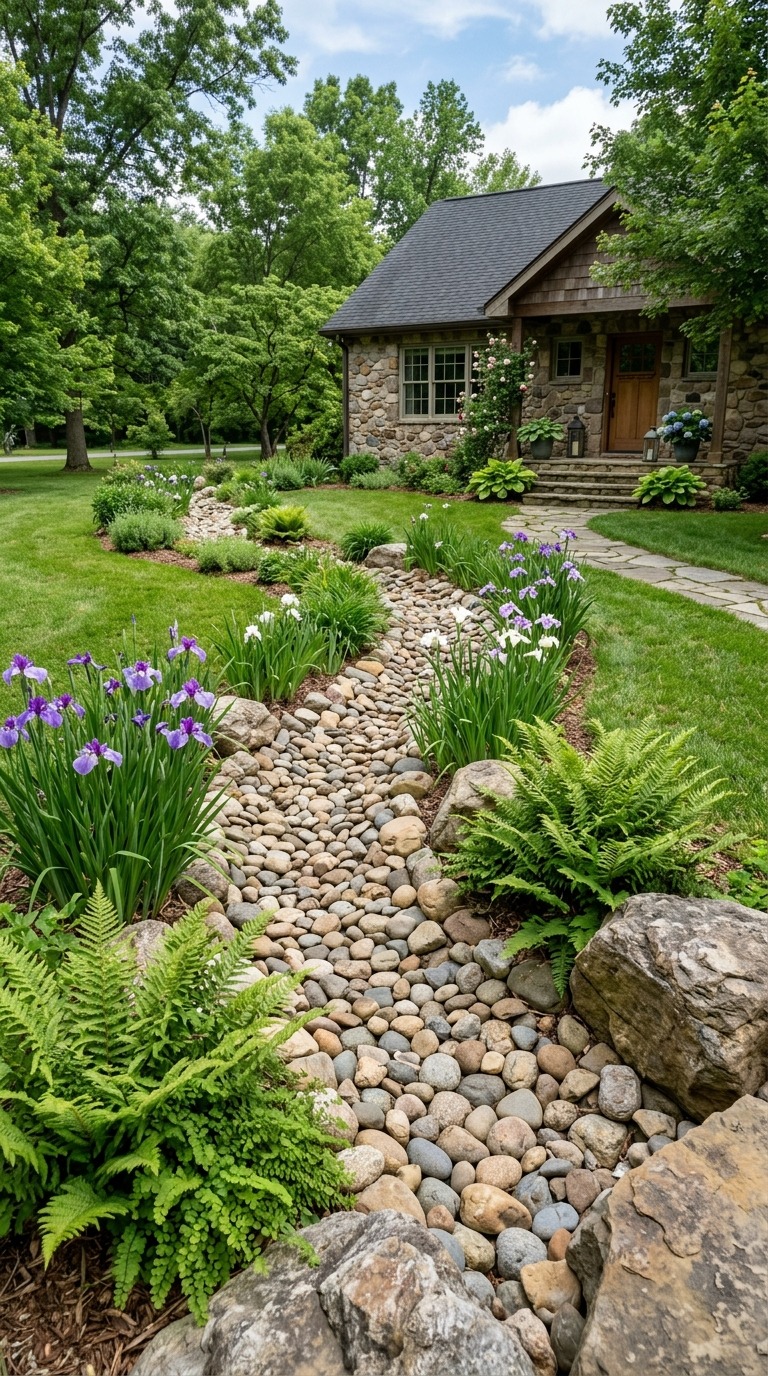
A dry creek bed is a channel of rounded river stones of varying sizes, designed to mimic a natural stream bed, that guides water flow away from problem areas during rain and looks like a beautiful stone feature the rest of the time.
Elements of a well-designed dry creek bed:
- A gently curved, irregular path (never straight — natural water doesn’t flow in straight lines)
- River stones in three to four sizes: large anchor boulders at the outside bends where a real stream would deposit heavy material, medium rounded cobbles filling the main channel, and small pea gravel filling gaps
- Moisture-tolerant plants along the banks — Japanese iris, blue flag iris, cardinal flower, native ferns
- Occasional stepping stone crossings so the creek feels accessible and walkable
- A defined “source” at one end (often a large boulder arrangement) and a defined “outlet” at the other end that leads to a deeper collection area
The design trick that makes dry creek beds look natural: vary your stone sizes more than feels necessary. Real creek beds have dramatic size contrast — tennis-ball-sized river rocks mixed with football-sized boulders mixed with small pebbles. When people only use one stone size, the result looks artificial.
The Front Yard Color Echo: Matching Plants to Your Home’s Exterior
This is one of those ideas that sound simple but is almost never executed intentionally — and when it is, the result is absolutely stunning.
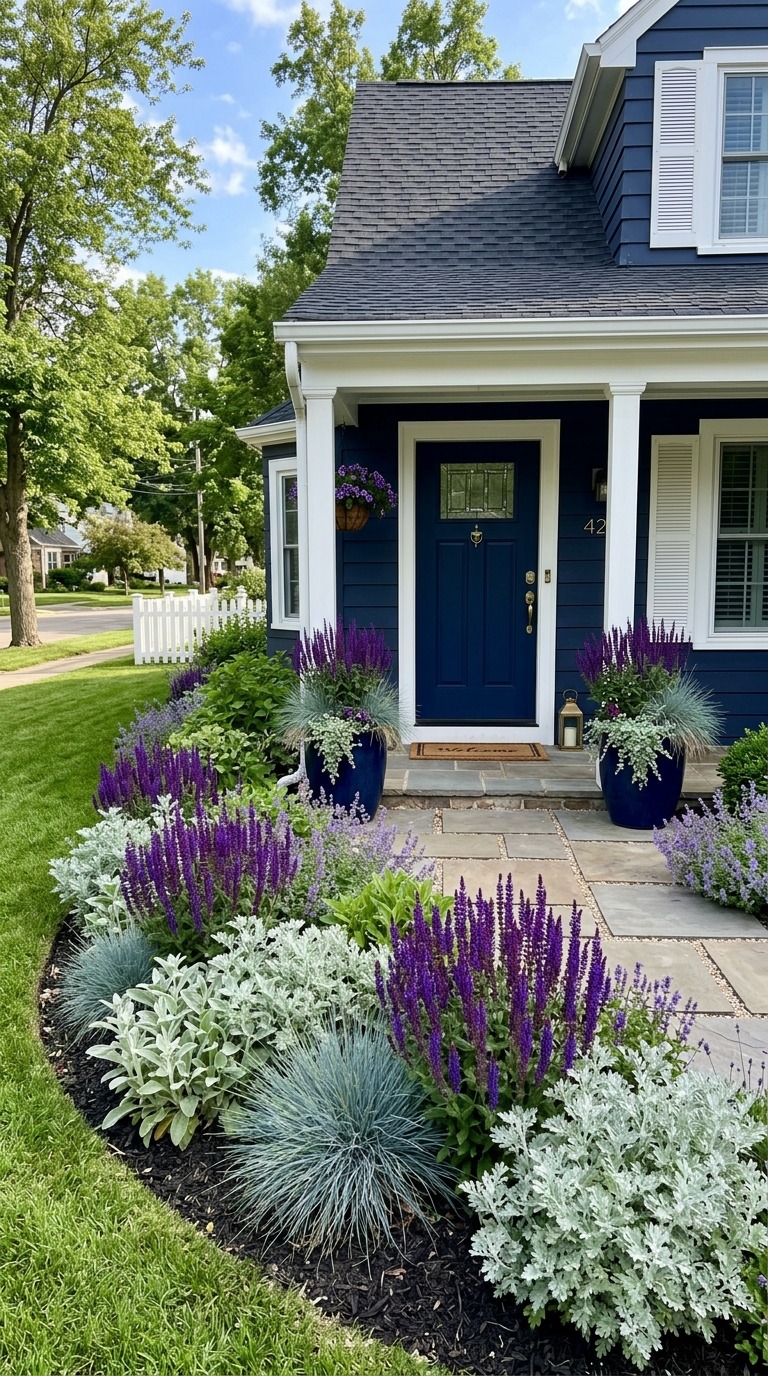
The color echo approach means deliberately selecting front yard plants whose flower colors, foliage colors, or bark tones echo the colors of your home’s exterior — siding, trim, roof, shutters, or door.
Specific examples that work beautifully:
- Navy blue front door + deep purple salvia + blue fescue grass + silver artemisia — the whole entry composition feels cohesive from the street
- Red brick home + deep burgundy Japanese maple + red knockout roses + bronzy heuchera foliage — the warm tones unify house and landscape
- White farmhouse + white peonies + silver lamb’s ear + soft pink garden roses — creates that dreamy romantic cottage look
- Charcoal grey modern home + black mondo grass + white iceberg roses + lime-green chartreuse spirea ‘Ogon’ — graphic, modern, and bold
The key is to pick one or two dominant exterior colors and then intentionally echo them in your plant palette rather than using random mix-and-match colors. You’re not trying to match exactly — you’re creating color resonance.
One practical tip: photograph your house’s exterior, then bring that photo to your local nursery when selecting plants. Hold foliage and flower colors against the photo. It sounds obvious but almost nobody does it, and it makes plant selection dramatically more accurate.
Solar-Powered Smart Lighting Landscape Design
Lighting transforms front yards more dramatically than almost any plant selection — and yet most homeowners either skip it entirely or install cheap solar stake lights from a big-box store that look sad and produce barely any light.
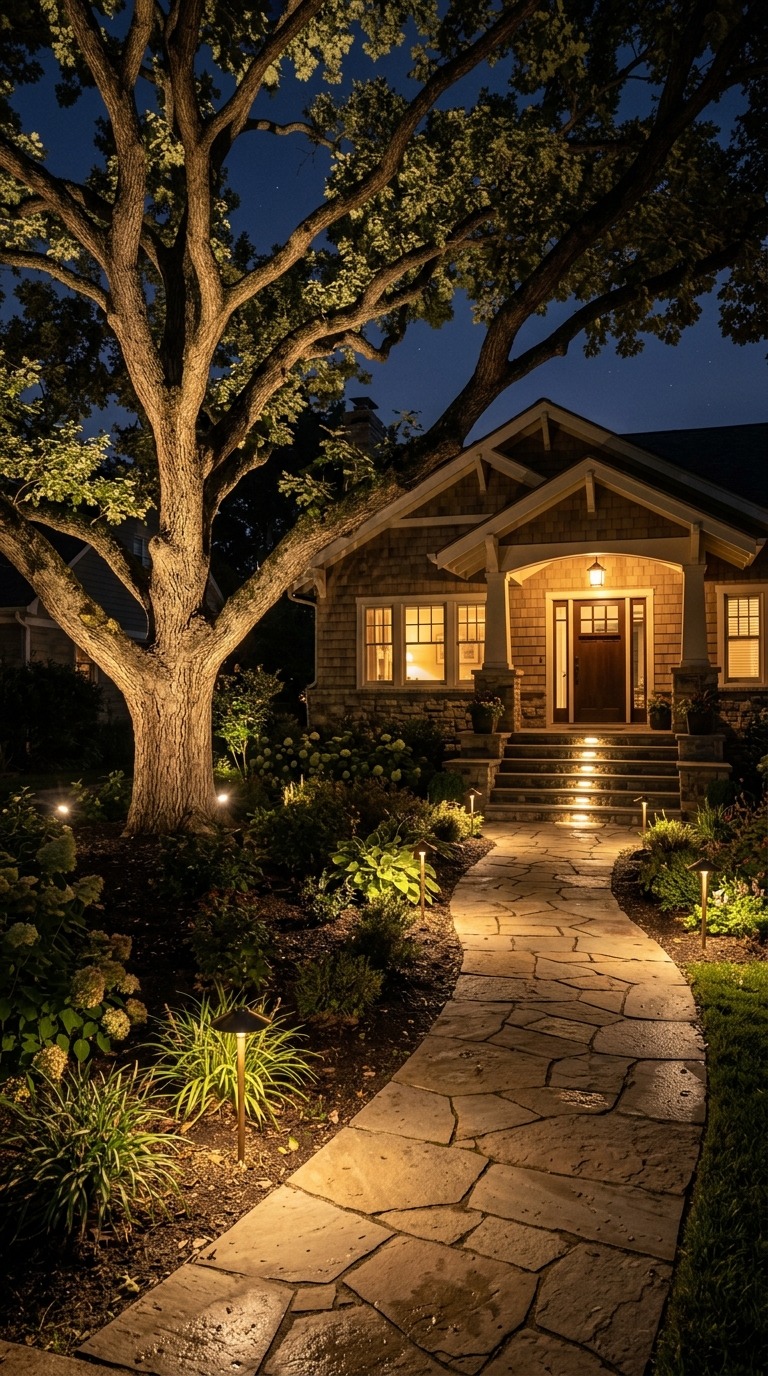
A properly designed front yard lighting plan uses layered light at three levels:
High-level lighting (8–12 feet): Uplighting aimed at your home’s facade or at a large specimen tree. This creates architectural drama and makes your home visible and impressive from the street at night. Use warm 2700K LED fixtures buried in the ground aimed upward.
Mid-level lighting (2–5 feet): Path lights with a wide, soft wash of light — not the tiny dot-of-light style, but proper low-voltage fixtures that actually illuminate the ground around your walkway. Brass or matte black finishes look far more premium than chrome or silver.
Ground-level lighting: Recessed step lights if you have front steps, or very low profile in-ground fixtures set directly into the edge of your planting beds to silhouette plants from below.
The 2026 upgrade that makes this truly smart: solar-powered fixtures paired with a Bluetooth mesh controller let you set schedules, adjust brightness, and even create seasonal lighting scenes from your phone. No electrician needed. No trenching wire across your yard.
Design rule for front yard lighting: always light the pathway and the feature, never the visitor’s face. Fixtures should be angled to illuminate what you want to show, not to shine into the eyes of someone walking to your door.
The Corner Lot Focal Garden: Turning an Awkward Space Into a Showpiece
Corner lots are both a blessing and a burden. You have more visibility — two full street frontages instead of one — but you also have more yard to maintain and often an awkward triangular or angled section that nobody quite knows what to do with.
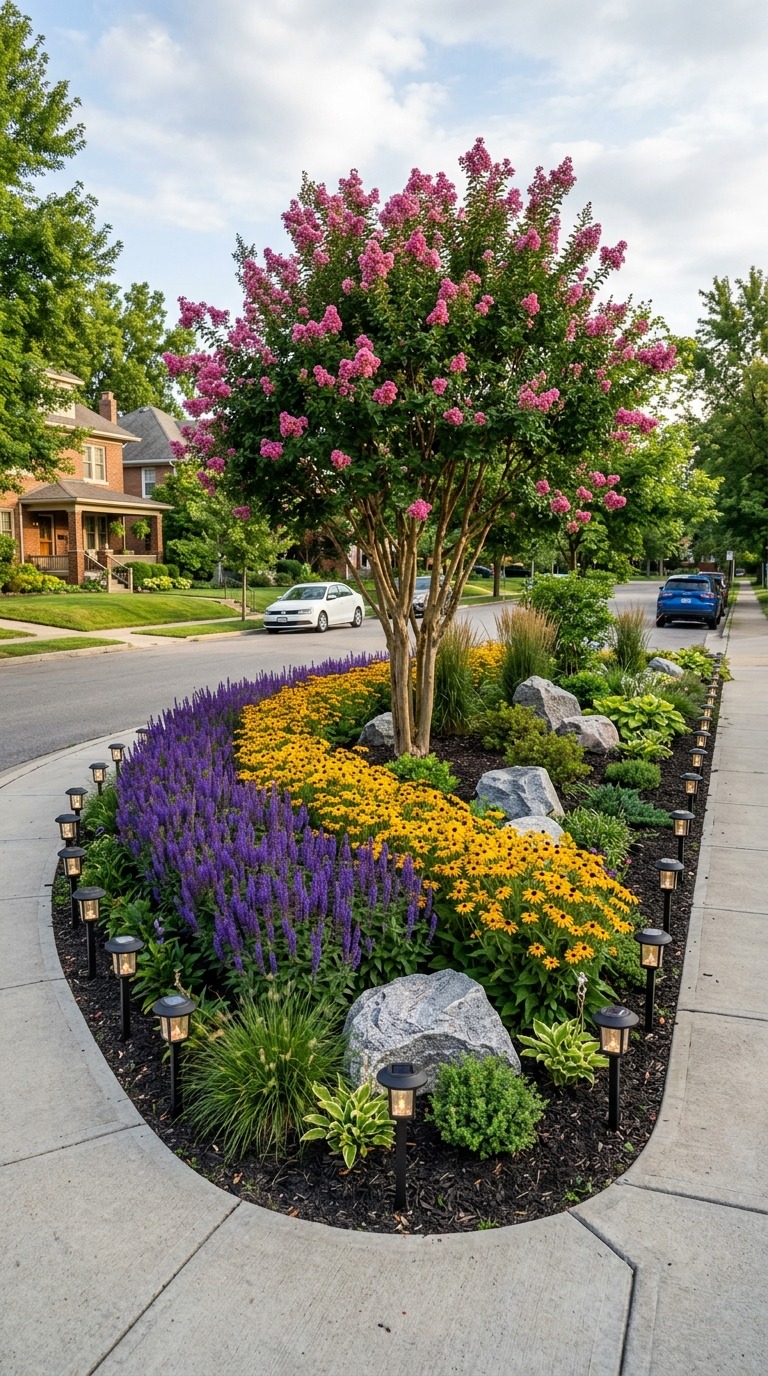
The corner focal garden idea turns that awkward corner zone into the undeniable star of the property.
Here’s the approach:
- Define the corner with a low curved stone retaining wall or decorative metal edging that creates a planting island at the corner point
- Plant a single spectacular specimen at the very corner apex — a weeping cherry tree, a multi-trunk crape myrtle in a bold color, or a large ornamental grass specimen like Miscanthus ‘Malepartus’ that you’ll see from both streets
- Build outward from that focal plant in sweeping curved bands of color — deep purple salvia nearest the focal tree, then a band of yellow rudbeckia, then low white alyssum at the outer edge
- Add one or two large accent boulders placed as if naturally settled, 18 inches apart from the focal plant
- Frame the corner with solar pathway lights on both street-facing edges
Why this works: both streets get a view of something beautiful instead of a mowed corner that drivers cut across. It also naturally discourages people from cutting the corner — which is a real problem on many corner lots.
Bonus: a corner garden this well-designed actually reduces your total mowing area and replaces it with a low-maintenance planting bed that only needs seasonal maintenance.
The No-Lawn Front Yard With Naturalistic Meadow Planting
Here’s the boldest idea on this list — and also one of the most rewarding once you commit to it.
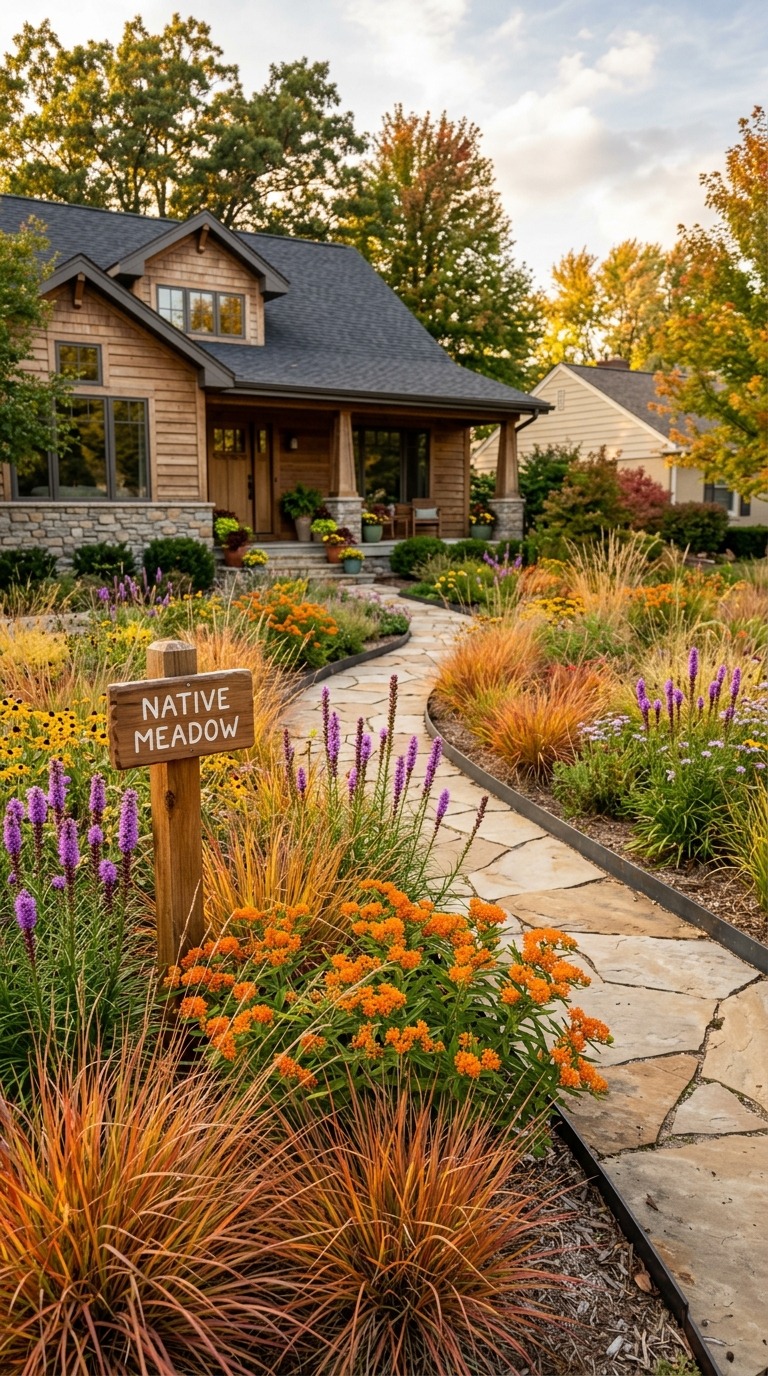
Replacing your traditional lawn with a naturalistic meadow planting isn’t about letting your yard go wild. It’s about designing a thoughtfully curated mix of native grasses, wildflowers, and low perennials that look beautiful, require minimal maintenance, support local wildlife, and make your front yard look genuinely unique on any street in America.
The framework for a designed meadow front yard:
- Select a matrix plant that forms the base layer — little bluestem grass (Schizachyrium scoparium) or prairie dropseed are exceptional choices that turn amber-red in fall
- Weave in flowering perennials in loose drifts: butterfly weed (Asclepias tuberosa) for stunning orange in summer, prairie blazing star for vertical purple spikes, wild bergamot for soft lavender clusters that bees adore
- Keep one or two areas of the yard neatly edged and defined — clean metal edging along your walkway signals that this is intentional design, not neglect
- Add a simple cedar or stone border along the street edge to further frame the meadow as a designed space
- Mow paths through the meadow seasonally so it feels navigable and human-scale
The most important element: a small hand-painted sign near the walkway reading something like “Native Meadow Planting — Supporting Local Pollinators” instantly transforms neighbor perception from “they stopped caring” to “they’re doing something meaningful.”
Maintenance reality: after the first establishment year, a native meadow requires one annual cutback in late winter and virtually no supplemental watering in most US climates. Compare that to a weekly mowing schedule and you’re getting your weekends back.
The Welcoming Entry Courtyard With a Defined Outdoor Room
The most luxurious front yard transformation isn’t about plants at all — it’s about thinking of your front entry as a room rather than just a transition zone.
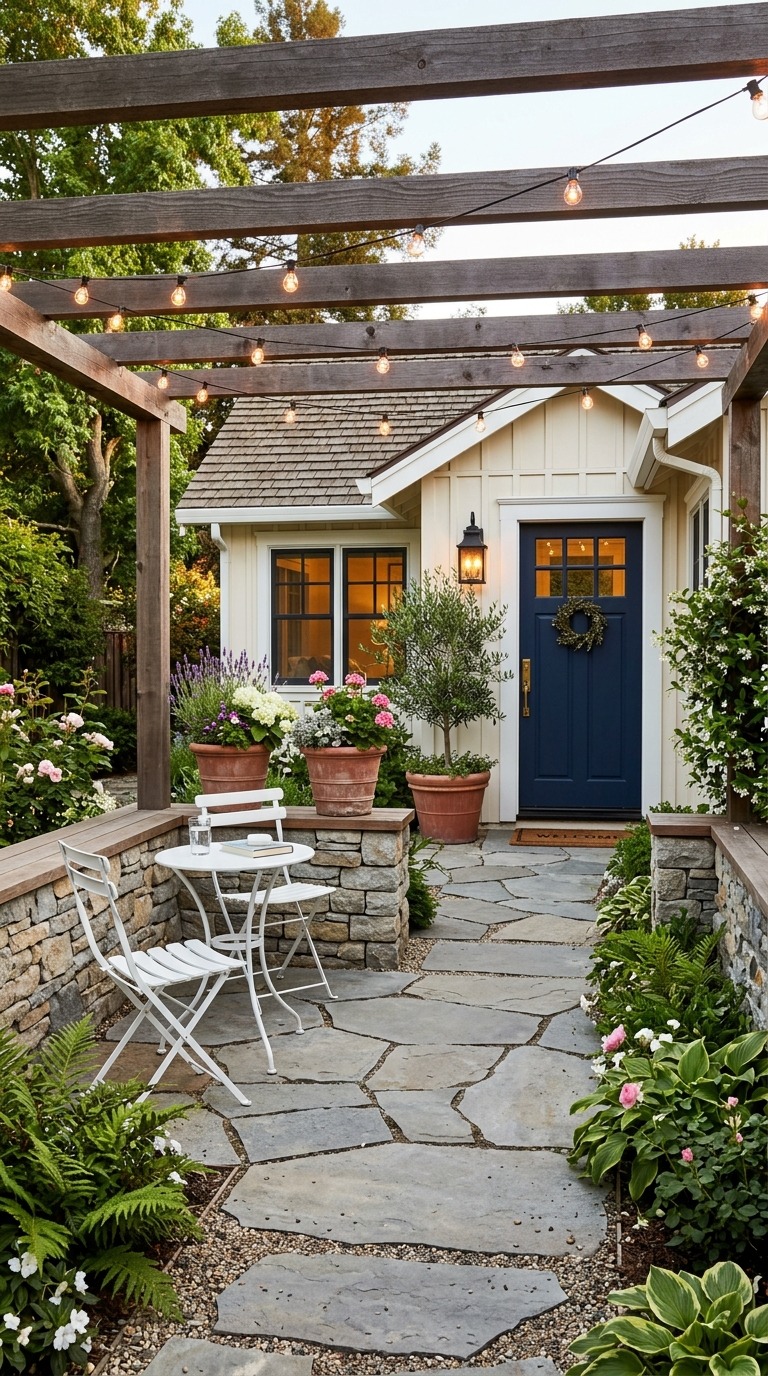
An entry courtyard takes the space between your sidewalk and front door and turns it into a defined outdoor living moment. Here’s what it looks like in practice:
- A low-wall enclosure (12 to 24 inches tall) on one or two sides, built from stacked stone, concrete block, or cedar planks — this defines the room boundary without blocking sightlines
- A distinctive paving surface within the courtyard — large-format concrete pavers, irregular flagstone, or brick — different from the standard sidewalk material to signal a transition
- One or two lightweight outdoor chairs or a small bistro bench placed inside this space, making it clear that this is a place to actually sit, not just pass through
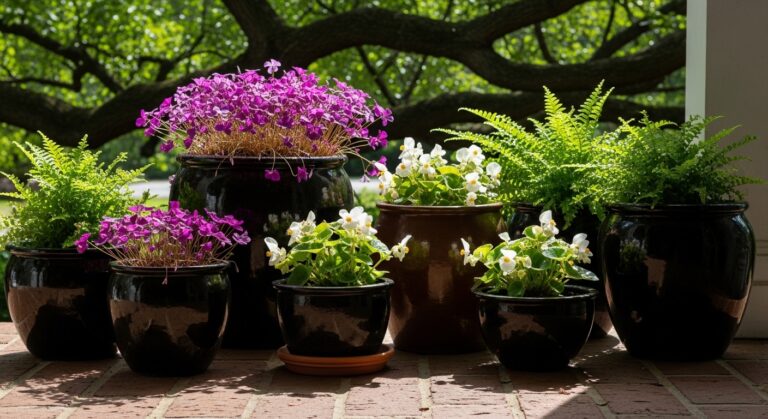
- Container plants in matching pots (two to four containers) planted seasonally for year-round interest
- Overhead definition through a pergola, a standard-trained small tree (like a patio rose tree or a clipped lollipop holly), or even just a string of Edison lights that frame the zone at night
The psychology behind this idea is powerful: a defined entry courtyard gives your home a sense of arrival. Guests feel welcomed before they even knock. You feel proud every single time you pull into the driveway.
Real application: You don’t need a big front yard for this. A 10 by 12-foot space is more than enough. Some of the most beautiful entry courtyards I’ve seen were on modest homes with small front yards — because the limited space forced a focused, well-curated design.
Final Thoughts
Every single idea on this list is achievable. None of them require you to be a professional landscaper, have an unlimited budget, or start from scratch. What they do require is intention — the decision to treat your front yard as something worth designing rather than just maintaining.
Start with one idea. Maybe it’s a mailbox vignette garden that costs you $100 and a weekend. Maybe it’s swapping out your tired foundation shrubs for a sculptural layered planting. Maybe it’s a dry creek bed that solves your drainage problem and becomes your yard’s best feature.
The front yard is the first chapter of your home’s story. Make it one worth reading.
Pick the idea that excites you most, grab your gardening gloves, and let’s make your neighbors slow down on purpose.