15 Homemade Trellis Ideas That Will Transform Your Garden
Have you ever looked at your garden and thought, “This space has so much potential — but it just feels flat”? You’re not alone. The moment I added my first DIY trellis to a bare corner of my backyard, the whole space came alive. Climbing plants shot upward, flowers spilled over wooden frames, and suddenly my garden looked intentional, lush, and full of personality.
The best part? You don’t need to be a carpenter or spend hundreds of dollars at a garden center. With a little creativity and some basic materials, you can build trellises that are genuinely beautiful, structurally solid, and uniquely yours.
Let’s walk through 15 homemade trellis ideas — from super simple beginner builds to more ambitious weekend projects — that will genuinely upgrade your outdoor space.
The Classic Bamboo Teepee Trellis
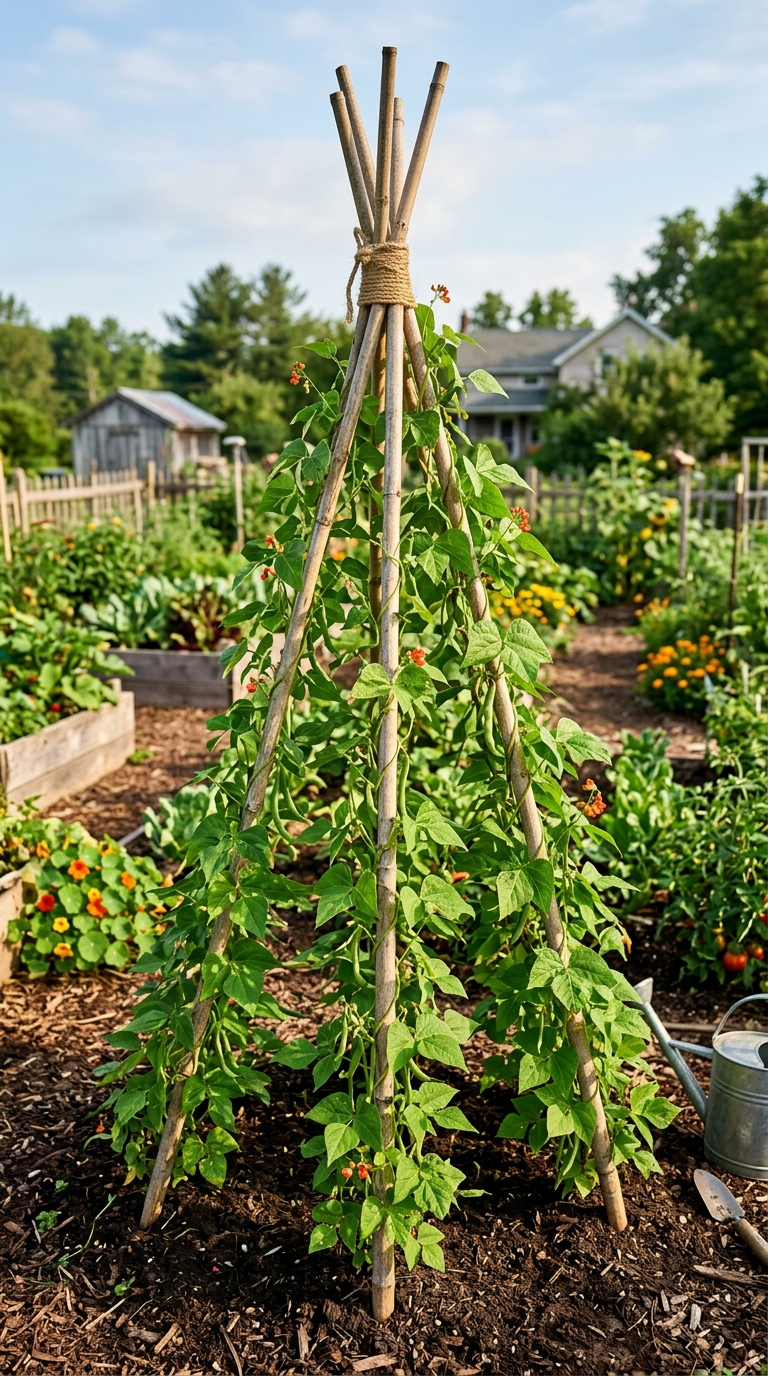
There’s a reason gardeners have been using bamboo teepees for centuries — they work brilliantly, they look charming, and they take about 20 minutes to build.
You take five or six bamboo stakes (about six feet long), push them into the soil in a circle, and tie the tops together with jute twine. That’s it. The result is a cone-shaped structure that beans, peas, cucumbers, and even morning glories absolutely love to climb.
What makes this design stand out is how well it works in raised beds and containers too. Push three smaller stakes into a large pot, tie them at the top, and you’ve got a patio-perfect teepee for cherry tomatoes or sweet peas. I’ve made these for under $5 using bamboo stakes from the dollar store and natural twine from a craft shop.
Pro tip: Tie horizontal rings of twine around the teepee at intervals of about 12 inches. This gives climbing plants multiple anchor points and keeps everything much more stable in wind.
The Reclaimed Wood Ladder Trellis
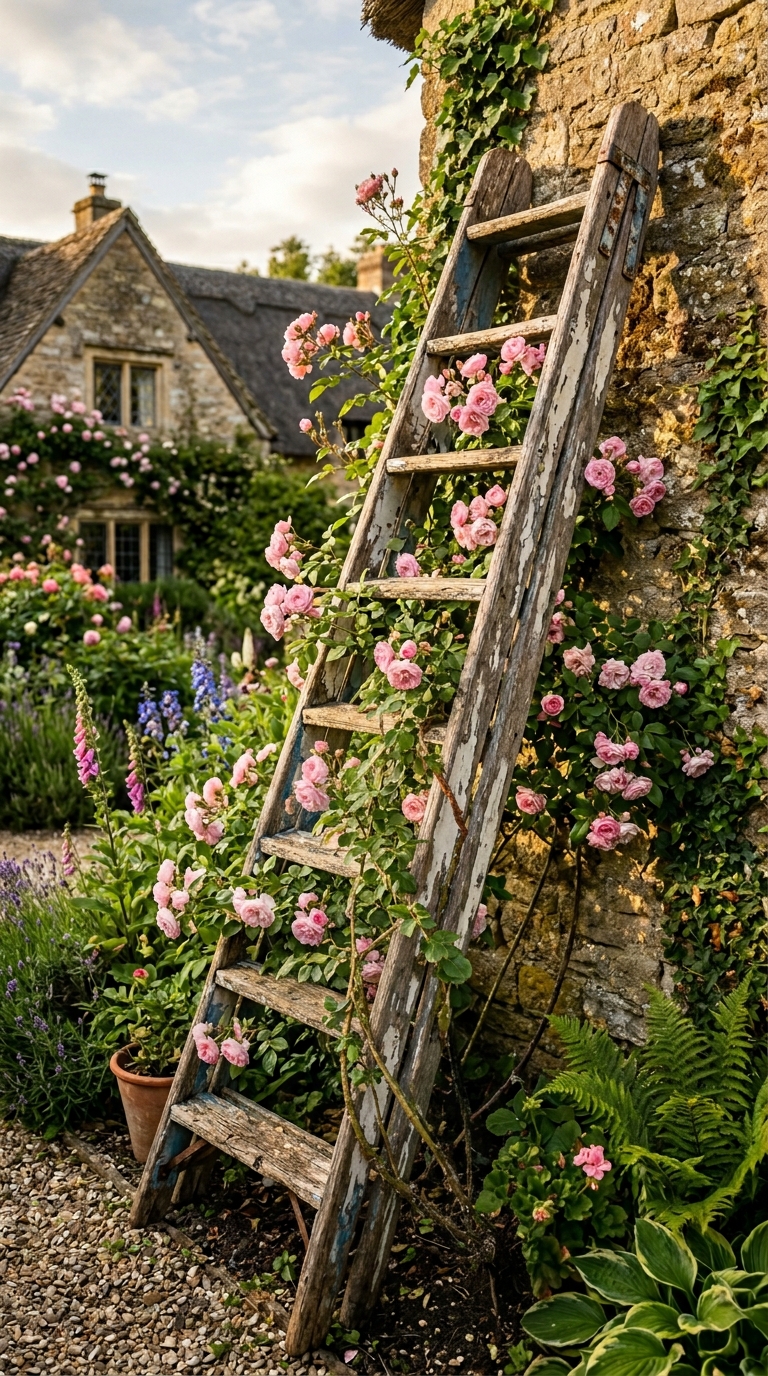
Old wooden ladders have a second life waiting for them — and it’s in your garden.
If you’ve got an old step ladder sitting in your garage, lean it against a fence or a wall at a slight angle, and you’ve instantly created a stunning trellis that looks like it came from a high-end garden boutique. The rungs act as natural climbing rails, and the whole thing has that lived-in, vintage charm that newer materials just can’t replicate.
You can also build one from scratch using reclaimed fence planks or pallet wood. Cut two long side rails and screw horizontal rungs across them every 8 to 10 inches. Sand the edges lightly, leave the wood natural for a weathered look, or apply a quick coat of outdoor wood stain in a warm walnut or grey driftwood tone.
Lean it against your house, your shed, or a fence post. A climbing rose or a jasmine vine trained up this thing will make your entire garden smell like a dream.
Pro tip: Anchor the bottom of the ladder into the soil using two metal garden stakes pushed through the base rungs. This stops it from sliding outward during heavy rain or wind.
The PVC Pipe Arch Trellis
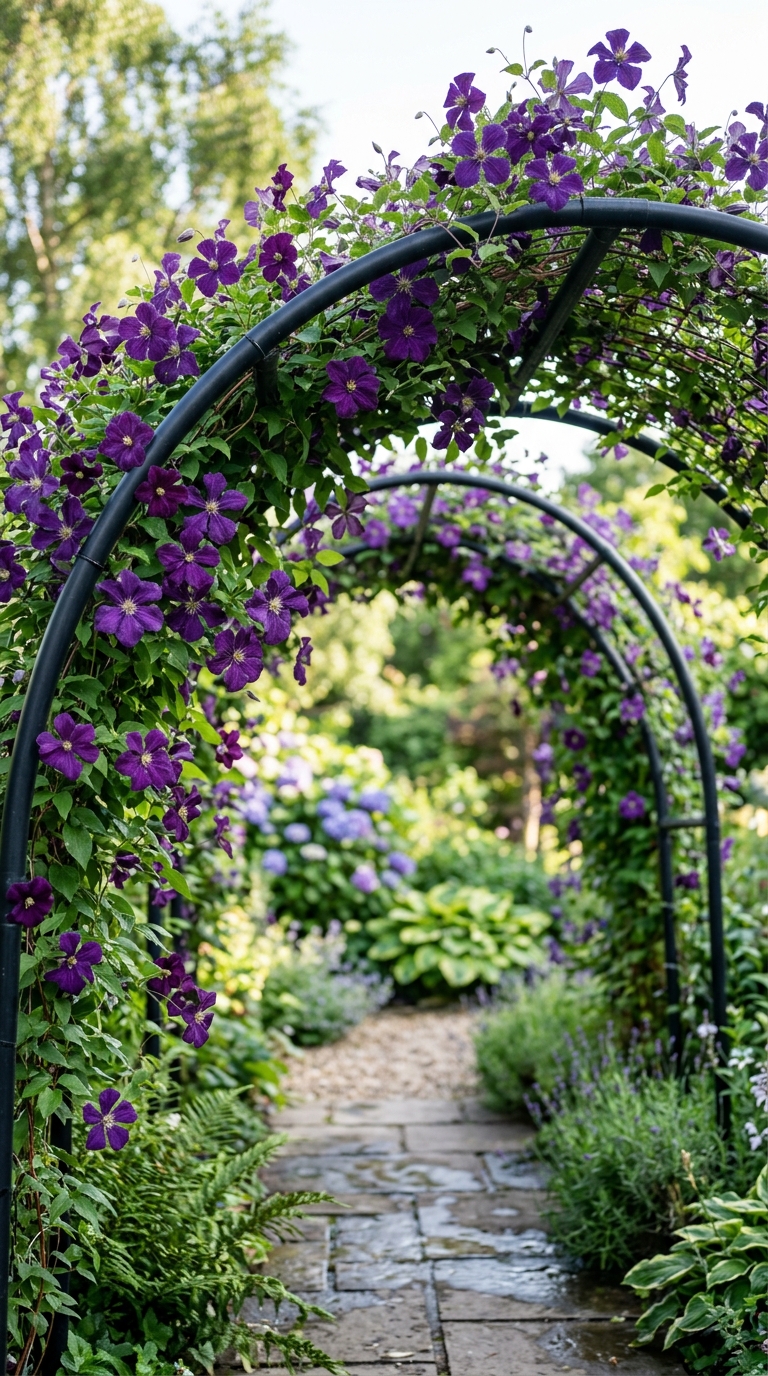
If you want a dramatic, professional-looking garden arch without the price tag of a wrought iron one, PVC pipe is your best friend.
Here’s how it works: you push two lengths of flexible PVC conduit into the ground on either side of a garden path, then bend them toward each other and connect them at the top with a connector fitting or a short horizontal piece. The result is a graceful arch that costs under $15 to build and lasts for years.
For extra stability and climbing surface, wrap jute twine, zip ties, or wire mesh between the two sides. You can train climbing plants — wisteria, clematis, sweet peas — to weave through the twine as they grow, and by midsummer you’ll have a tunnel of foliage and flowers that looks absolutely spectacular.
Paint the PVC with a quick coat of matte black or forest green spray paint to disguise the utilitarian look and make the whole structure blend naturally with your garden.
The Wire Mesh Panel Trellis
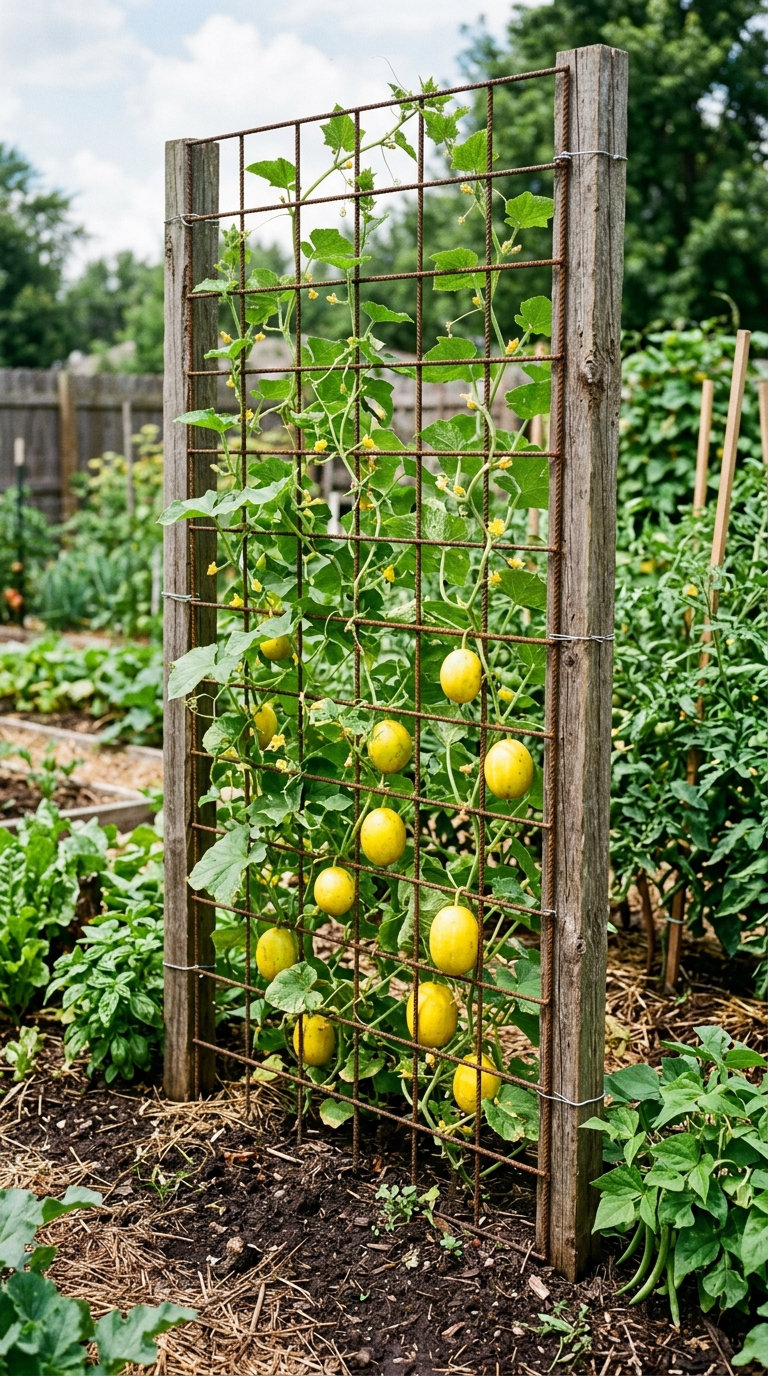
Sometimes the most useful trellis is also the most straightforward. A simple panel of concrete reinforcing mesh (also called remesh or rebar mesh) mounted between two wooden posts gives you an instant, incredibly sturdy trellis with a grid of perfect climbing holes.
You can buy a 4×8 foot sheet of this mesh from any hardware store for around $10. Sink two wooden fence posts into the ground about four feet apart, attach the mesh panel to the posts using wire ties or zip ties, and you’re done. The square grid pattern gives climbing plants like cucumbers, squash, and climbing roses dozens of anchor points.
The beauty here is scalability. Need a longer trellis? Use more posts and more panels. Need a curved wall? Bend the flexible mesh slightly before attaching. I’ve used this exact setup in a kitchen garden where I grew four varieties of cucumber side by side — the yield was phenomenal because every plant had maximum sunlight and airflow.
The Rope and Post Trellis
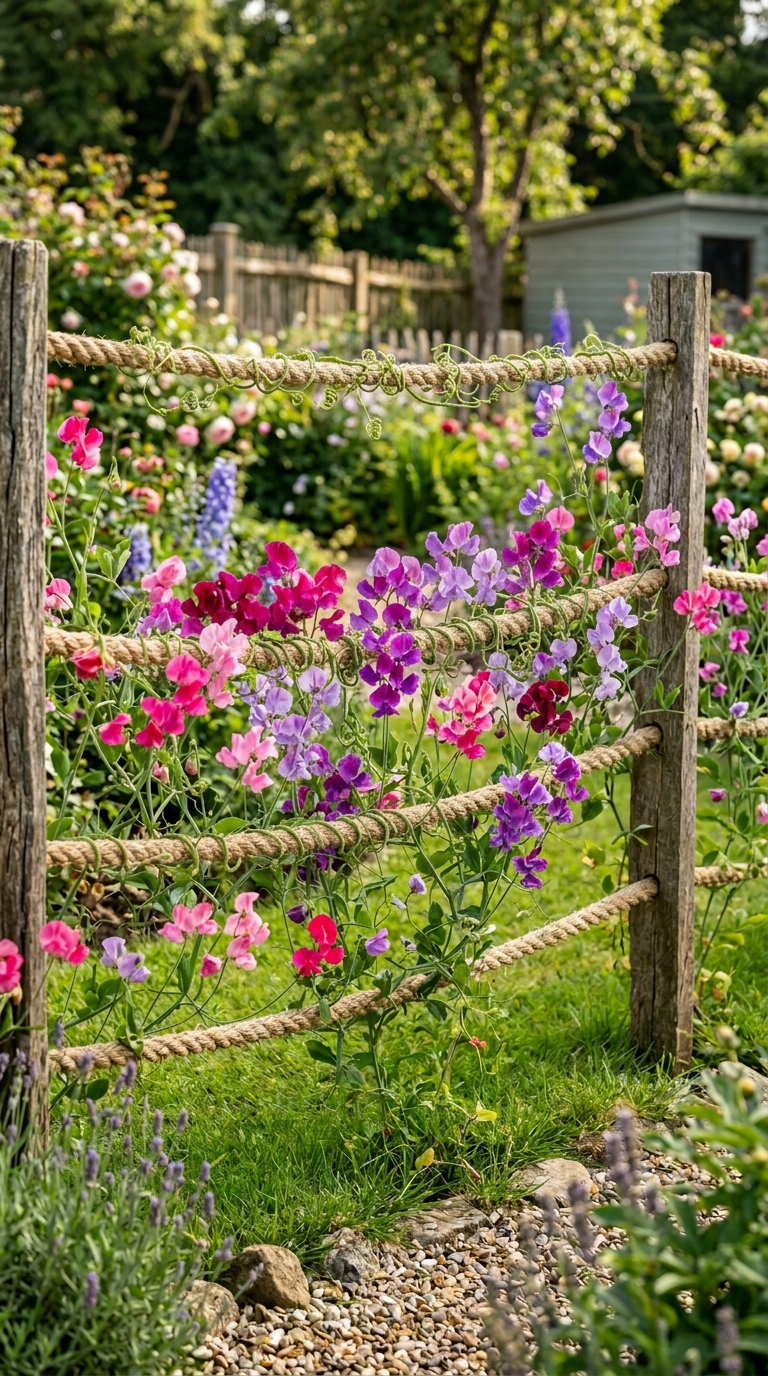
This one brings a coastal, nautical feel to any garden space — and it’s incredibly easy to build.
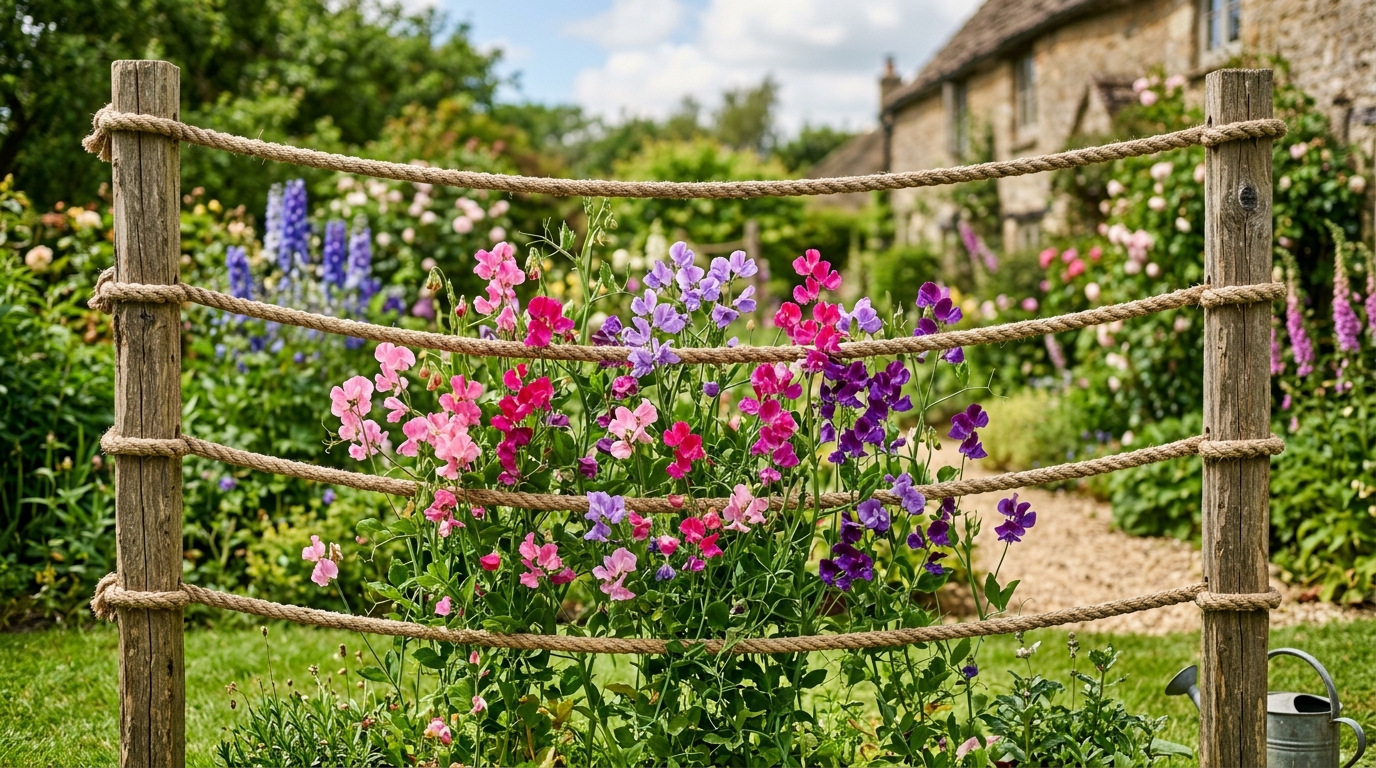
Drive wooden posts into the ground at regular intervals, then run multiple horizontal lengths of thick natural rope (sisal or hemp works beautifully) between them at different heights, knotting the rope firmly around each post. You end up with a series of horizontal lines that climbing plants can weave through.
For an even more interesting effect, run diagonal ropes as well, creating a diamond or zigzag pattern between the posts. This not only looks stunning but gives plants even more surface area to grip and climb. Sweet peas, black-eyed Susan vines, and climbing nasturtiums all perform beautifully on this kind of support.
Natural rope biodegrades over time, which is actually a gardening win — you just replace it every couple of seasons, and the posts remain permanent. The whole setup costs almost nothing if you’ve already got the posts.
The Pallet Wood Grid Trellis
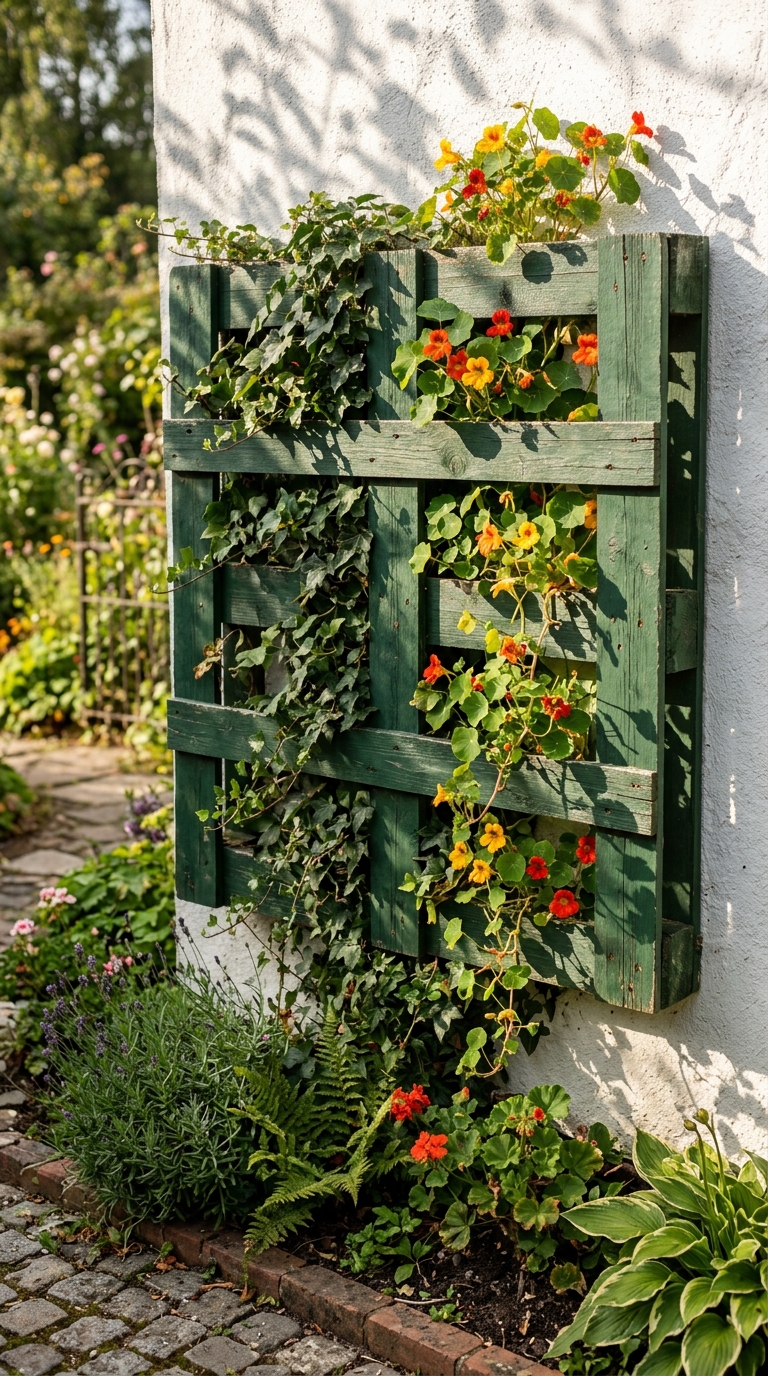
Free pallets are hiding a surprisingly versatile trellis waiting to be discovered.
Take a standard wooden pallet (the kind you can often pick up for free from garden centers, hardware stores, or furniture shops), stand it upright, and mount it to a wall or fence using heavy-duty screws or brackets. The ready-made grid of slats creates an instant trellis with no cutting or building required.
If you want something a little more polished, disassemble the pallet and use the individual planks to build a custom grid trellis. Lay out an overlapping pattern of horizontal and vertical slats, screw them together at each intersection point, and mount the whole panel onto your fence or the side of a shed. You can space the slats as close together or as far apart as you like depending on what you plan to grow.
Paint it in a deep hunter green, charcoal, or cobalt blue for a striking visual contrast against light-colored walls or foliage.
The Fan Trellis Against a Wall
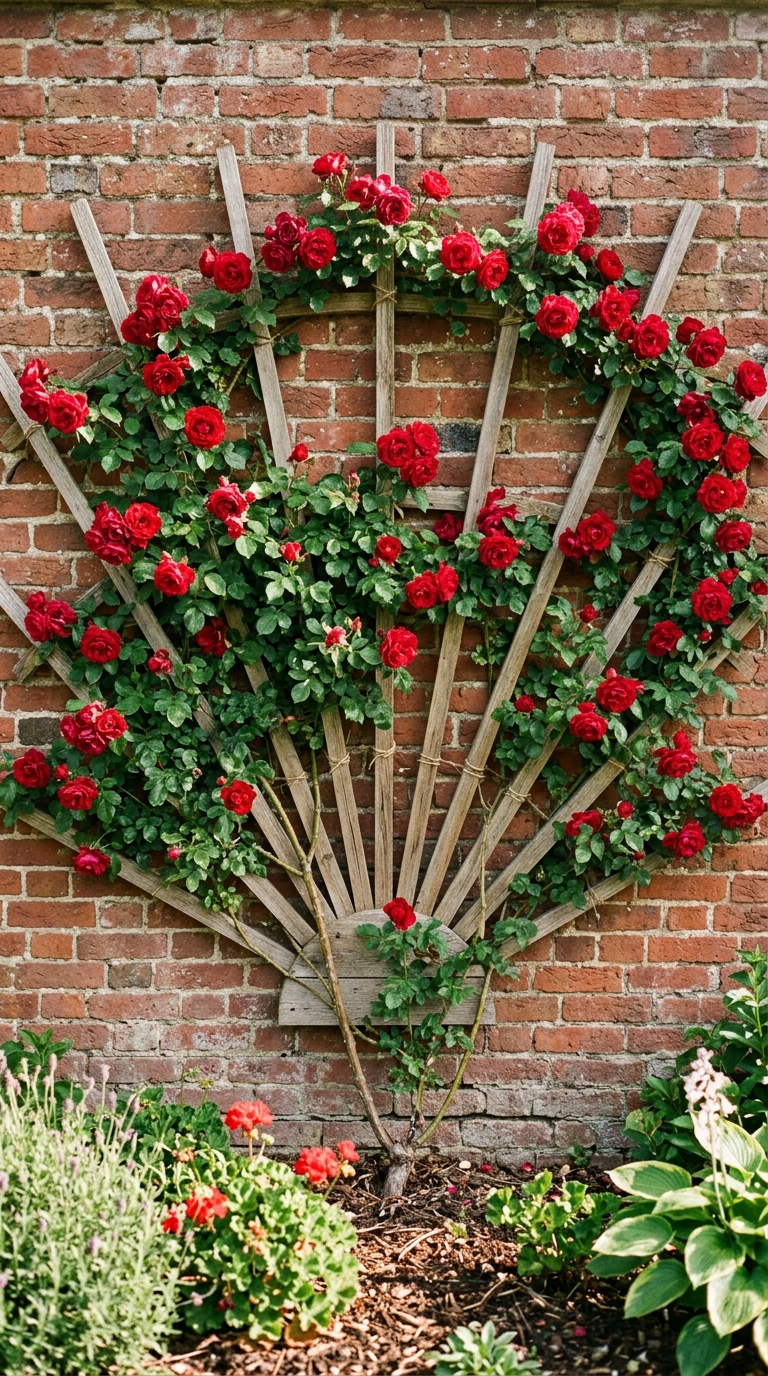
Fan trellises — where all the support arms radiate outward from a central base point like the spokes of a fan — are one of the most elegant trellis designs you can build at home.
Start by cutting a series of thin wooden laths (about 1 inch by 1.5 inches) in graduated lengths — the center ones tallest, the outer ones progressively shorter. Screw all of them into a single horizontal base board at the bottom, spreading them out in a fan shape. Run horizontal crosspieces at two or three heights to connect all the arms and add stability.
Mount this directly onto a wall, fence, or shed exterior, and plant a climbing rose, wisteria, or fig tree at its base. The fan shape naturally guides the plant to spread outward as it climbs, creating the classic espalier silhouette that looks extraordinary against a brick or stone wall.
This project takes a Saturday morning and costs around $20 in materials. The visual payoff is genuinely stunning.
The Willow Weave Trellis
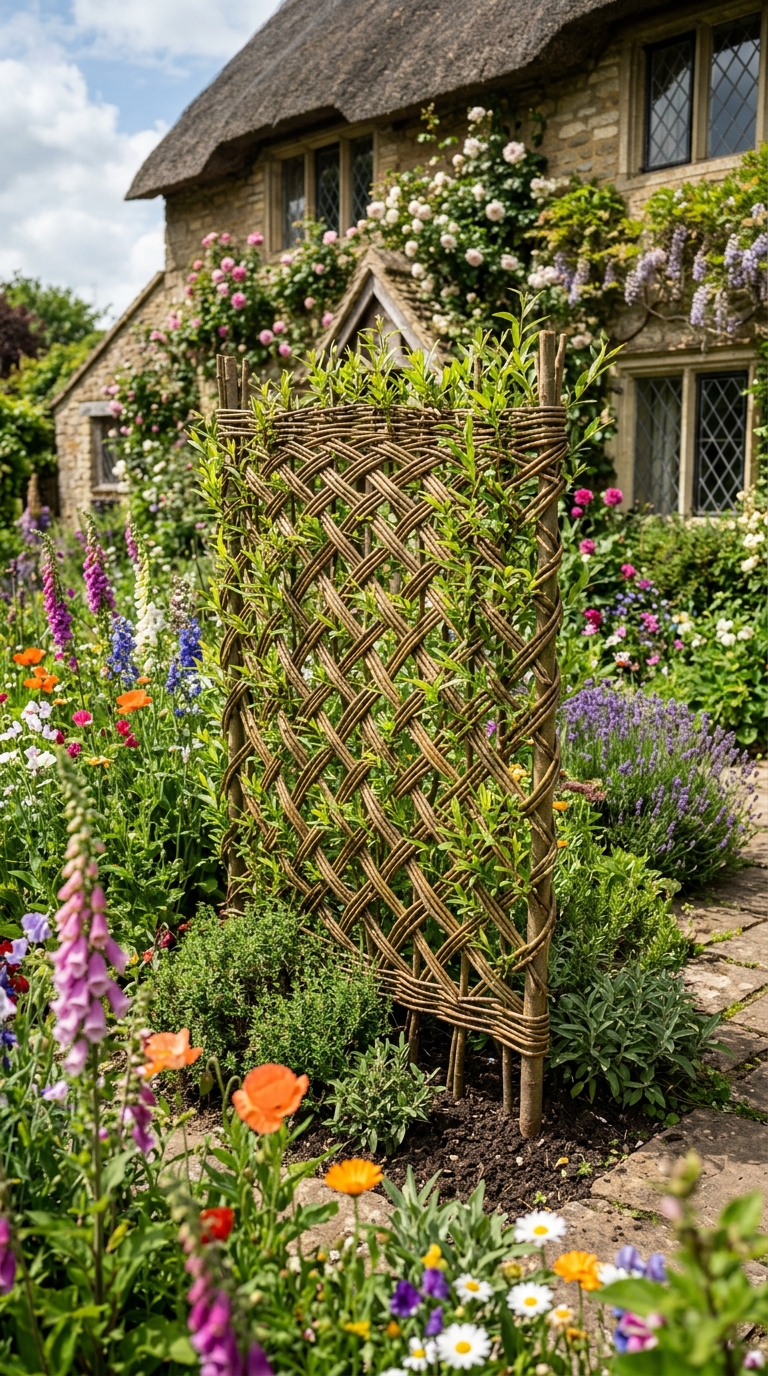
If you want something that feels truly hand-crafted and deeply rooted in garden tradition, willow weave trellises are the answer.
Cut fresh willow whips (or hazel rods, which work equally well) while they’re still flexible and green. Push the thicker end of several rods firmly into the soil as your vertical uprights, spaced about 6 to 8 inches apart. Then weave thinner, more flexible rods horizontally through the uprights in an over-under pattern, working your way upward row by row until the panel reaches your desired height.
The result looks extraordinary — like something from a fairy-tale kitchen garden. It’s completely biodegradable, costs nothing if you have access to willow or hazel, and it actually roots itself over time, turning your trellis into a living, growing structure.
This works beautifully as a windbreak, a garden room divider, or a decorative focal point. Train climbing plants through it for a layered, natural look.
The Painted Geometric Trellis
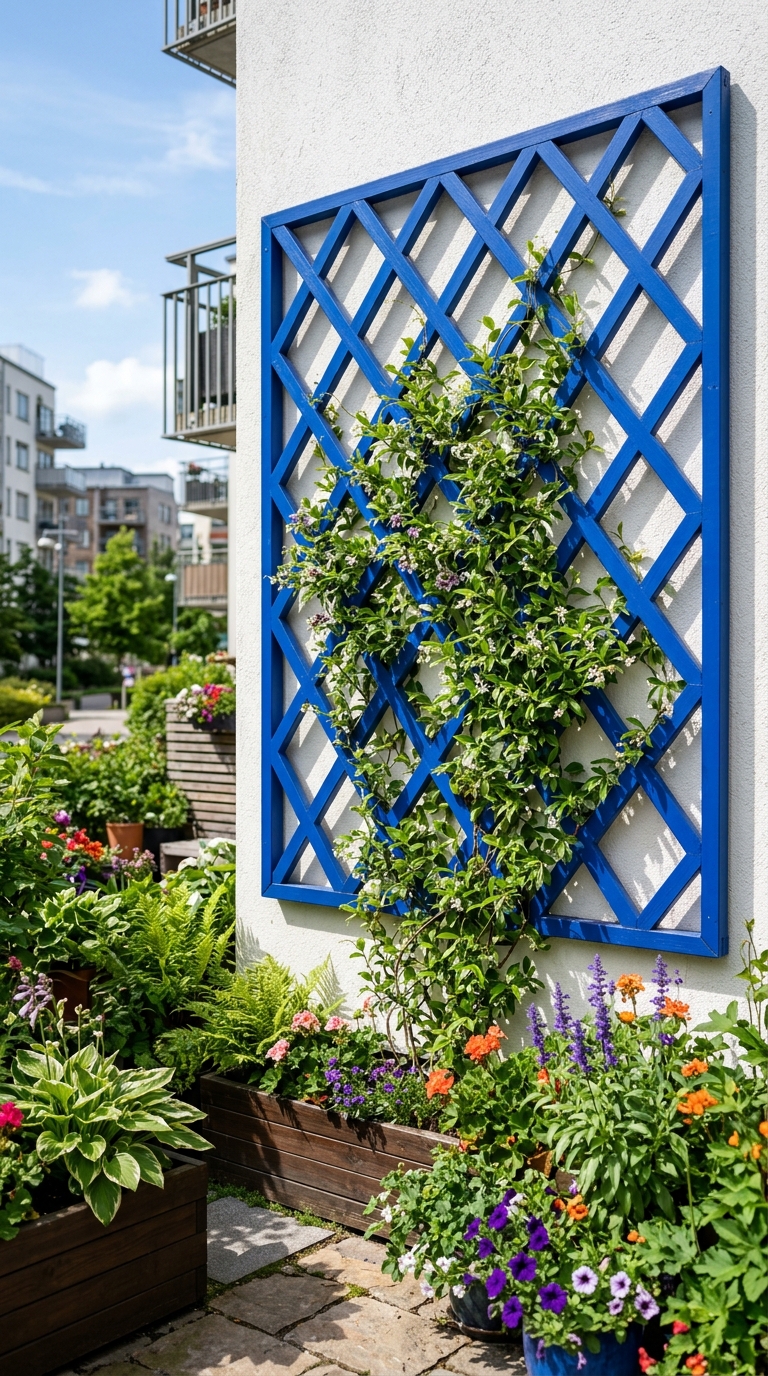
Who says a trellis has to be a plain grid? This idea takes the basic lattice concept and turns it into actual garden art.
Build a standard wooden panel trellis using thin wooden dowels or laths screwed together in a diamond or hexagonal pattern instead of the usual square grid. Then paint the whole thing in a bold, unexpected color — deep terracotta, bright cobalt blue, or dusty sage green — that contrasts dramatically with your wall color and your plant foliage.
When plants start climbing, their green leaves and colorful flowers weave through the geometric shapes, creating a dynamic interplay between the structure and the living plants. Even in winter, when the plants have died back, the geometric panel looks deliberate and artistic against a wall.
This is a particularly great idea for a small urban garden or a balcony where you want maximum visual impact from a minimal footprint.
The Cattle Panel Tunnel Trellis
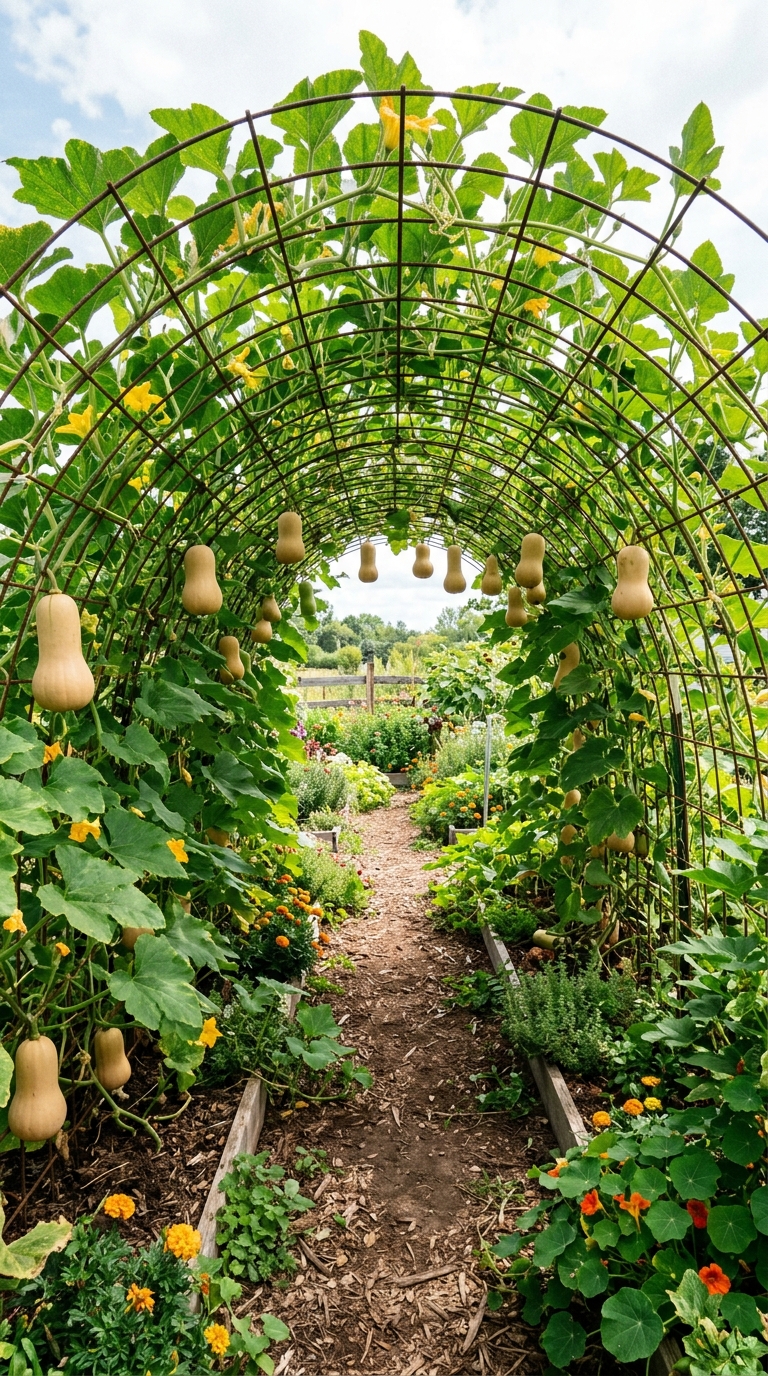
If you want to grow squash, melons, or cucumbers vertically and harvest them with zero back strain, the cattle panel tunnel is one of the most practical builds in this entire list.
A cattle panel is a rigid welded wire panel (typically about 16 feet long) used for livestock fencing. When you bend it into a half-circle arch and anchor both ends into the ground, you get a perfectly proportioned tunnel trellis that’s strong enough to support extremely heavy crops like butternut squash and watermelon.
Two people can install one in about 30 minutes. Push metal stakes or rebar into the ground on both sides of your garden bed, bend the panel over into an arch, and secure it to the stakes. Plant your crops on both sides and they’ll climb up and over, with the fruit hanging inside the tunnel where it’s shaded and ventilated.
This is a long-term investment — a cattle panel lasts decades — and it will pay for itself in harvests within one season.
The Branch and Twig Natural Trellis
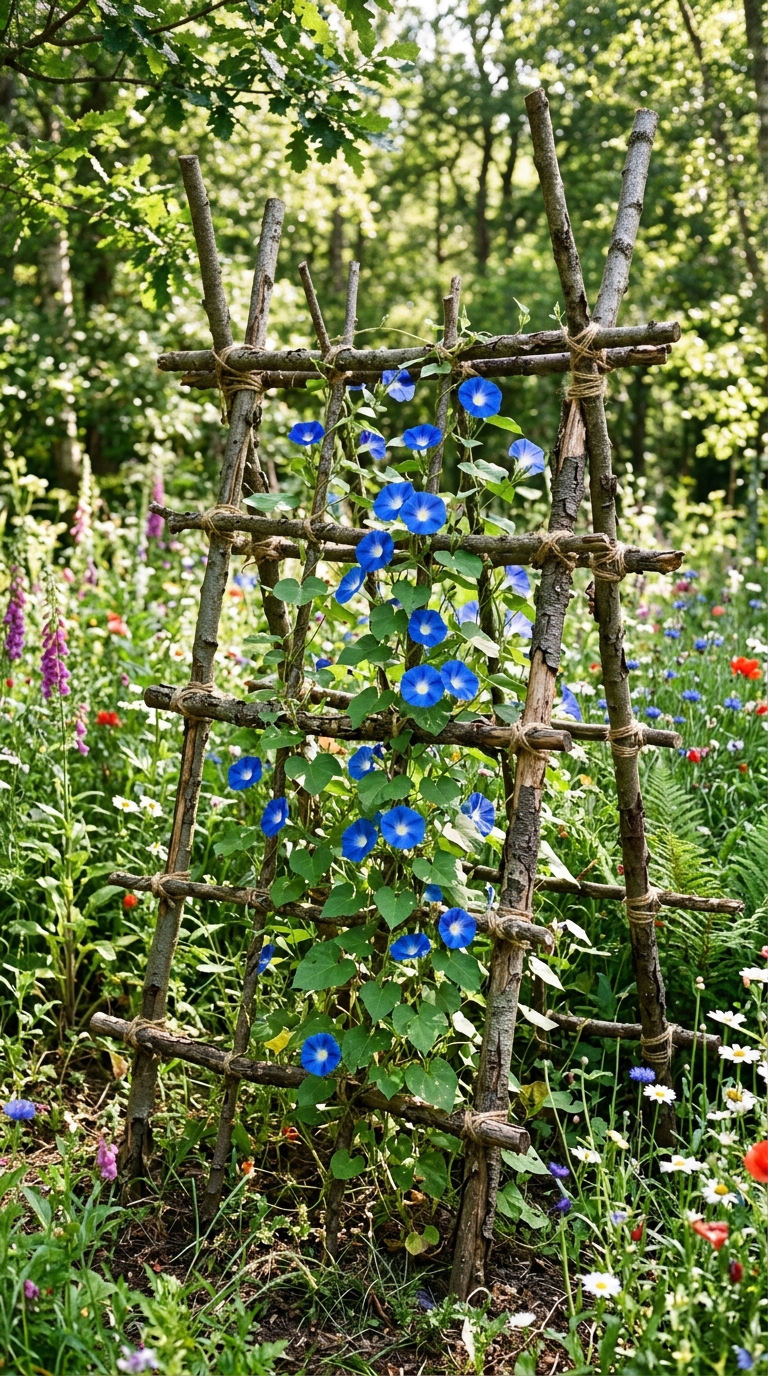
Here’s a zero-cost idea that’s also one of the most beautiful — if you have access to a garden, woodland, or even just a tree that needs trimming.
Collect fallen or pruned branches of varying thicknesses. Use two or three stout branches as your main vertical stakes, driving them firmly into the soil. Then weave or tie thinner twigs horizontally and diagonally across the vertical uprights using natural jute twine or even flexible plant stems. The goal isn’t perfect symmetry — it’s an organic, wabi-sabi structure that looks like it grew in place.
This kind of trellis is especially beautiful in a wildflower garden, a woodland-style planting, or a cottage garden where a rustic, natural look is part of the design language. Morning glories, climbing nasturtiums, and sweet peas all love this kind of structure.
Every one of these is completely unique because it’s made from whatever your garden provides. No two will ever look the same.
The String and Nail Wall Trellis
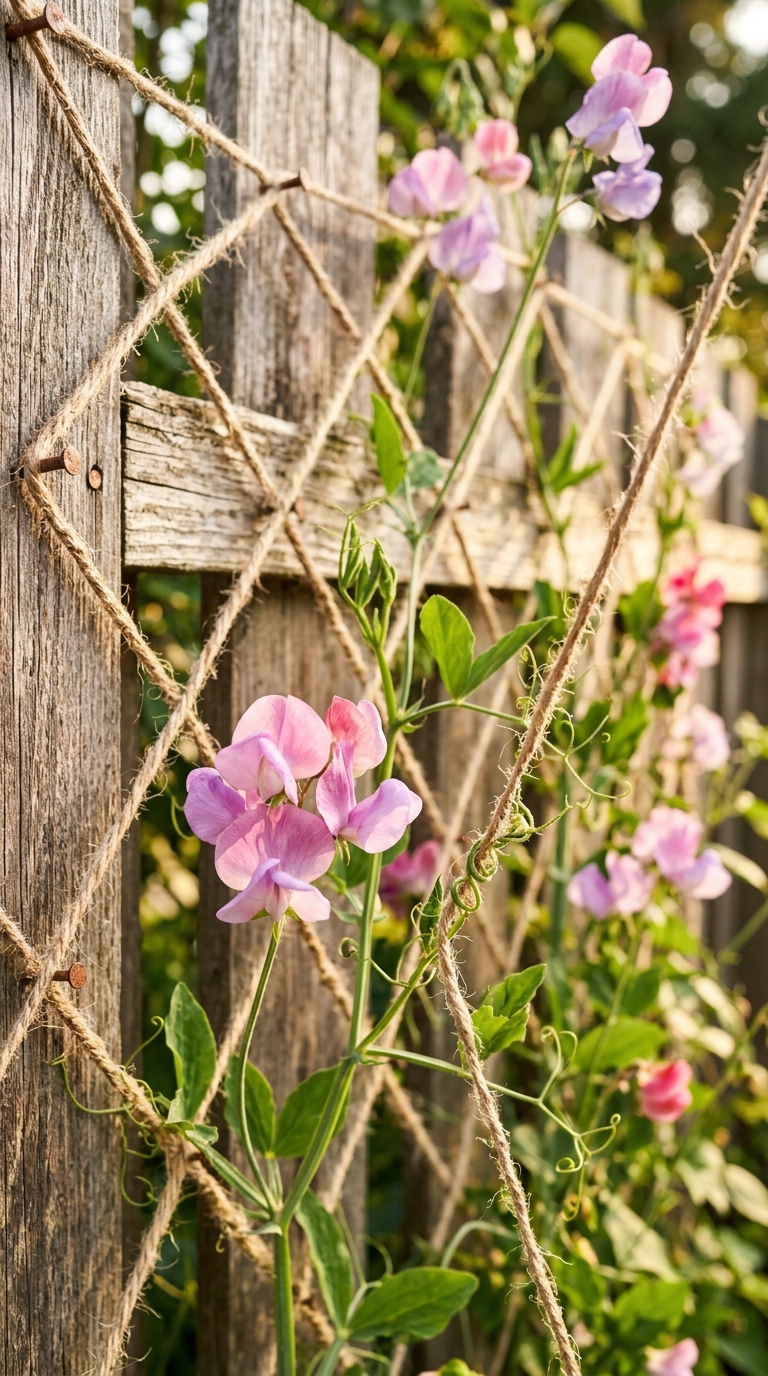
This idea is perfect for a blank wall, a fence panel, or the side of a shed where you want climbing plants without drilling lots of holes or mounting heavy hardware.
Hammer small nails or cup hooks into the surface of your wall or fence in any pattern you choose — a grid, a zigzag, a starburst, or even a simple V-shape. Then connect them all with lengths of cotton string, garden twine, or even copper wire, running it back and forth between the nails to create your climbing surface.
The result looks surprisingly elegant, especially when the plants start threading through the string pattern. You can create almost any design — letter shapes, geometric patterns, or a simple dense grid — depending on how you place your nails and run the string.
This works especially well for annual climbing plants that you replant each year. When the season ends, you remove the string (or let it decompose if you’ve used natural twine), and start fresh the next spring with a new pattern.
The A-Frame Trellis
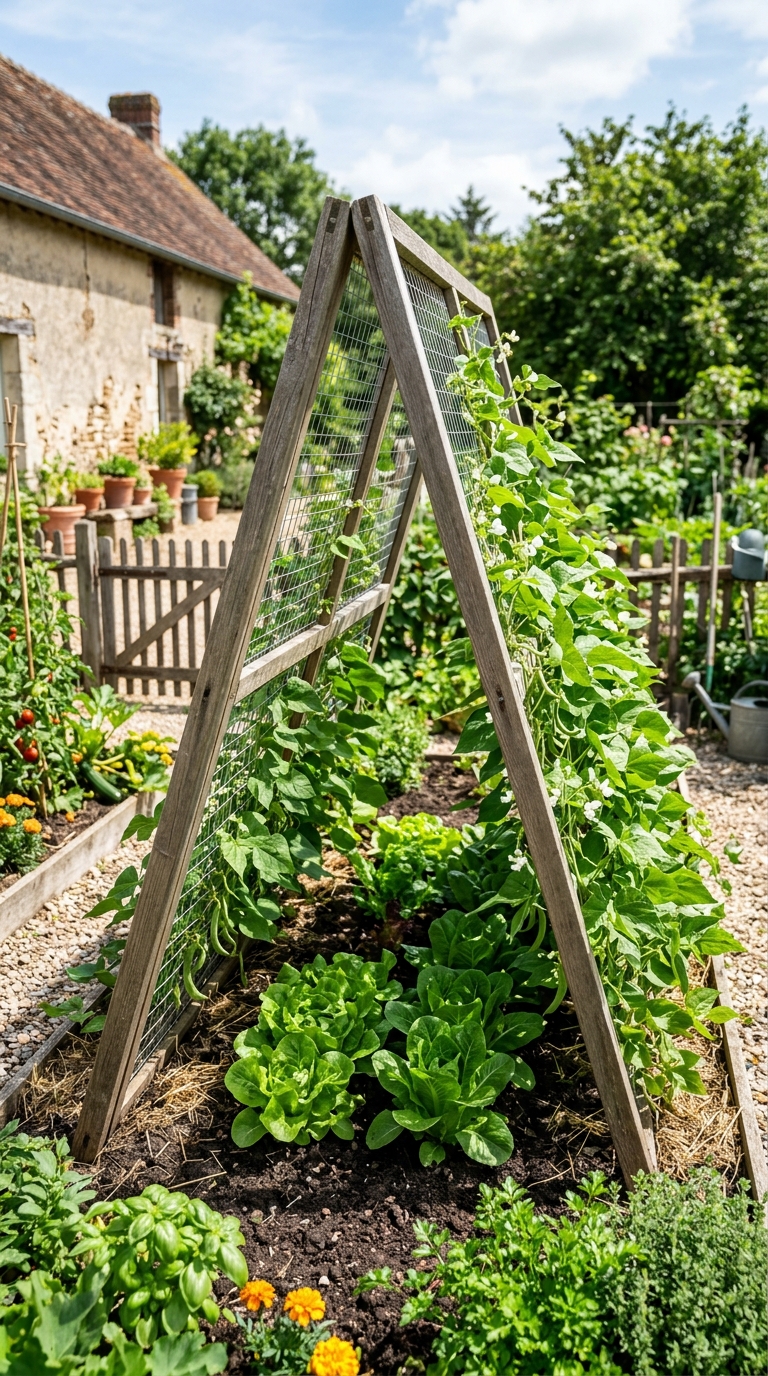
The A-frame trellis is the Swiss Army knife of garden structures — it does multiple jobs beautifully and you can build one in an hour from basic lumber.
Build two identical rectangular frames from 2×2 lumber, each roughly 6 feet tall and 4 feet wide. Screw wire mesh, wooden lath strips, or just run parallel lengths of twine across each frame. Then lean the two frames against each other at the top, hinging them together with a couple of bolts or just tying them firmly at the peak, to form the classic A-shape.
This structure gives you two climbing surfaces instead of one, and you can plant on both sides. Cucumbers on one face, beans on the other. Or train a squash up one side and let it drape back down the other. The A-frame creates its own natural shaded zone underneath, which is ideal for growing heat-sensitive crops like lettuce and spinach during summer.
Fold it flat for storage at the end of the season, and it’ll last for many years with minimal maintenance.
The Copper Pipe Trellis
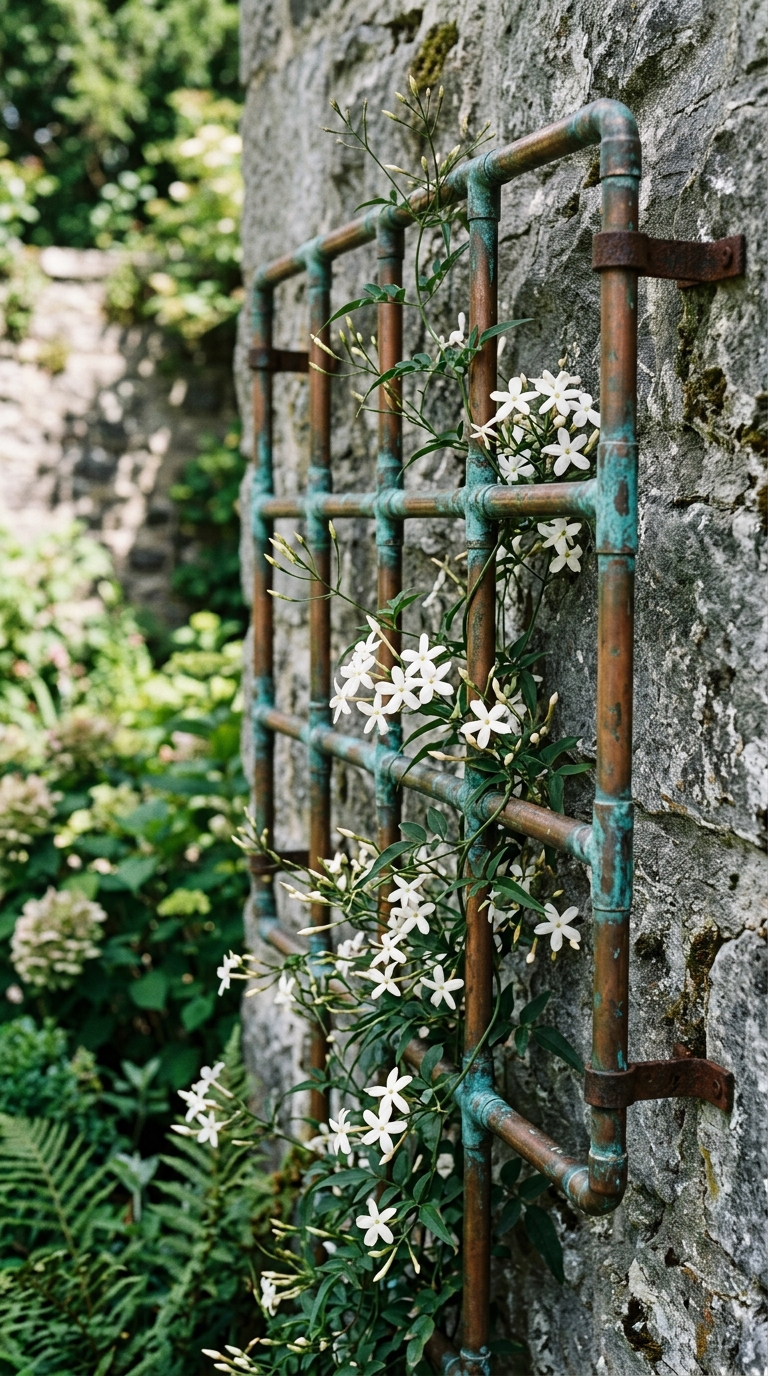
This one is a bit of a splurge compared to the other ideas — but the result is genuinely stunning and it ages more beautifully than anything else on this list.
Copper plumbing pipe (the kind used for household water supply) can be cut to length, connected with standard copper fittings, and soldered or simply press-fitted together into elegant trellis shapes. A square grid, a ladder design, or even a simple tall rectangular frame — all look expensive and artisan in copper.
Over time, copper develops a gorgeous green-blue patina (called verdigris) that looks absolutely extraordinary against stone walls, dark wood fences, or white rendered walls. The whole trellis effectively becomes more beautiful with age, something that no plastic or painted metal version can claim.
Use copper in a container garden for a particularly luxurious look, or mount a copper panel on the wall of a covered porch or outdoor dining area as a design statement with climbing plants.
The Espalier Frame Trellis
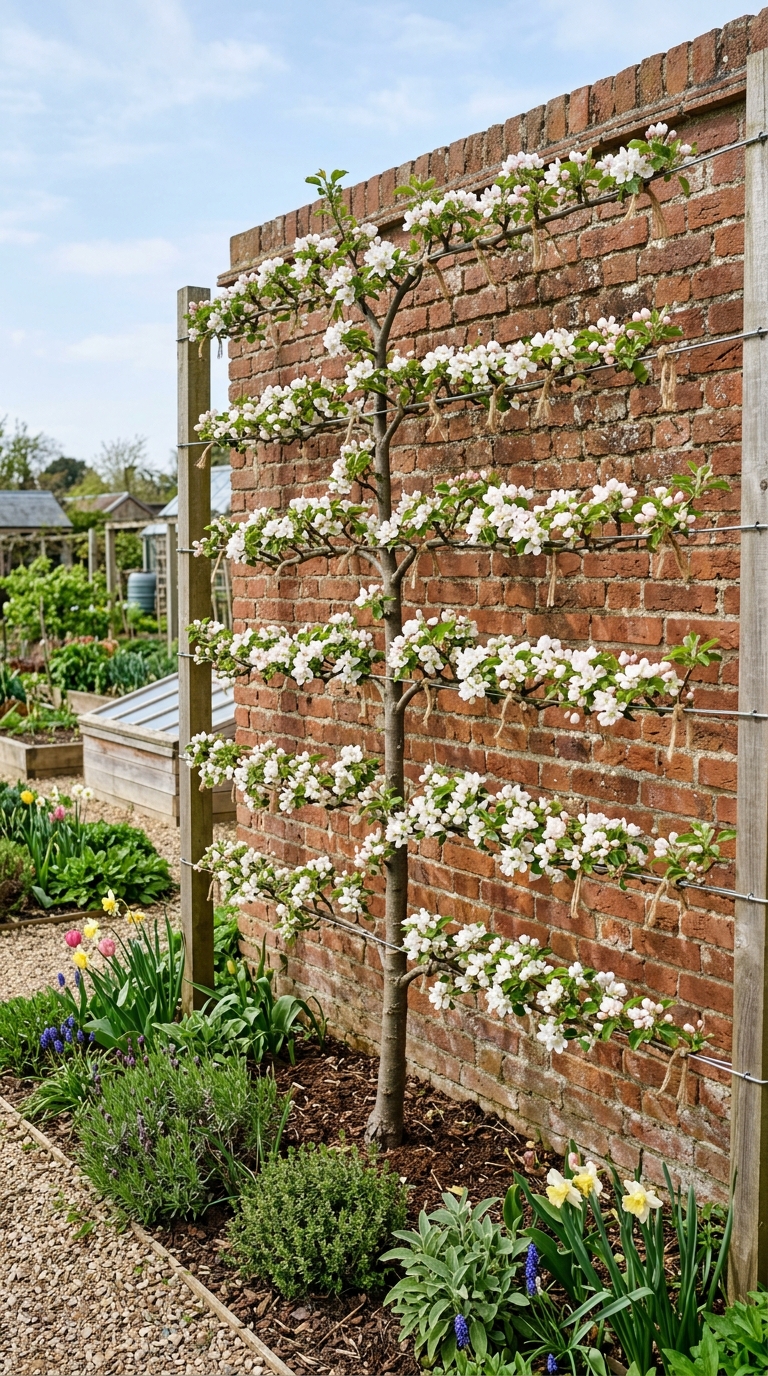
Espalier — the ancient practice of training a tree to grow flat against a surface in a deliberate pattern — sounds intimidating, but the frame you need to support it is actually one of the simplest trellis builds on this list.
Drive three or four wooden posts into the soil in a straight line against a wall or fence, evenly spaced. Then run horizontal wires between the posts at heights of about 18 inches, 36 inches, and 54 inches from the ground. That’s your espalier trellis frame. Now plant a fruit tree — an apple, pear, fig, or peach work brilliantly — and begin training its branches horizontally along those wires as it grows.
The visual effect over time is extraordinary: a flat, art-like tree spreading its arms across your wall, flowering in spring and bearing fruit in summer and autumn. It’s one of the most productive uses of a small garden wall you’ll ever find, and it turns a blank fence into a living artwork.
This is a long-game project — it takes three to five years to train a properly shaped espalier — but every single year the garden looks more impressive.
Choosing the Right Trellis for Your Space
Now that you’ve seen all 15 ideas, the real question is which one suits your specific garden situation. Here’s how to think through it:
If you’re a complete beginner working with a tight budget, start with the bamboo teepee or the branch and twig trellis. Both require no tools, no special skills, and barely any money.
If you have climbing roses, wisteria, or other heavy, long-lived perennials, invest in something more permanent — the wire mesh panel, the cattle panel arch, or the espalier frame will all handle decades of growth without buckling.
If you’re working with a small urban balcony or courtyard, the string and nail wall trellis or the painted geometric trellis will give you maximum visual impact from minimal materials without overwhelming a compact space.
For serious food gardeners focused on yield and practicality, the A-frame trellis and the cattle panel tunnel are the two most productive structures you can build — both dramatically increase growing space, improve airflow, and make harvesting genuinely easy.
Materials You’ll Use Again and Again
Across all 15 of these ideas, a few materials keep showing up because they genuinely work:
Natural jute twine is flexible, biodegradable, and plants can actually grip it better than synthetic string. Keep a large roll in your garden shed at all times.
Bamboo stakes in various lengths are incredibly versatile — you’ll find uses for them in almost every trellis project here.
Pressure-treated 2×2 or 2×4 lumber is the backbone of most permanent trellis builds. It resists rot, it’s inexpensive, and it’s easy to work with even for beginners.
Wire mesh (whether welded remesh, chicken wire, or hardware cloth) provides the most planting surface area per dollar of any climbing support material.
One Final Thought
The most important thing about any garden trellis is that you actually build it. Don’t overthink the design or wait for the perfect weekend. A simple bamboo teepee or a leaning wooden ladder will transform your garden more than any amount of planning.
Start with whatever materials you have on hand. Your plants will tell you what they need as they grow, and you’ll refine your trellis-building skills with every season. The gardens that feel most alive and most personal are always the ones built by the person who actually tends them — with imperfect, handmade structures that carry the marks of real hands and real seasons.
Get out there and build something.