16 Mosaic Stepping Stones Ideas to Transform Your Garden Path
My neighbor knocked on my door one Saturday morning holding a cracked concrete stepping stone she had just pulled from her backyard path. She wanted to rip the whole path out. I told her to wait. An hour later, we were at the craft store buying glass tiles, ceramic shards, and a bag of unsanded grout. By Sunday evening, she had the most beautiful garden path on the block, and honestly, it changed the way I think about outdoor spaces entirely.
Mosaic stepping stones are one of those deeply satisfying projects where the process feels just as good as the finished result. I have made them for my front walkway, my backyard herb garden, my daughter’s fairy garden corner, and even as gifts for friends moving into new homes. Every single one turned out differently, and that is exactly the point. This article walks you through sixteen genuinely inspiring ideas that cover every skill level, every garden style, and every budget — with honest details from my own hands-on experience.
Broken Vintage China Mosaic
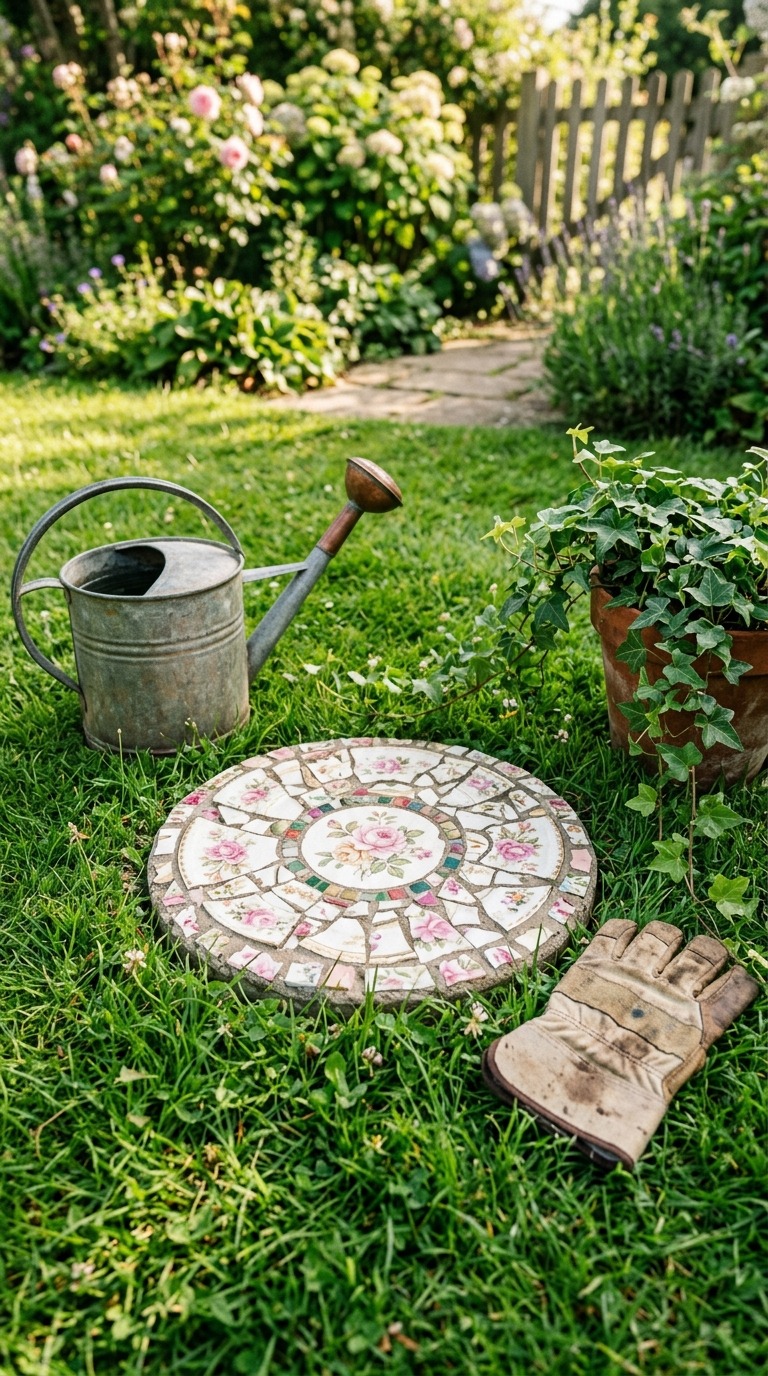
There is something genuinely romantic about pressing your grandmother’s old china pattern into wet concrete and watching it become something new and permanent. Broken vintage china mosaic stepping stones carry history right into the garden with them. The soft florals and aged cream glazes of old dishware catch afternoon light in the most beautiful way — not aggressively sparkly like glass tiles, but warmly luminous, almost like watercolor. When I set mine along my front path, visitors always stop and crouch down to look closer. The broken edges, the faded patterns, the tiny chips — they all add to the character rather than taking away from it.
To make this style work beautifully, source your china from thrift stores, estate sales, or that cabinet of mismatched pieces gathering dust in your own kitchen. Wrap pieces in a thick towel and tap firmly with a rubber mallet to create organic shapes rather than sharp jagged points. Press the pieces face-down into your concrete form and let them sink slightly so the surface stays relatively smooth and safe to walk on. I personally seal mine with an outdoor tile sealer every spring, and after three seasons they still look absolutely stunning. The china holds up better than you would expect through rain and frost.
Stained Glass Sunburst Design
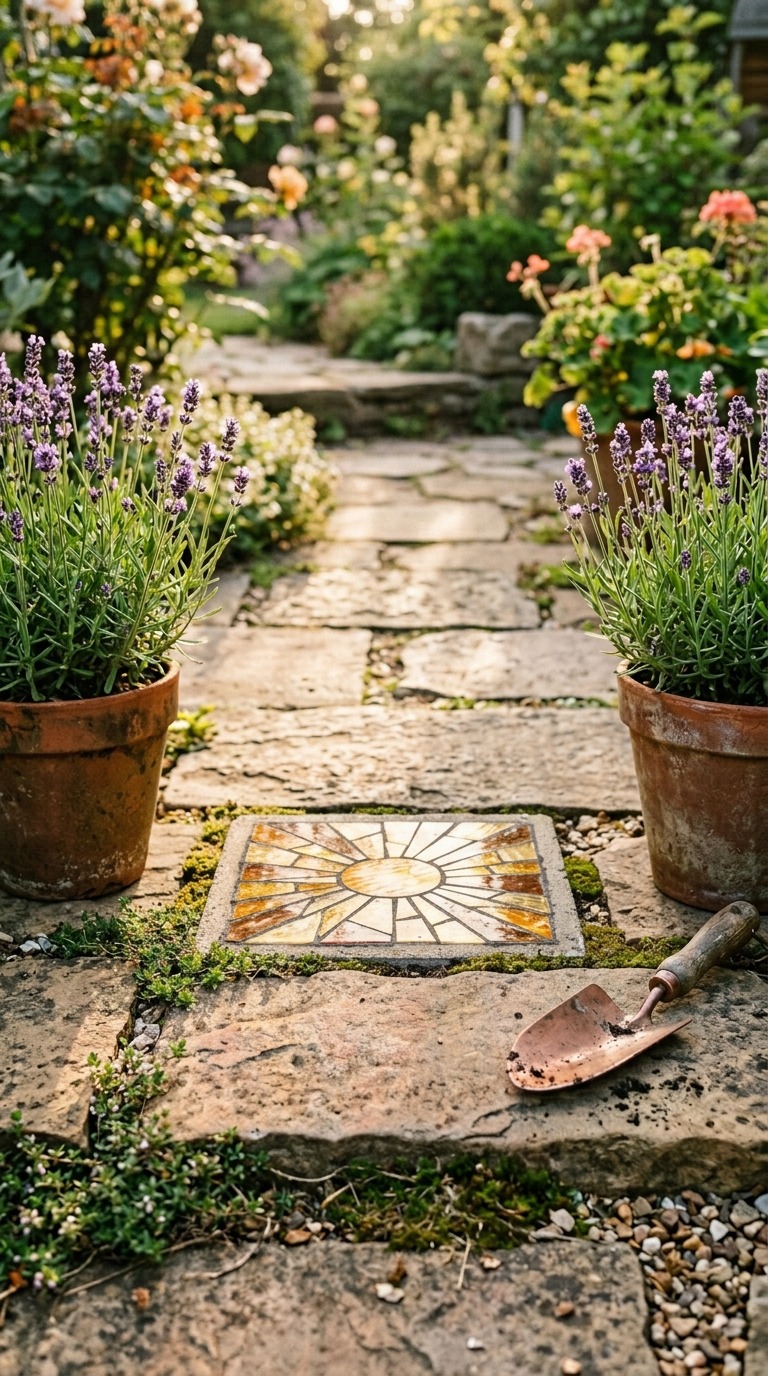
Stained glass catches light in a way that genuinely stops you mid-step and makes you look down with pure delight. A sunburst mosaic stepping stone in amber and gold glass tiles radiates warmth even on a gray day, and when actual sunshine hits it, the whole garden seems to glow from the ground up. I placed one of these near my back porch where the afternoon sun sweeps across the yard, and every single day around four in the afternoon it lights up like something magical. Guests always ask if it is expensive custom work, and I love telling them it cost under twenty dollars in materials.
The key to a clean sunburst design is planning your layout on paper first before you ever touch grout. Cut a circular cardboard template the size of your stone form, draw your sunburst lines out from the center, and arrange your cut glass pieces dry before committing. Use a glass cutter and running pliers for clean straight edges, and always wear safety glasses. I use black unsanded grout for maximum contrast against the gold and amber glass — it makes each piece pop dramatically. Seal the finished stone with an outdoor stone sealer rated for freeze-thaw cycles if you live somewhere with cold winters, as stained glass can shift in extreme temperature swings.
River Stone and Pebble Mandala
River stone mandalas feel meditative to make and meditative to look at, and I say that as someone who normally has zero patience for slow crafts. There is something deeply satisfying about sorting pebbles by size and color, then pressing them into a circular pattern that radiates outward from the center like a natural compass rose. The organic colors — slate gray, cream, rust, warm brown — feel completely at home in any garden setting, whether your style leans cottage, modern, or Japanese zen. Mine sits in the gravel section of my backyard and practically looks like it grew there naturally alongside the ornamental grasses.
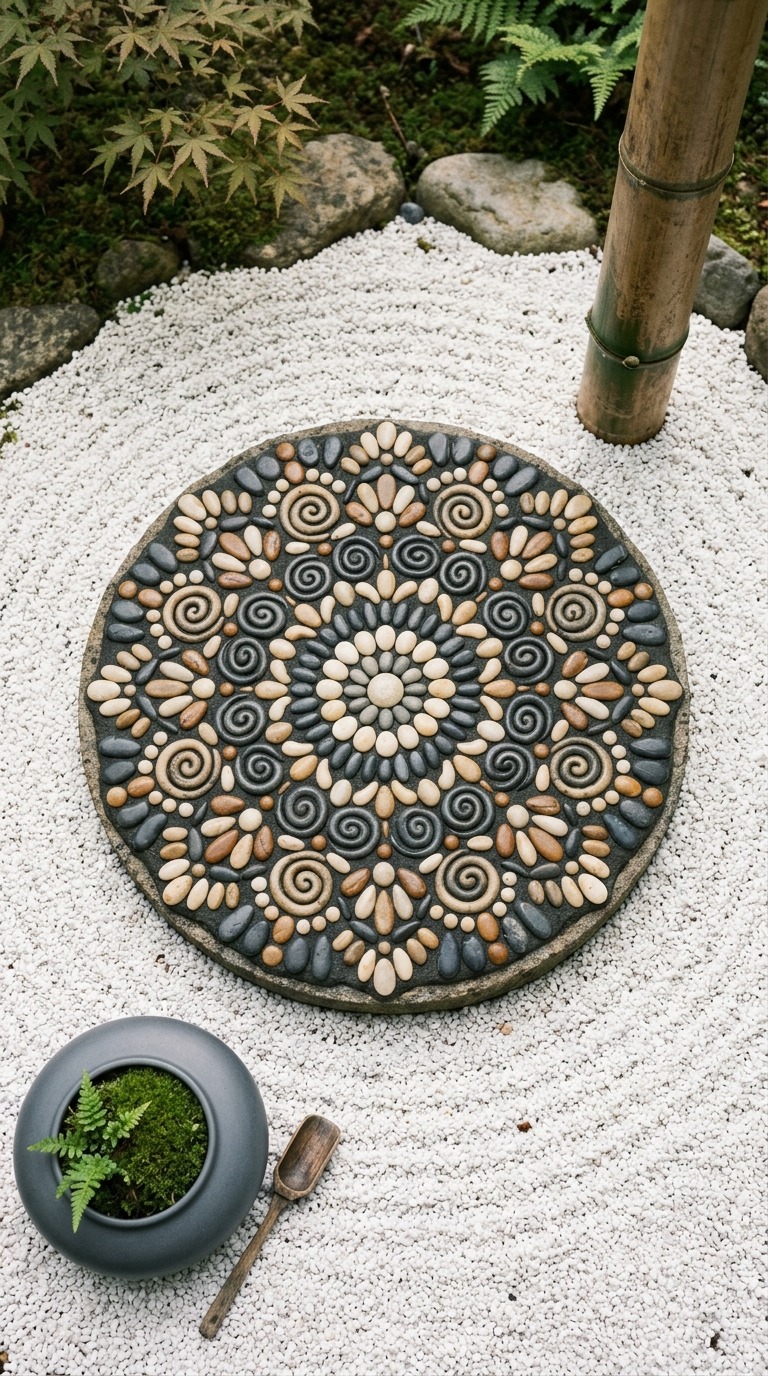
Collect your river stones from a landscape supply store or a natural stone retailer rather than a riverbed, both for convenience and environmental respect. Sort them into groups by size before you start — tiny stones for the center detail, medium for the mid-ring, larger for the outer border. Press each stone vertically into the concrete rather than flat, which anchors them far more securely. Mix your concrete slightly stiffer than the bag instructions suggest so stones stay exactly where you place them without sinking. I grout these with unsanded grout in a warm sandy beige to mimic the look of natural stream sediment, which ties the whole piece together beautifully.
Alphabet and Name Stones for Children
Making a personalized name stone with your child is genuinely one of the most heartwarming craft afternoons you can plan. My daughter and I made one for her garden patch the summer she turned six, pressing mosaic alphabet tiles into concrete to spell her name surrounded by tiny flower-shaped glass gems. Four years later, that stone still marks her little growing corner of the yard, and she is still fiercely proud of it. There is something about seeing your own name permanently embedded in the garden — it creates a sense of ownership and belonging that no store-bought garden decoration ever could. Kids absolutely beam over these.
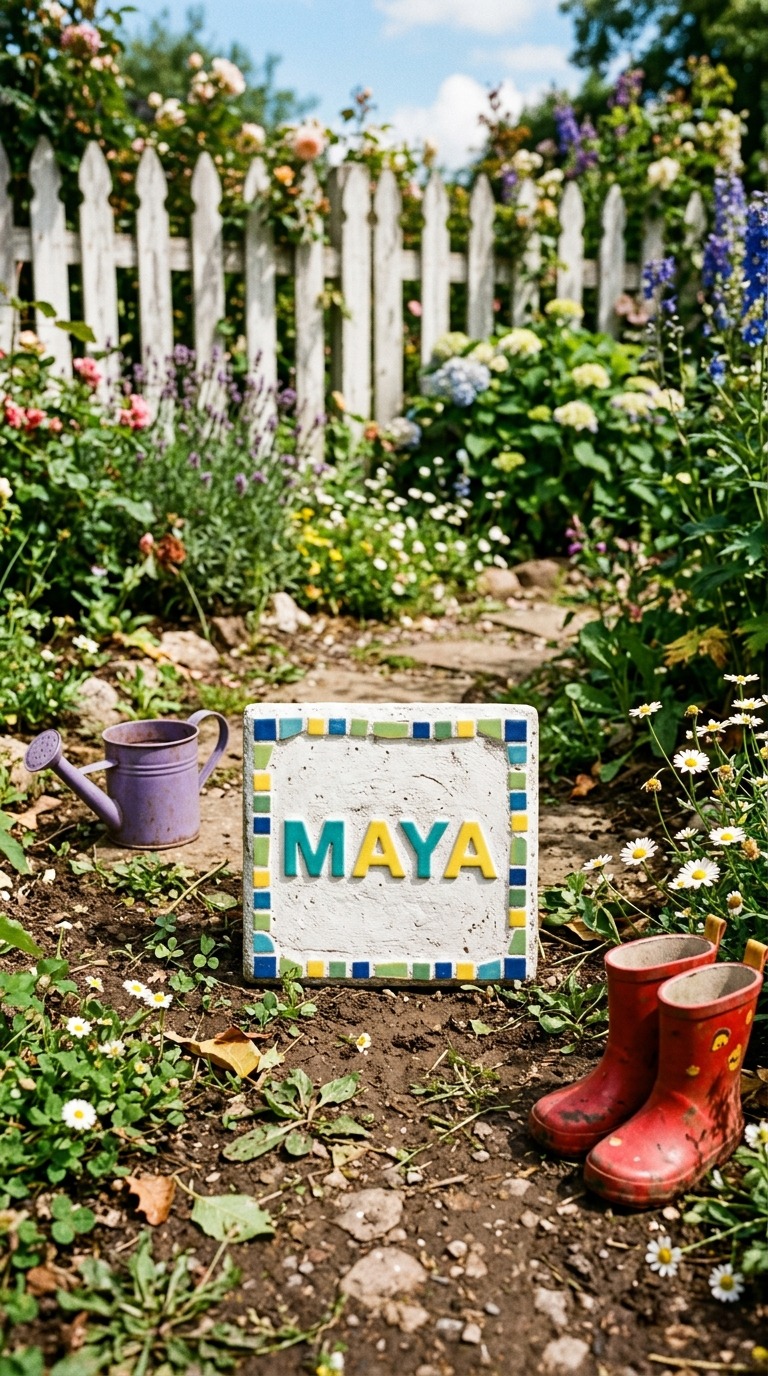
Use pre-cut ceramic alphabet tiles from a craft store for the cleanest, most readable letters, or let older children cut and arrange their own letter shapes from colored ceramic tile for a more handmade look. Mix your concrete in a simple round or square silicone mold — these are widely available online and release cleanly without cracking. Let the stone set for at least 48 hours before removing it from the mold, and wait a full week before placing it outdoors in high-traffic areas. Choose bright, cheerful grout colors — I used bright white grout with my daughter’s stone and it makes those teal and yellow tiles absolutely sing against the green grass.
Sea Glass Beach Mosaic
Sea glass carries the mood of the ocean right into your garden, and if you have ever walked a beach and filled your pockets with those smooth frosted pieces, you already know the quiet joy they bring. A mosaic stepping stone made from sea glass in soft seafoam, pale aqua, and milky white feels instantly calming and coastal, even if you live three states from the nearest shoreline. I made a set of five sea glass stones for my back deck area two summers ago, and they genuinely transformed that corner of the yard into a space that feels like a permanent vacation. Every time I walk past them I slow down a little.
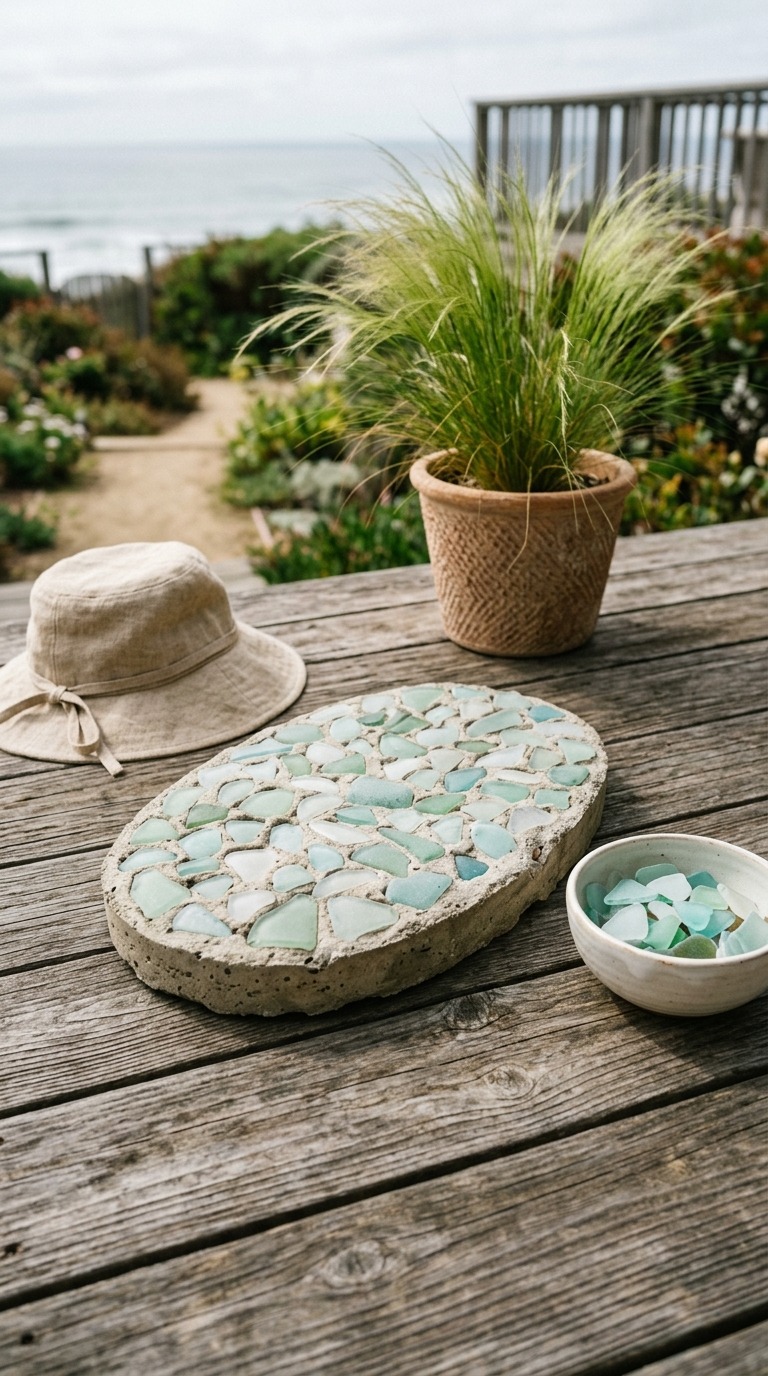
Source authentic sea glass from online specialty retailers if you are not near a coast, or use craft store tumbled glass that mimics the frosted look beautifully. The key difference with sea glass mosaics compared to tile work is that you want to embrace irregular shapes and uneven spacing — the gaps between pieces are part of the organic, wave-worn aesthetic. Use a light gray unsanded grout rather than white, which can look harsh against the soft frosted tones. Press each piece firmly without forcing it perfectly flat, letting the natural curves of the glass create a subtly varied surface that catches light differently throughout the day as the sun moves across your garden.
Geometric Black and White Tile Pattern
Bold geometric black and white stepping stones have a graphic energy that feels completely current and surprisingly versatile — they work equally well in modern minimalist gardens and classic cottage settings because the contrast reads as timeless rather than trendy. I placed a set of these along my side yard path last year, and they made that previously overlooked narrow strip of garden feel intentional and designed rather than just practical. The pattern plays visual tricks with your eye as you walk along the path, which sounds strange but is actually delightful in practice. People who visit for the first time genuinely stop and comment on the path before they even reach my front door.
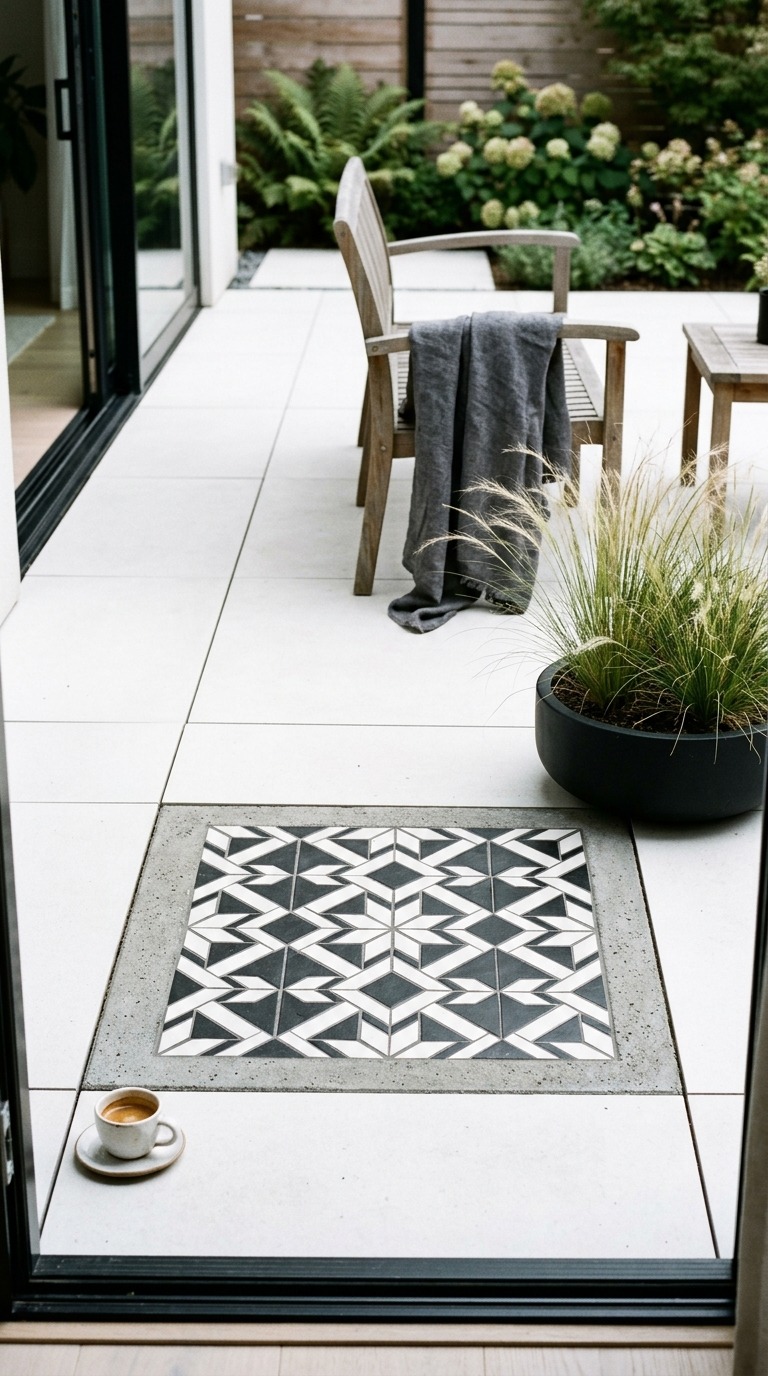
Work with pre-cut square ceramic mosaic tiles in standard black and white from any tile supply store for the cleanest lines and easiest execution. Lay the whole pattern out dry in your mold before mixing concrete so you can adjust spacing and confirm the design looks exactly right. Use white unsanded grout for a graphic, high-contrast finish, or charcoal gray grout if you want a slightly softer industrial look. Press tiles firmly and evenly so the surface stays level — uneven tiles create a trip hazard on functional path stones. I apply a penetrating sealer after grouting to protect the white tiles from soil staining, which makes a significant difference in how the stones look after a rainy season.
Butterfly and Nature Motif Mosaic
A butterfly mosaic stepping stone feels like something from a secret garden, the kind of garden you dreamed about as a child and have been quietly building your whole adult life. Cobalt blue wings outlined in deep violet against clean white concrete create a striking focal point that pollinators seem to genuinely appreciate — my stepping stone sits near my pollinator bed, and I am only slightly joking when I say the actual butterflies spend more time near it than anywhere else in that corner. Nature motifs like butterflies, dragonflies, and hummingbirds add organic life to hardscape in a way that purely geometric patterns simply cannot replicate. They make a garden feel alive even in the quiet off-season.
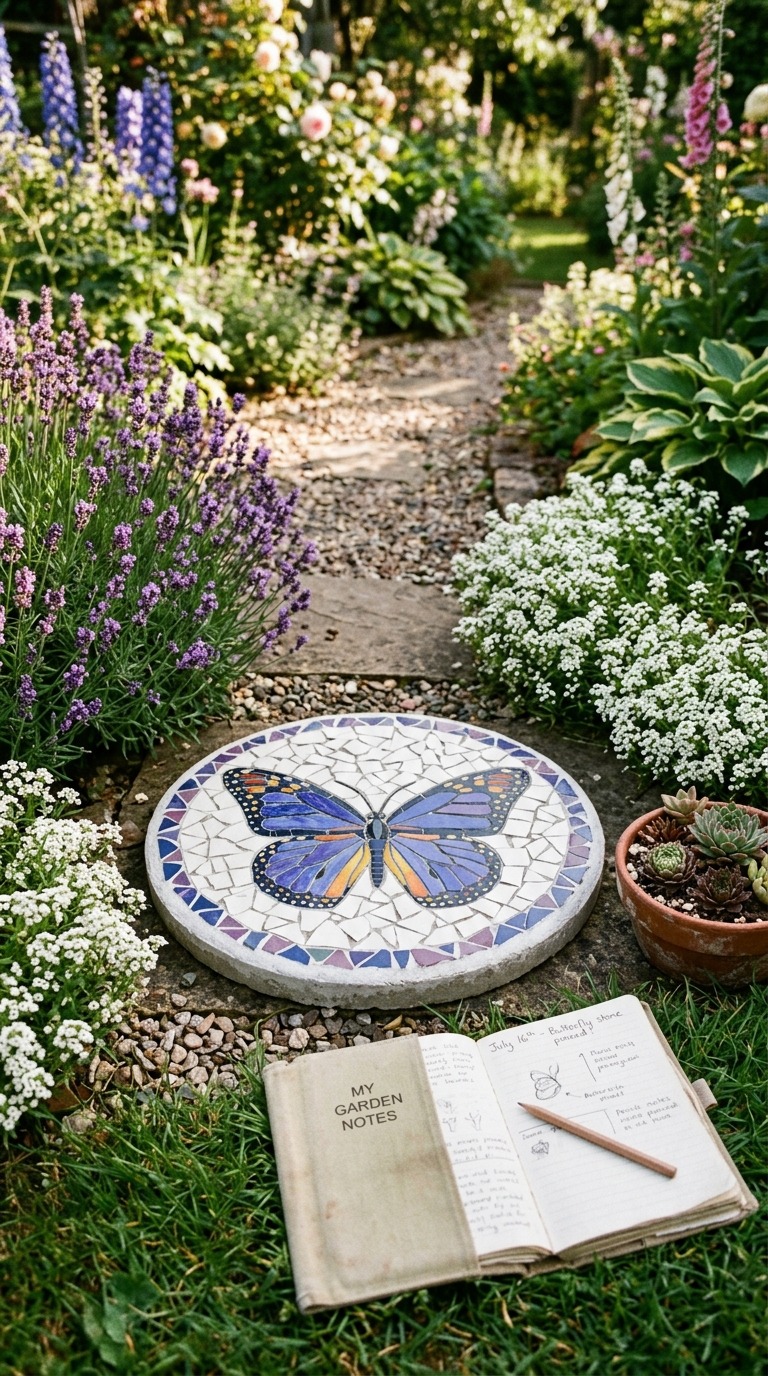
Sketch your butterfly shape onto paper first and cut your cardboard mold to a round shape slightly larger than your design. Break or cut cobalt and violet ceramic tiles into wing-shaped pieces, working from larger shapes in the wing centers to smaller fragments at the wing tips for a naturalistic graduated look. Use a darker navy blue for the butterfly body and antennae, cutting thin strips of tile to create the linear detail. White unsanded grout makes the colors appear most vivid and true — I tested cream and gray grout on sample pieces and neither compared to bright white for color saturation. Set the finished stone in a spot where both you and the real butterflies will linger.
Cracked Pottery Pique Assiette Style
Pique assiette is the French art of mosaic made entirely from broken crockery, pottery, and found ceramic objects, and it produces the most richly textured, visually complex stepping stones I have ever made. The name literally translates to “stolen from the plate,” and there is something wonderfully rebellious about transforming broken things into lasting beauty. My pique assiette stone incorporates the handle from a smashed favorite mug, fragments of a painted plate from Portugal, and pieces of a terracotta pot that cracked in a hard frost. Every piece means something to me, which makes the stone feel genuinely personal in a way that purchased garden art never could.
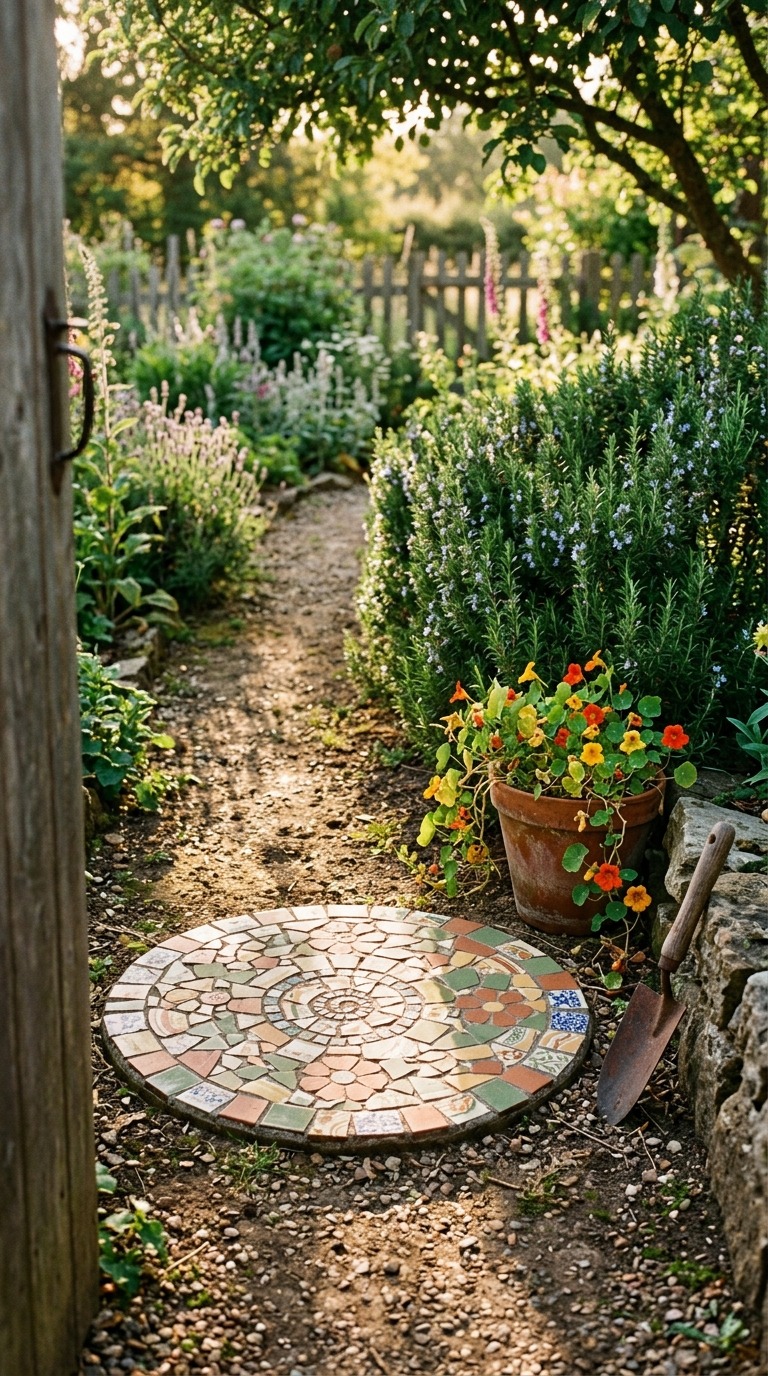
Gather your broken pottery over time rather than deliberately smashing pieces — let it accumulate naturally from kitchen accidents, thrift store finds with chips, and garage sales selling incomplete sets. Vary the depth of pieces as you press them into concrete, letting some sit deeper and others project slightly for a richly tactile surface. Because pique assiette stones use thicker materials than flat ceramic tiles, mix your concrete slightly wetter than usual so deeper pieces sink to a stable level. Grout generously in warm sandy brown or terracotta-toned grout to complement the earthy palette, working it carefully into all the irregular gaps with your finger and a damp sponge before wiping the surface clean.
Mirror Tile Mosaic for Reflective Magic
Mirror tile stepping stones do something genuinely enchanting in a garden — they pick up fragments of sky, leaves, and light and throw them back at you from the ground in the most unexpected and delightful way. I placed one under my Japanese maple tree where the canopy creates shifting dappled shade, and throughout the day the mirror pieces catch light at different angles and send tiny bright sparks across the soil and surrounding plants. It feels alive in a way that solid decorative stones simply do not. In a shaded corner where color plants struggle, a mirror mosaic stone brings light literally down to the ground level where you actually walk.
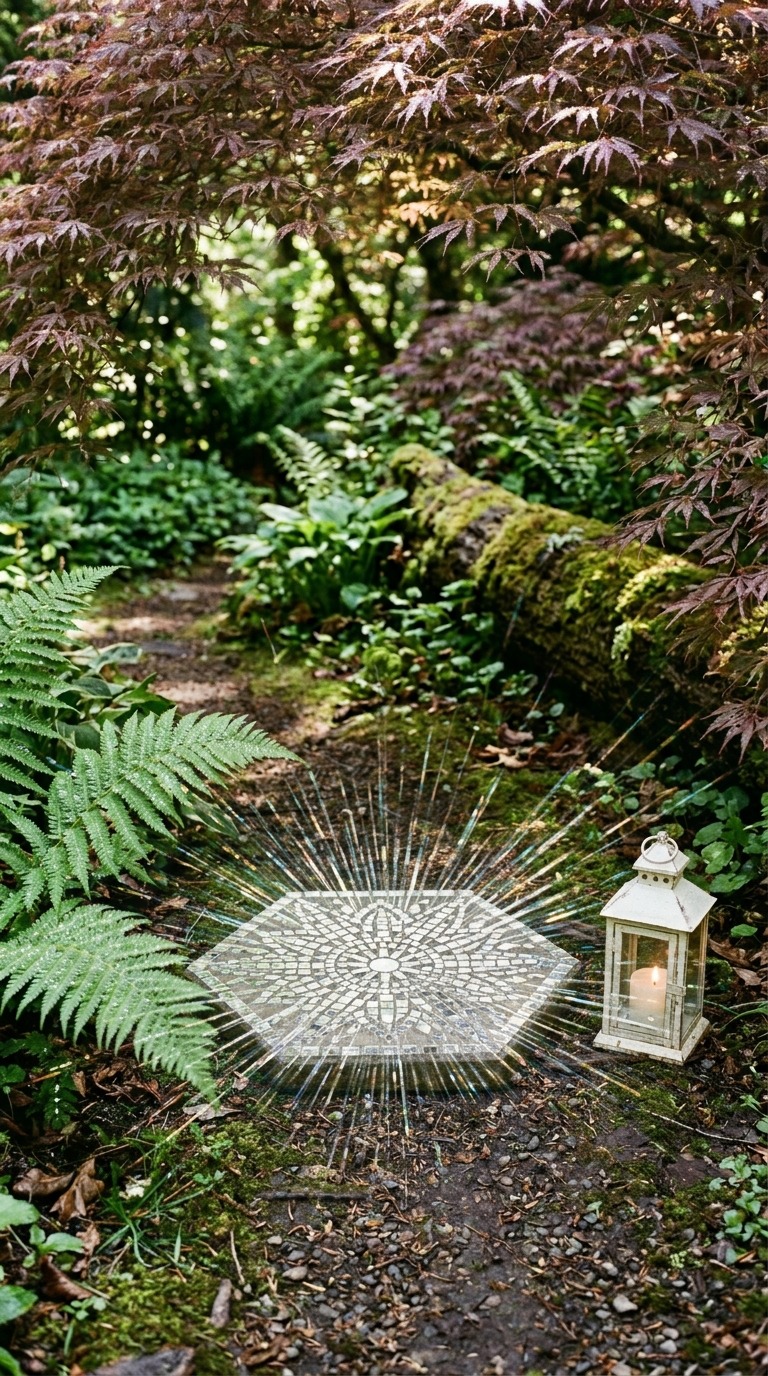
Use small square mirror tiles available in craft stores rather than cutting actual mirror glass, as the craft tiles have pre-sanded edges that are far safer to handle. Apply them adhesive-side down into your concrete form in a radiating pattern from the center, or arrange them randomly for a more scattered sparkling effect. Here is the critical detail most tutorials skip: avoid using grout colors that are too dark around mirror tiles, as dark grout makes the finished stone look heavy and muddy rather than luminous. I use bright white unsanded grout and it makes the mirrors appear to float. Seal the whole stone with a clear outdoor sealant to protect the mirror backing from moisture, which can cause dark spots over time.
Seasonal Floral Wreath Design
A floral wreath mosaic stepping stone works like a permanent garden decoration that never wilts, fades, or needs deadheading — my kind of gardening. I designed mine with soft pink ceramic tile petals arranged into a loose wreath ring with cream-colored centers and sage green leaf shapes filling the gaps between blooms, and it looks genuinely like something from an English cottage garden catalog. The circular wreath format is forgiving for beginners because you can space elements unevenly and it still reads as intentional and beautiful — nature is not perfectly symmetrical either, and your stone should reflect that honest truth. Placed at the entry of a garden gate, a floral wreath stone sets a tone of welcome before anyone even opens the latch.
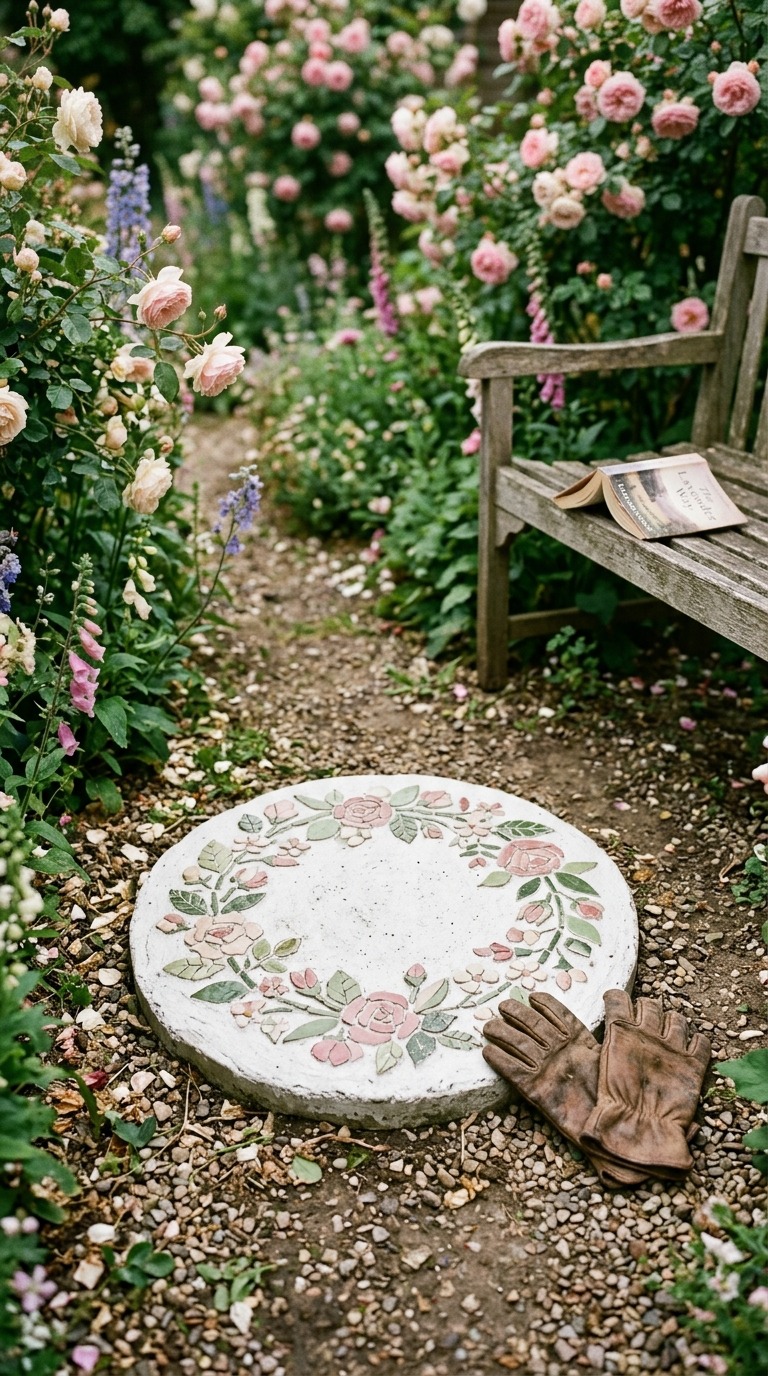
Source rose-pink, blush, cream, and sage green ceramic mosaic tiles from a tile supply store or online retailer, and sketch your wreath loosely on paper before beginning. Cut petal shapes freehand using tile nippers — they do not need to be identical, and slight variation in petal size actually makes the wreath look more organic and hand-painted rather than mechanical. Press each petal at a very slight inward angle toward the center of the flower to create subtle dimensional depth. Use soft white grout rather than bright white, as pure white can look clinical against gentle floral tones. This is the stone I would make as a gift every single time — it is genuinely beautiful and deeply personal without being difficult.
Mosaic House Number Stone
A mosaic house number stepping stone solves a practical problem and creates a beautiful garden feature simultaneously, which is my absolute favorite kind of project. Instead of a plastic number stake from the hardware store, imagine a hand-crafted stone set into the earth near your front gate, displaying your house number in bold cobalt blue tile surrounded by an elegant border of gold and white accent mosaic. It is visible, functional, and genuinely artistic — the kind of detail that tells visitors something real about the people who live in the home before they even knock. Mine has been in place for two years and neighbors regularly stop to photograph it during neighborhood walks.
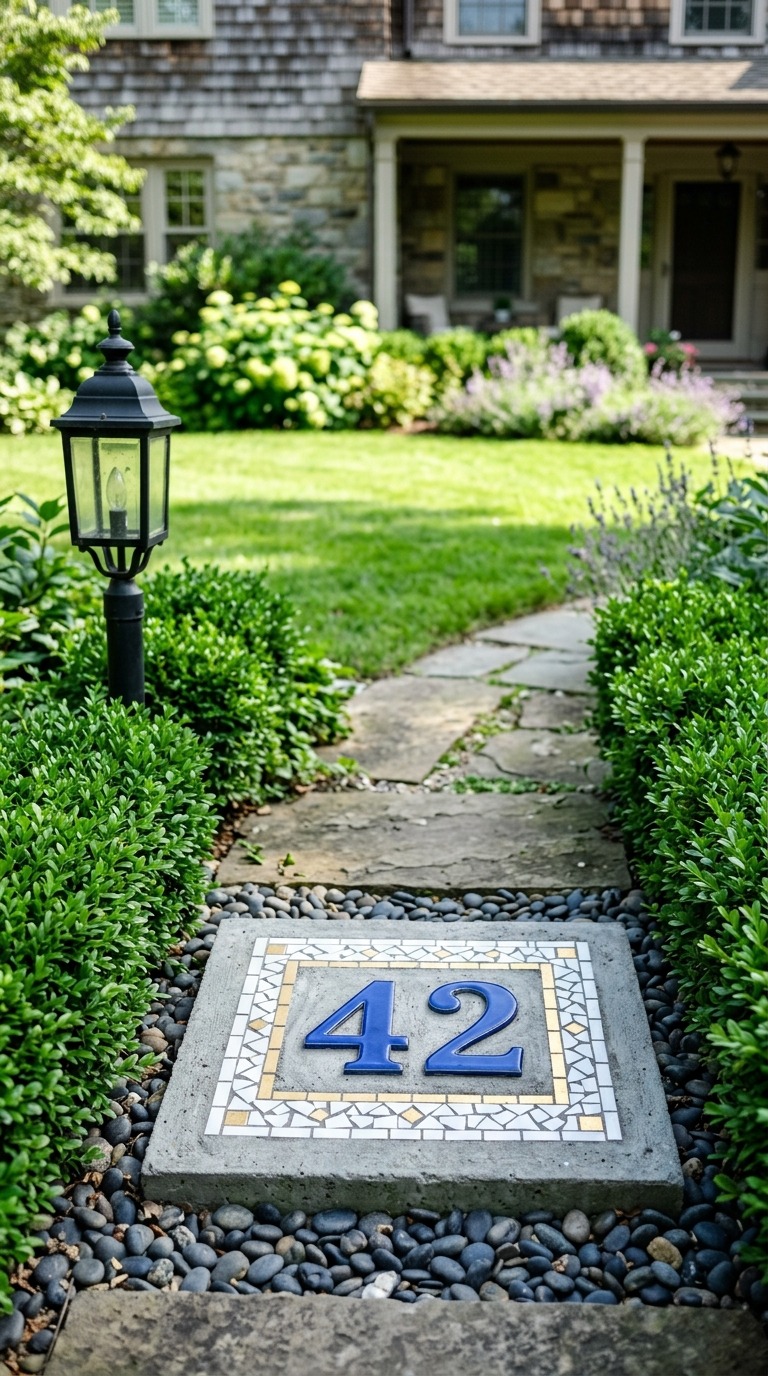
Use pre-made ceramic number tiles in a bold font for maximum readability from a distance rather than cutting your own numerals, which can look inconsistent and be difficult to read at a glance. Choose a tile color that contrasts strongly with your concrete base — cobalt blue on light gray concrete, black on white, or deep red on cream all read clearly in varying light conditions. Surround the numbers with small accent tiles in a complementary color to frame and elevate the design from purely functional to genuinely decorative. Set this stone slightly raised from the surrounding soil rather than flush with it, which helps it stay visible and prevents grass from encroaching over the edges and obscuring the numbers over time.
Abstract Swirl and Freeform Design
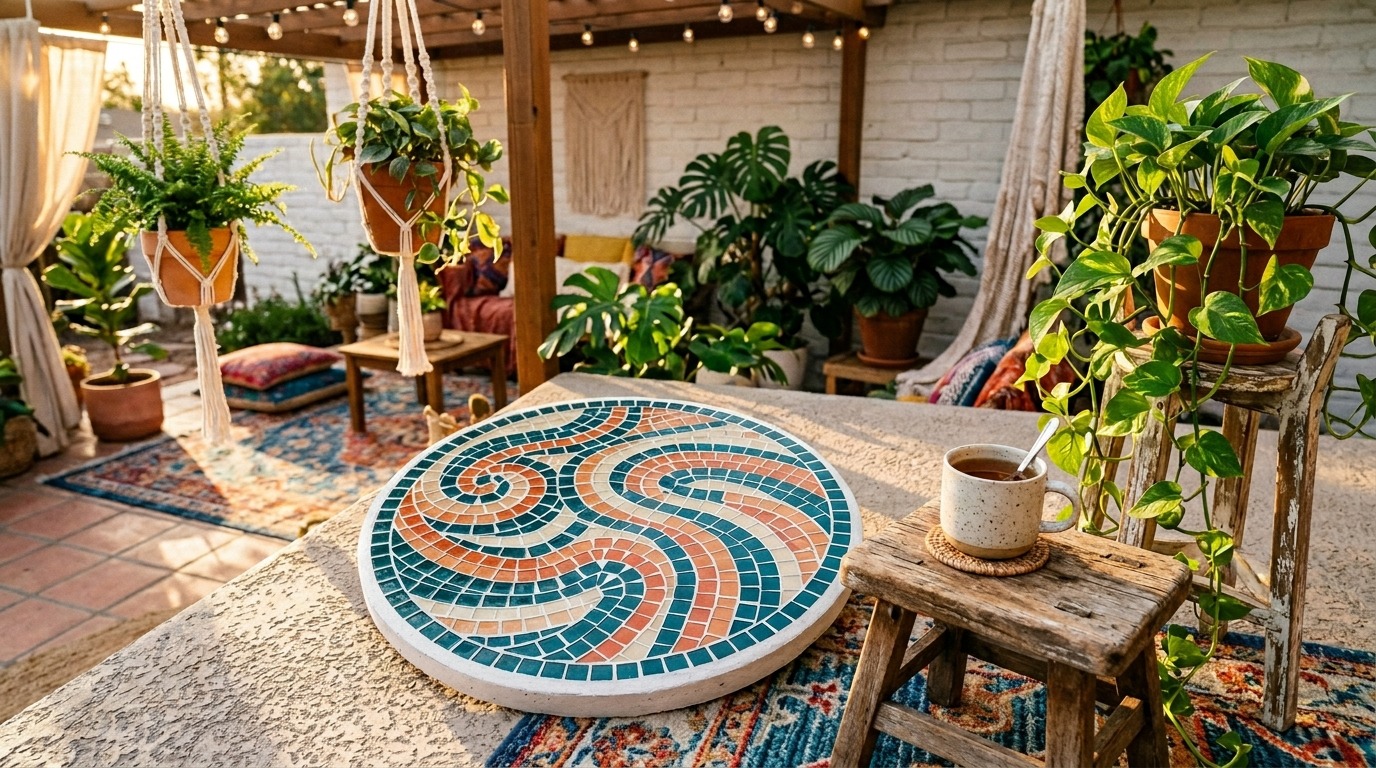
Abstract mosaic stepping stones give you total creative freedom, zero rules, and — in my experience — the most joyful afternoon of making you can have with a bag of mixed tiles and a concrete form. There is no right or wrong swirl, no correct proportion of teal to coral, no wrong way to curve the line. You work intuitively and expressively, pressing tiles in flowing arcs and letting one color bleed organically into the next like a watercolor wash captured permanently in stone. My most abstract stone is also my most complimented one, which I find deeply encouraging as someone who spent years believing she was not particularly artistic. Abstract mosaic teaches you that art lives in your hands, not just your eye.
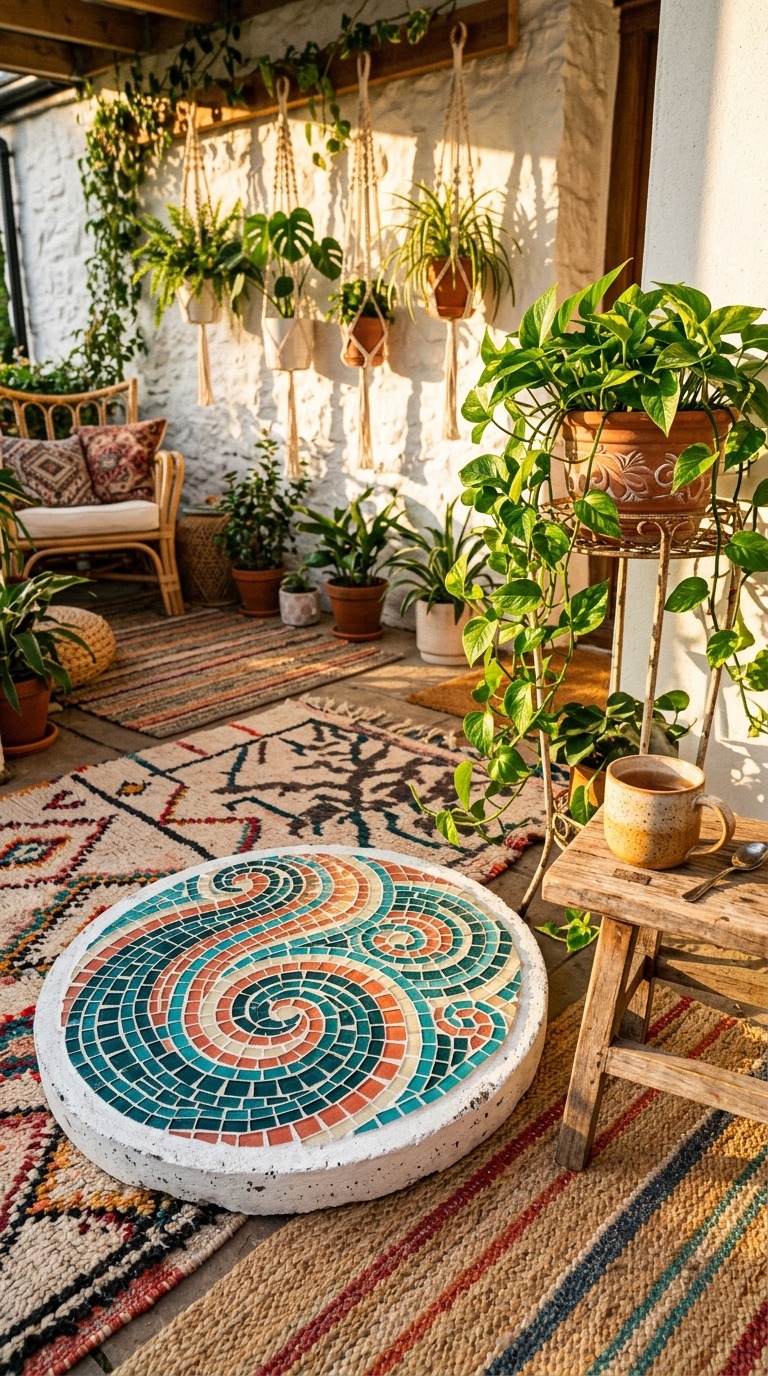
Mix a bag of glass tiles in three complementary tones — I love deep teal, warm coral, and soft cream together — and arrange them loosely before committing to any area of your design. Begin with the central swirl anchor point and work outward in organic arcs, letting the pattern evolve naturally rather than forcing a predetermined plan. Glass tiles reflect light far more vividly than ceramic, which makes abstract designs especially dynamic and engaging as natural light shifts throughout the day. Use charcoal gray grout for bold contrast that makes each tile read individually rather than merging into a flat field of color. Grout is the finishing layer that either makes or breaks an abstract piece, so choose it as thoughtfully as the tiles themselves.
Inspirational Word Stone
An inspirational word stepping stone placed in a garden carries a quiet daily encouragement that I honestly did not expect to affect me as much as it does. I made one that says “bloom” in clean white ceramic letters set into sage green-tinted concrete, and I placed it in my herb garden where I go every morning to snip rosemary and thyme for breakfast. Something about reading that single word first thing, surrounded by growing things, sets a particular tone for the day that I am not willing to overanalyze. Simple words like grow, breathe, bloom, gather, or tend work beautifully because they feel both instructional and poetic at the same time. Single word stones are beginner-friendly and deeply meaningful.
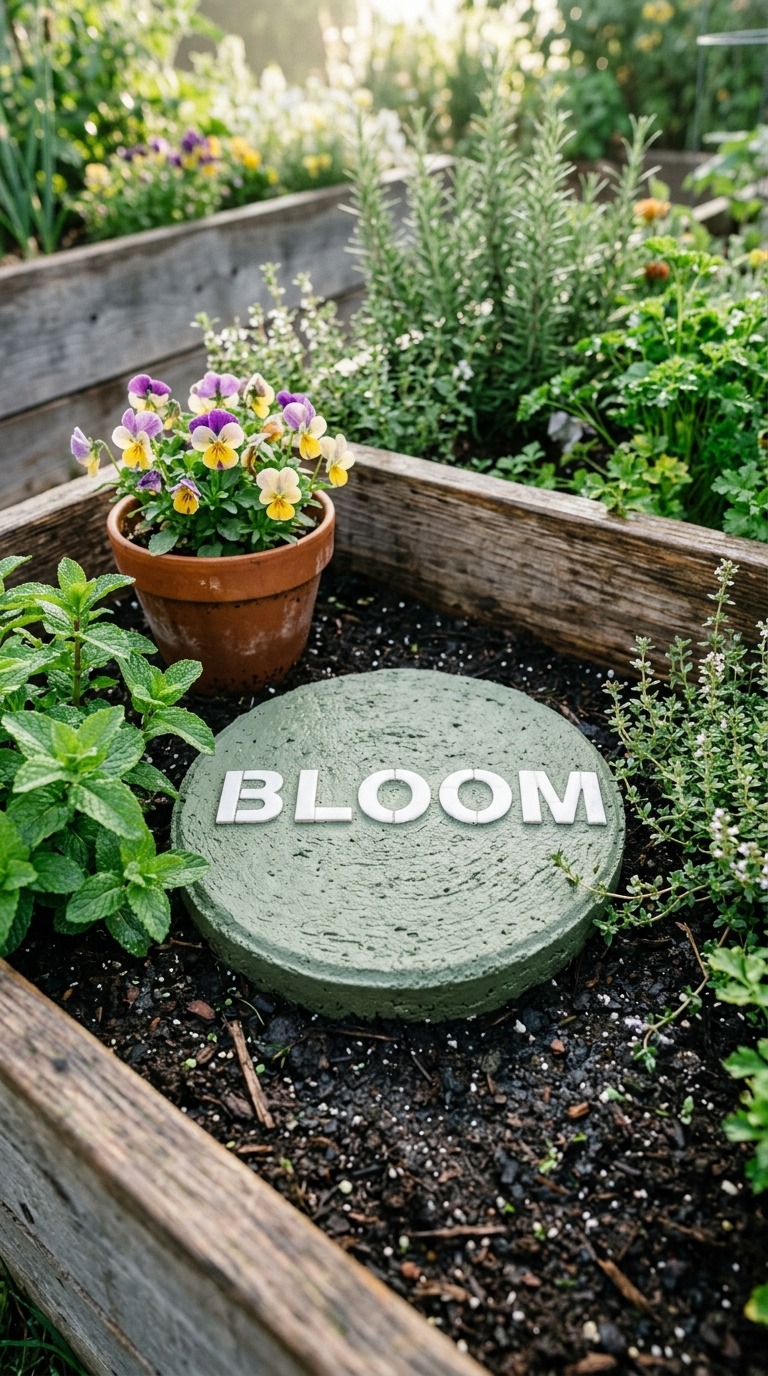
Tint your concrete using concrete dye powder — a soft sage green or warm terracotta creates a more interesting base than plain gray and makes white letter tiles pop beautifully without competing with them. Mix the dye with your dry concrete before adding water, and always test a small sample batch first because concrete colors shift as they cure and the dried shade differs noticeably from the wet mix. Center your letters carefully by measuring the form and marking a center line with a skewer before pressing anything into place. Use white unsanded grout between the letters to keep the focus clean and uncluttered. I add a coat of outdoor matte sealer annually, and the color holds remarkably well even through harsh weather cycles.
Celestial Moon and Stars Mosaic
Celestial mosaic stones carry a sense of wonder and quiet mystery that I find completely irresistible, especially when they are made with iridescent or pearlescent glass tiles that shift between silver and pearl white depending on the viewing angle. A crescent moon surrounded by scattered stars on deep charcoal gray concrete looks genuinely magical in a garden after dusk, when even a tiny solar lantern nearby can send light rippling across the iridescent tile faces. I made a set of three — sun, moon, and star — for the far corner of my garden where I keep a small reading bench, and sitting there at twilight with those stones glowing faintly at my feet is honestly one of my favorite experiences in my own yard.
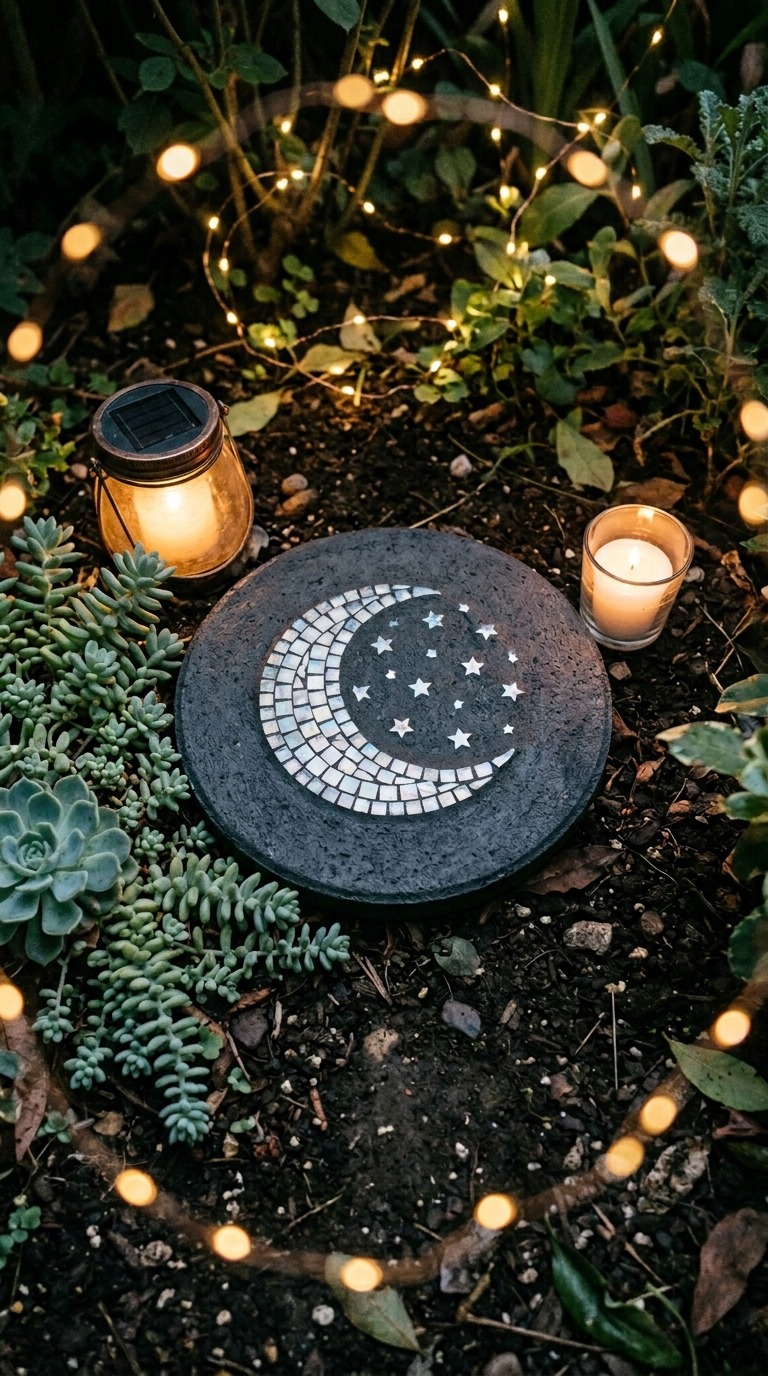
Tint your concrete with black concrete dye for a deep charcoal base that makes iridescent tiles appear most luminous — on standard gray concrete, the effect is pretty but on charcoal it is genuinely dramatic. Cut your crescent moon from white or silver glass tile using a wet tile saw for smooth curves, or use a mosaic tile adhesive to build the shape from smaller irregular pieces in a crescent arrangement. Scatter five-pointed star shapes made from small gold or silver mirror tiles around the moon for a night sky effect. Use dark gray unsanded grout to maintain the deep background between tile pieces, taking care to clean residue from the face of iridescent tiles immediately as grout haze is harder to remove from glass surfaces once it dries completely.
Garden Map or Layout Stone
A garden map stepping stone sounds quirky until you make one and realize it is the most conversation-starting garden object you have ever owned. Mine represents a simplified overhead view of my kitchen garden, with green tile strips for the paths, tiny ceramic flower-shaped gems marking each planting bed, and a small glass sun tile at the center where the paths intersect. Visitors crouch down to interpret it like a treasure map, and children are completely fascinated by the idea that you can walk on an image of the very garden you are standing in. It sounds conceptual but it reads as immediately charming and playful in the most genuine way.
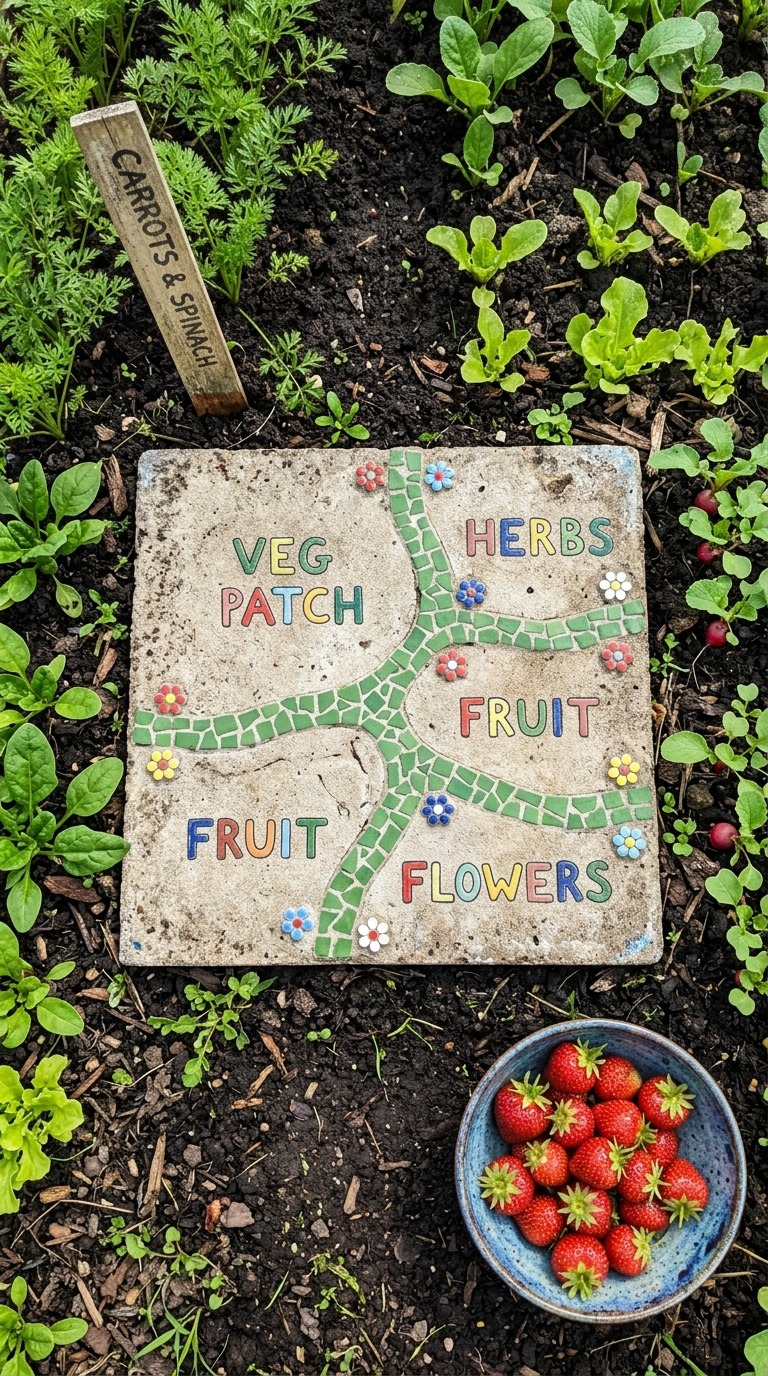
Plan your garden map on grid paper first, simplifying your actual garden layout into its most essential shapes — paths, beds, and one or two landmark plants or features. Keep the design readable by using strongly contrasting tile colors for paths versus planting areas: deep green for beds, cream or tan for gravel paths, and bright feature colors for any special plants or structures you want to mark. Work section by section in the concrete form, pressing each color zone fully before moving to the adjacent area to prevent tile drift. Use gray unsanded grout throughout to unify the palette without competing with the tile colors. I seal this stone twice a year because foot traffic wears the grout slightly faster on a centerpiece stone than on decorative border stones.
Recycled Glass Bottle Bottom Mosaic
Recycled glass bottle bottoms pressed into concrete create a mosaic effect that is genuinely unlike anything else — each bottle bottom becomes a thick jewel-like circle of deeply colored glass that catches and holds light in a way flat tiles simply cannot replicate. Deep green wine bottle bottoms, amber beer bottle glass, and clear spirits bottle circles arranged in a honeycomb pattern produce a richly dimensional stone that feels genuinely artisanal and sustainably made in the most authentic sense of the word. I started collecting bottles specifically for this project months before I made the stone, and the making day felt like opening a treasure chest of colored glass I had been hoarding with purpose and anticipation.
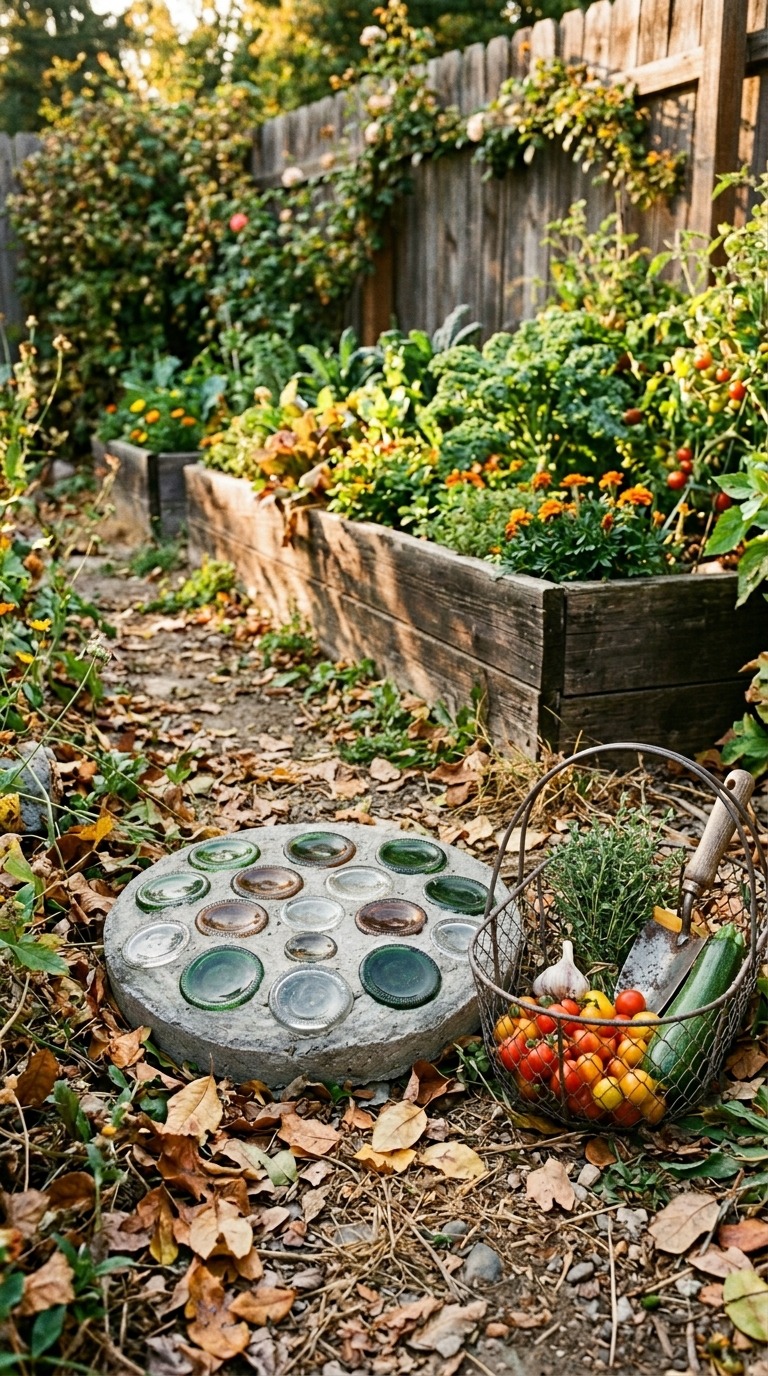
Cut the bottoms from glass bottles using the score-and-soak method — score a clean line around the bottle with a glass cutter, soak in very hot water then immediately plunge into ice water, and the bottom separates cleanly with a satisfying snap. Sand the cut edges lightly with coarse sandpaper before pressing them into concrete. Press each bottle bottom firmly face-down so the beautiful circular pattern of the glass base faces upward and the cut edge is embedded safely in the concrete. Because bottle bottoms are significantly thicker than standard mosaic tiles, use a concrete mix rated for heavier inlays and press each piece down firmly until concrete rises slightly around all the edges. Grout with warm sand-colored unsanded grout to maintain the earthy, organic, recycled material aesthetic of this beautiful and genuinely eco-minded project.
You do not need a large garden, an expensive supply list, or years of craft experience to make a mosaic stepping stone that genuinely delights you every single time you walk past it. You just need one weekend afternoon, a willingness to make something with your hands, and the courage to choose the idea that made your heart lift a little when you read it. That quiet lift is your instinct telling you exactly what your garden is waiting for. Trust it completely.
Pick one idea from this list today — just one — and start gathering your materials this week. The first stone is always the one that teaches you the most, and every stone after it gets easier, freer, and more personally expressive. Your garden path does not have to look like anyone else’s, and it absolutely should not. Make it look like you, press your favorite colors into concrete, and leave something beautiful and permanent behind for every morning you walk outside into the garden you have built.